When I think of apple cobbler, I’m instantly carried back to my grandmother’s kitchen on a chilly October evening. She never measured a thing, yet somehow her cobblers came out golden and bubbling every single time. I remember standing on a stool, barely tall enough to see the counter, watching her peel apples with a paring knife as though it were an extension of her hand. She would hum while tossing the apples with sugar and cinnamon, and the scent would fill the whole house long before the oven timer dinged. Years later, I realized she wasn’t chasing perfection—she was simply feeding the people she loved. My own cobbler journey has had its fair share of missteps (too much juice once, a crust that baked up tough another time), but with patience, practice, and a lot of hungry friends willing to taste-test, I’ve come to treasure this recipe as my own. It’s cozy, unfussy, and always welcome on the table.
Why You’ll Love This Recipe
- Simple ingredients you likely already have in your pantry
- A forgiving recipe that doesn’t demand perfection
- Comforting flavors of baked apples, cinnamon, and buttery topping
- Easy to scale up for gatherings or down for a small family dessert
- Delicious warm from the oven or reheated the next day
Ingredients You’ll Need
- Apples – I like to use a mix of tart Granny Smith and sweet Honeycrisp. The balance keeps the cobbler from being too sugary. Honestly, I’ve made it with whatever apples I had on hand, even bruised ones nearing the end of their life, and it still turns out just fine.
- Granulated sugar – This sweetens the filling, but I sometimes cut it back a little if my apples are especially sweet.
- Brown sugar – Adds depth and a touch of molasses warmth to the filling and topping.
- Ground cinnamon – A must for me, though my grandmother swore by adding just a pinch of nutmeg too.
- Lemon juice – It brightens the apples and keeps them from tasting flat.
- All-purpose flour – Used in the topping, though I’ve swapped in half whole wheat flour before with good results.
- Baking powder – To give the topping a little lift.
- Salt – Essential for balance. Don’t skip it, even in dessert.
- Unsalted butter – Melted for the topping. If I’m out of unsalted, I’ll use salted and cut back slightly on the added salt.
- Milk – Whole milk makes the richest topping, but I’ve used 2% without complaint.
How to Make It (Step-by-Step Instructions)
First, preheat your oven to 350°F. I always like to get the oven warm before I start peeling apples because the smell of butter and sugar baking together feels like a promise of what’s to come. Peel and slice about six medium apples. I cut them into wedges that are not too thin—if you slice them paper-thin, they tend to break down too much, leaving you with apple sauce instead of apple filling. Toss the slices in a bowl with granulated sugar, a little brown sugar, cinnamon, and lemon juice. The lemon juice really makes the apples pop, especially if you’re using sweeter varieties.
Spread the apples into a greased baking dish. Don’t worry if they look piled high—they shrink as they bake. Now for the topping: whisk together flour, baking powder, salt, and the remaining brown sugar. Pour in melted butter and milk, stirring until just combined. This is one of those batters you don’t want to overwork; I learned that the hard way after producing a topping that baked up heavy instead of tender.
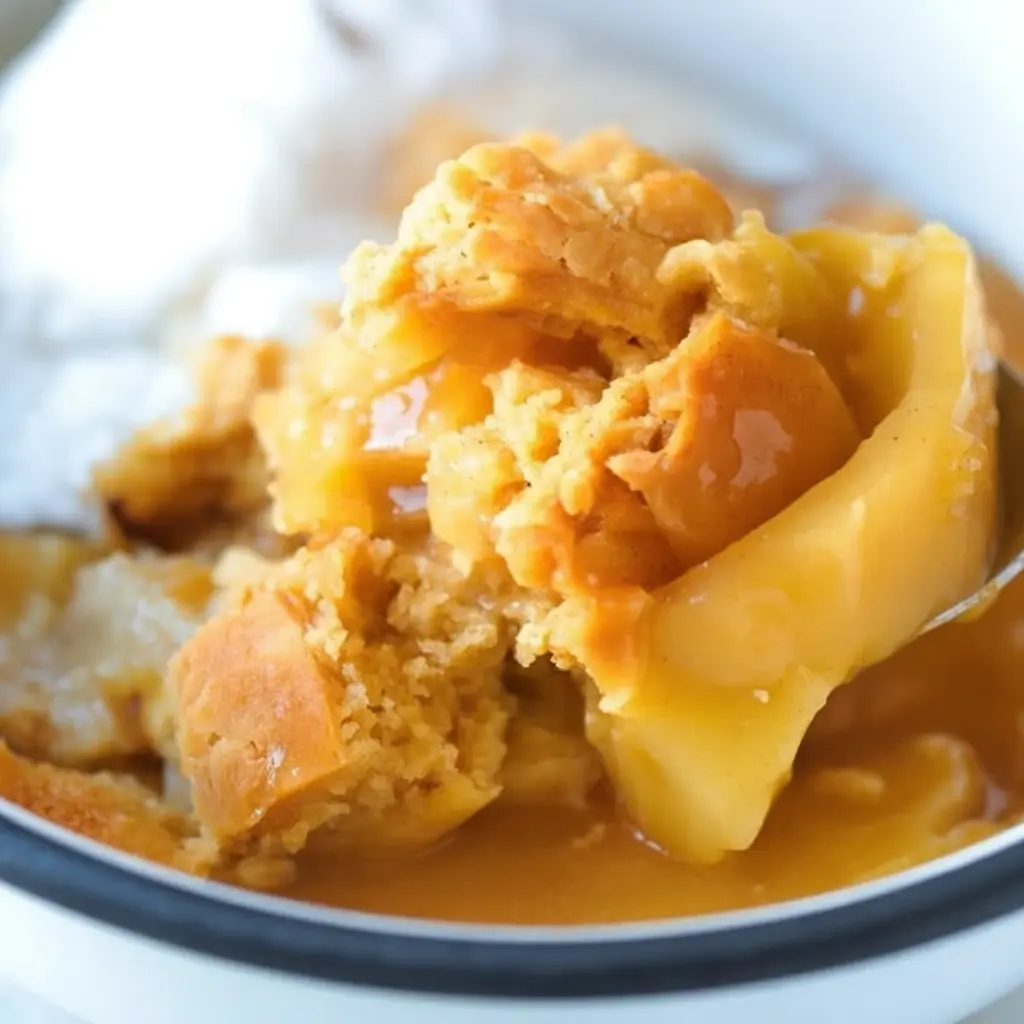
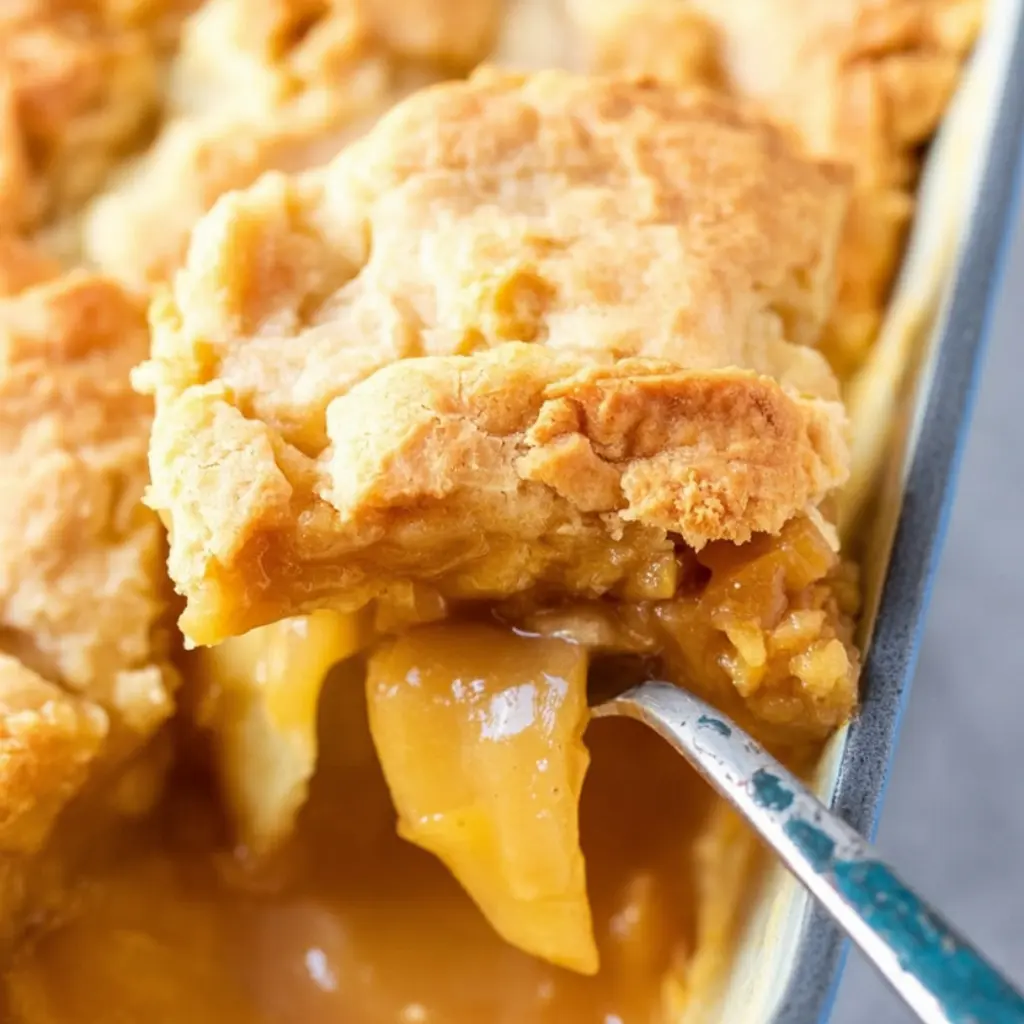
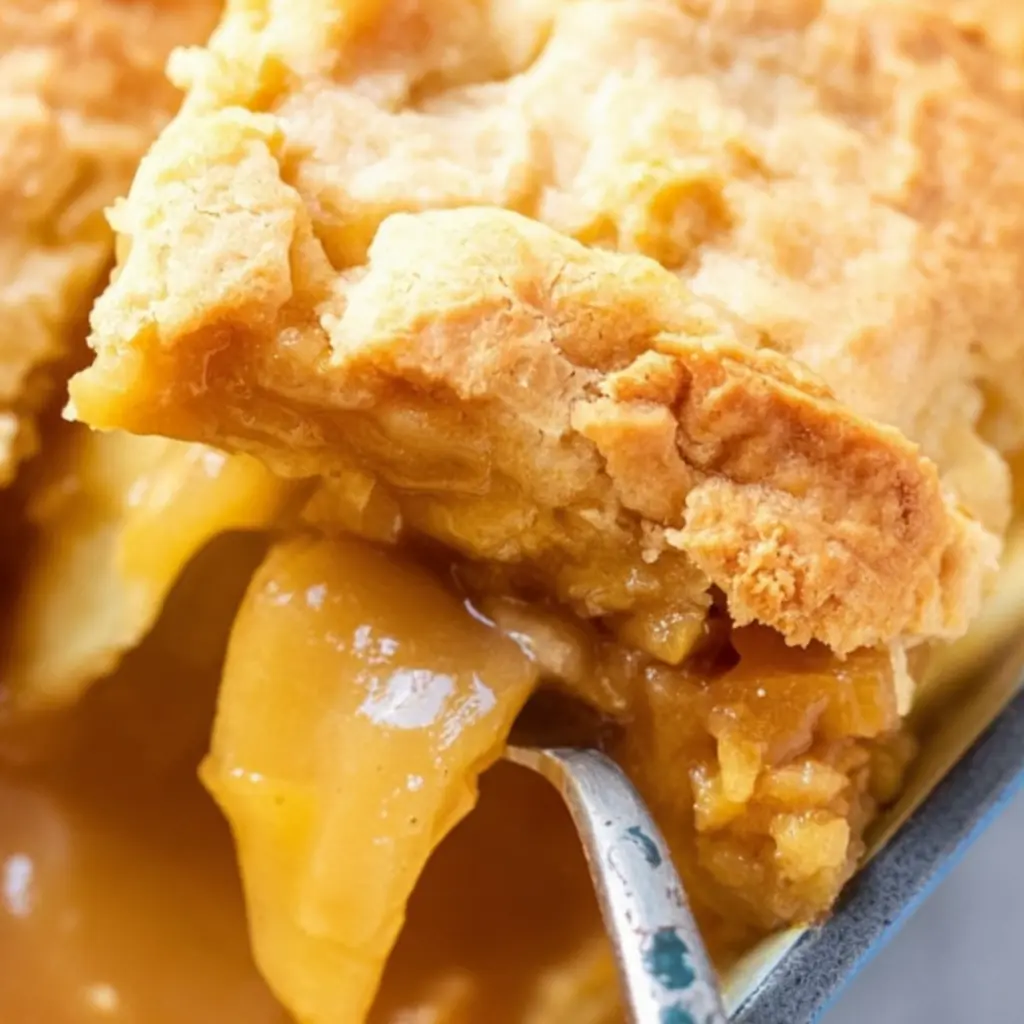
Spoon the batter over the apples, leaving little gaps here and there. Those spaces allow the juices to bubble up, mingling with the crust in the most delicious way. Slide the dish into the oven and bake for about 40–45 minutes, until the top is golden and the filling is bubbling around the edges. The waiting is the hardest part. Let it cool for at least 10 minutes before serving, even though the temptation is strong to dig right in. The resting time helps the juices settle a bit.
Expert Tips for the Best Results
I’ve learned that the real secret to a great cobbler lies in balance: balancing the sweet and tart apples, balancing the moisture in the filling with the tenderness of the topping, and balancing patience with eagerness. Choose apples that can hold their shape, don’t skimp on the resting time after baking, and resist the urge to drown the filling in sugar. And perhaps most importantly, remember that cobbler is meant to be rustic. It isn’t a showpiece; it’s a spoon-and-bowl kind of dessert, the sort that’s supposed to look homemade.
Variations & Substitutions
I’ve had fun over the years experimenting with what goes into the filling. Once, I didn’t have enough apples, so I tossed in a couple of ripe pears and it turned out beautifully fragrant. Another time, a friend suggested adding a handful of cranberries, and that tart pop against the sweet apples was unforgettable. I’ve even replaced part of the flour in the topping with ground oats, which gave it a nuttier flavor and a heartier texture. Don’t be afraid to improvise a little—this is the kind of recipe that forgives you when you get creative.
Serving Suggestions
I usually serve apple cobbler warm, right out of the baking dish, with a big scoop of vanilla ice cream slowly melting over the top. Whipped cream works too, especially if you whip it yourself with just a touch of sugar and vanilla. If you’re serving a crowd, it pairs wonderfully with a pot of coffee or mugs of hot cider. It’s casual enough for a weekday treat yet special enough to take to a holiday table, and somehow it feels just as fitting at a backyard potluck as it does on Thanksgiving.
Storage & Reheating Instructions
If you’re lucky enough to have leftovers, cover the dish tightly and store it in the refrigerator for up to three days. The topping softens a bit in the fridge, but that’s nothing a warm oven can’t fix. I usually reheat individual servings in the microwave for speed, but if I want to restore that crisp top, I slide the dish back into a 325°F oven until warmed through. The flavor deepens overnight, so don’t be surprised if you find yourself sneaking bites straight from the fridge.
Recipe FAQs
Can I make this ahead of time?
You sure can. I often prepare the apple filling in the morning, cover it, and refrigerate. When I’m ready to bake, I stir together the topping and assemble it fresh.
What are the best apples for cobbler?
I like to use a mix of tart and sweet—Granny Smith and Honeycrisp are my go-to—but honestly, I’ve made it with whatever I had on hand, and it’s always been delicious.
Can I freeze apple cobbler?
Yes, though I prefer it fresh. If you do freeze it, wrap it well and store for up to two months. Reheat in the oven straight from frozen until hot and bubbly.
How do I know when it’s done?
The topping should be golden brown, and you’ll see juices bubbling up around the edges. If the top is browning too quickly, cover loosely with foil and keep baking until the apples are tender.
Conclusion
Apple cobbler has a way of bringing people together around the table, not because it’s fancy but because it’s honest. It reminds us that the best desserts aren’t about perfection—they’re about comfort, memory, and sharing. I hope this recipe finds a place in your kitchen the way it has in mine. If you make it, I’d love to hear how it turned out for you. Leave a note, share your version, or simply enjoy the quiet joy of a homemade dessert.
Nutrition Information (per serving, based on 8 servings)
Calories: ~280
Carbohydrates: 47g
Protein: 3g
Fat: 9g
Fiber: 3g
Sugar: 28g

Apple Cobbler
Ingredients
For the apple filling:
- 6 cups apples peeled, cored, and sliced (Granny Smith or Honeycrisp work well)
- ½ cup granulated sugar
- 2 tbsp brown sugar
- 1 tsp ground cinnamon
- ¼ tsp nutmeg
- 2 tsp lemon juice
- 2 tbsp all-purpose flour
For the cobbler topping:
- 1 cup all-purpose flour
- 1 cup granulated sugar
- 1 tsp baking powder
- ½ tsp salt
- 1 cup milk
- ½ cup unsalted butter melted
Instructions
- Preheat oven: Preheat oven to 375°F (190°C). Grease a 9×13-inch baking dish.
- Prepare apple filling: In a large bowl, toss sliced apples with sugar, brown sugar, cinnamon, nutmeg, lemon juice, and flour until coated. Spread evenly into the prepared baking dish.
- Make topping: In another bowl, whisk together flour, sugar, baking powder, and salt. Stir in milk until smooth. Pour in melted butter and gently mix until combined.
- Assemble cobbler: Pour the batter evenly over the apples (don’t stir—batter will bake up around the apples).
- Bake: Bake for 40–45 minutes, or until the top is golden brown and set.
- Serve: Allow to cool slightly before serving warm with vanilla ice cream or whipped cream.
Notes
- Granny Smith apples add a tart flavor, while Honeycrisp or Fuji bring more sweetness—mixing varieties gives the best balance.
- Add a pinch of cloves or allspice for extra warmth.
- Can be made ahead and reheated in the oven at 325°F (165°C) before serving.
- For individual servings, bake in ramekins instead of a large dish.