
When I was little, my grandmother had a way of making you feel special just by handing you a warm plate of something she’d baked. Her kitchen always smelled of cinnamon and sweet butter, especially in the fall when the apples from her backyard tree came tumbling down faster than we could gather them. She’d tie an apron around my waist, set me on a stool by the counter, and let me help peel apples—though most of the time, I ended up eating as many as I prepped.
Her apple crisp wasn’t fancy. There were no secret ingredients, no precise measurements scribbled in a cookbook. It was simply what she called “a good way to keep warm and use what you have.” She believed that food should be comforting and forgiving. Over the years, I’ve made her apple crisp more times than I can count—sometimes to share with guests, sometimes to soothe a long day, and sometimes just because the house needed the smell of baked apples and brown sugar.
I’ve learned that what makes this recipe special isn’t just the taste—it’s the feeling it brings with every bite: the memory of home, the reassurance that simple things can be the most satisfying, and the reminder that you don’t have to be a perfect baker to make something everyone will love.

Why You’ll Love This Recipe:
- Easy to make with everyday pantry ingredients
- No need for fancy equipment—just a bowl, a baking dish, and your hands
- Warm, spiced aroma that makes the whole house smell inviting
- Perfect for potlucks, holiday gatherings, or cozy nights in
- Delicious with ice cream, whipped cream, or all by itself
Ingredients You’ll Need:
- Apples – About 6 to 7 cups, peeled and sliced. I usually mix tart Granny Smith with sweeter varieties like Honeycrisp or Gala. If all you have are one kind, that’s perfectly fine—just taste and adjust the sugar as needed.
- Granulated sugar – A little sprinkled over the apples to draw out their juices and balance tartness. I sometimes use light brown sugar here if I want extra caramel notes.
- Ground cinnamon – Essential. Don’t skimp—it’s what gives the crisp that warm, nostalgic flavor.
- Nutmeg – Just a pinch for depth. Freshly grated if you have it.
- All-purpose flour – Used in the topping to give it body and help it crisp up. I’ve swapped in whole wheat flour before; it works, but the texture is a bit heartier.
- Old-fashioned rolled oats – These give the topping its crumbly, chewy texture. Quick oats can work, but they soften more and lose that pleasant bite.
- Brown sugar – Packed, for sweetness and a subtle molasses flavor.
- Unsalted butter – Cold, cut into small pieces. This is what turns the topping into golden, crisp perfection.
- Salt – Just enough to balance the sweetness.
How to Make It (Step-by-Step Instructions):
Start by preheating your oven to 350°F (175°C). This gives you time to prep everything without rushing. Butter a 9×13-inch baking dish or something close in size. I’ve used everything from a deep pie plate to an old ceramic casserole, and it all works.
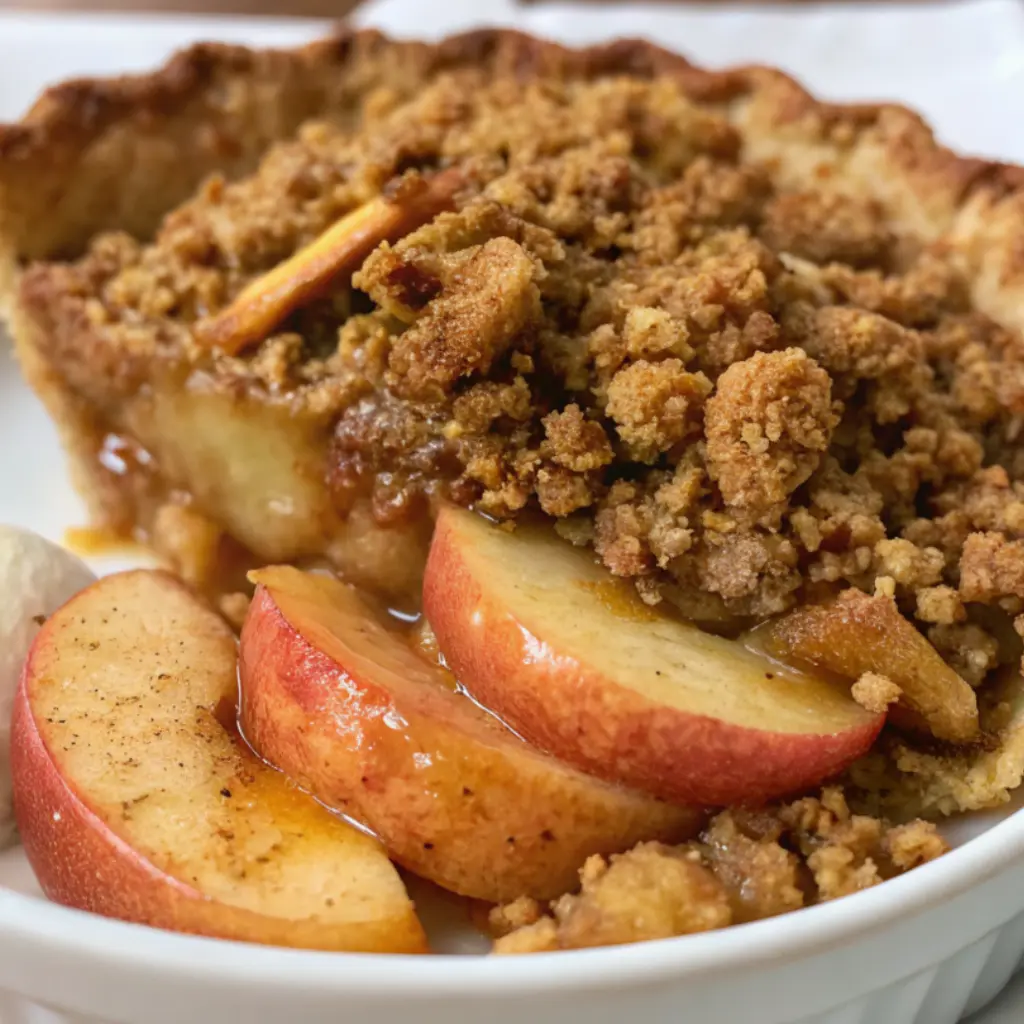
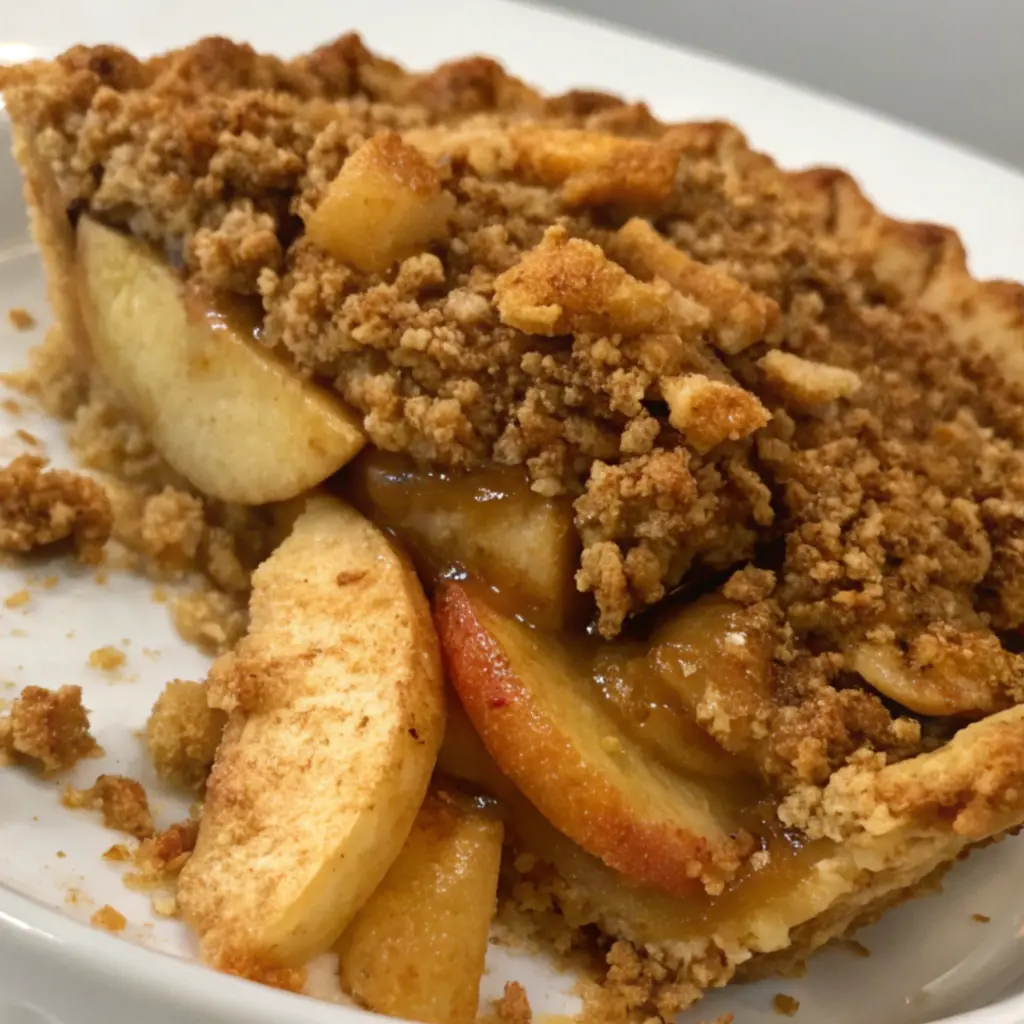
Peel and core your apples, then slice them about a quarter-inch thick. If you go too thin, they can turn mushy; too thick, and they won’t soften enough. I usually pile them straight into the baking dish as I go. Sprinkle them with granulated sugar, cinnamon, and nutmeg. Toss gently with your hands so every slice gets a little coating of sweetness and spice.
In a separate bowl, combine the flour, oats, brown sugar, and salt. Give it a good stir to break up any clumps. Now, scatter in the cold butter pieces. Here’s where your hands come in handy: use your fingertips to pinch and rub the butter into the dry ingredients until you have coarse crumbs. Don’t overmix—it should look a bit uneven, with some larger buttery bits still visible. That’s what makes the topping crisp and rustic.
Evenly sprinkle the topping over the apples. You don’t want to pack it down—just let it sit lightly, so the juices bubble up through the crumbs as it bakes.
Slide the dish into the oven and bake for about 45–50 minutes, or until the apples are tender when pierced with a knife and the topping is golden brown. If you notice the topping getting too dark before the apples are ready, cover it loosely with foil.
Let it cool for at least 15 minutes before serving. This helps the juices thicken a bit and saves your tongue from a burn—I learned that the hard way more than once.
Expert Tips for the Best Results:
Over time, I’ve found that the best apple crisp comes down to using a mix of apple varieties and keeping your butter cold. When you mix sweet and tart apples, you get a more interesting flavor and just the right amount of juice. And never melt the butter ahead of time—it makes the topping heavy instead of crumbly. If you want extra texture, you can stir a handful of chopped nuts, like pecans or walnuts, into the topping. One last little tip: don’t rush the cooling time, because a warm crisp sets up beautifully and keeps the topping crisp rather than soggy.
Variations & Substitutions:
I’ve played around with this recipe on many occasions, sometimes because I wanted to try something new and sometimes because I’d run out of an ingredient. Pears make a lovely substitute for some or all of the apples—especially in early fall when they’re ripe and sweet. I’ve also stirred in a handful of fresh cranberries for a tart pop of color and flavor. For a gluten-free version, I use almond flour instead of all-purpose, and it turns out just fine, though a bit more tender. Once, when I was low on oats, I used crushed graham crackers to bulk up the topping, and my family loved it so much I almost pretended I did it on purpose.
Serving Suggestions:
This apple crisp is wonderful warm from the oven, served in shallow bowls with a big scoop of vanilla ice cream slowly melting into all those syrupy apples. If you’re feeling extra cozy, a dollop of softly whipped cream or a drizzle of caramel sauce turns it into a company-worthy dessert. I’ve even served leftovers for breakfast with a spoonful of plain yogurt—no judgment here. It’s the sort of dish that feels right on any occasion, from a casual Sunday supper to a holiday feast.
Storage & Reheating Instructions:
If you have leftovers, let the crisp cool completely, then cover it tightly or transfer to an airtight container. It will keep in the fridge for up to four days, though the topping softens over time. To bring back a bit of the original crunch, I reheat it uncovered in a 325°F oven for about 15 minutes. If you’re in a hurry, a quick zap in the microwave works too, but the texture won’t be quite the same. I’ve found that even a softened topping still tastes delicious.
Recipe FAQs (Answered by Clara):
Can I prepare this ahead of time?
Absolutely. You can assemble the crisp up to the point of baking, cover it tightly, and refrigerate for up to 24 hours. When you’re ready, bake as directed, adding a few extra minutes if needed.
Do I have to peel the apples?
You don’t have to, but the texture will be different. The skins can get a little tough after baking. When I’m in a rush, I sometimes leave them on—it’s still tasty.
Can I freeze apple crisp?
Yes, you can freeze it either unbaked or baked. If freezing unbaked, wrap it well and bake straight from frozen, adding 15–20 minutes to the bake time. If freezing baked crisp, let it thaw overnight and reheat in the oven.
What kind of apples work best?
I recommend mixing tart and sweet varieties—Granny Smith and Honeycrisp are my go-to combination. Avoid Red Delicious, which tend to go mushy.
Is it okay to reduce the sugar?
Sure. If you prefer a less sweet dessert, you can cut back the sugar by about a third without any issues. Taste your apples first—if they’re very tart, you might want to keep a little extra sweetness
This apple crisp has been part of my kitchen for as long as I can remember, and every time I make it, I feel connected to the women in my family who taught me to bake without worrying about perfection. I hope it brings you the same comfort, whether you’re serving it to friends, family, or just yourself on a quiet evening. If you try this recipe, I’d love to hear how it turned out for you. Leave a comment, share a photo, or simply enjoy every warm bite. That’s what good food is all about.
Nutrition Information (per serving, approx.)
Calories: 320 | Carbohydrates: 55g | Protein: 3g | Fat: 12g | Fiber: 4g | Sugar: 33g | Sodium: 90mg

Apple Crisp
Ingredients
For the Apple Filling:
- 6 medium apples Granny Smith, Honeycrisp, or a mix, peeled and sliced
- ⅓ cup granulated sugar
- 1 tablespoon lemon juice
- 1 teaspoon ground cinnamon
- ½ teaspoon ground nutmeg
- 1 tablespoon all-purpose flour
For the Crisp Topping:
- ¾ cup old-fashioned rolled oats
- ½ cup all-purpose flour
- ½ cup packed light brown sugar
- ½ teaspoon ground cinnamon
- ¼ teaspoon salt
- ½ cup 1 stick unsalted butter, cold and cubed
Instructions
- Preheat the oven: Preheat oven to 350°F (175°C). Lightly grease an 8×8-inch or 9×9-inch baking dish.
- Prepare the apple filling: In a large bowl, combine sliced apples, sugar, lemon juice, cinnamon, nutmeg, and flour. Toss until apples are well coated. Transfer to the prepared baking dish.
- Make the topping: In a separate bowl, mix oats, flour, brown sugar, cinnamon, and salt. Cut in cold butter using a pastry cutter or fork until the mixture resembles coarse crumbs.
- Assemble the crisp: Sprinkle the oat topping evenly over the apples.
- Bake: Bake for 40–45 minutes, or until the topping is golden brown and the apples are tender and bubbling around the edges.
- Serve: Let cool for 10–15 minutes. Serve warm, optionally with vanilla ice cream or whipped cream.
Notes
- For added crunch, stir chopped nuts (like pecans or walnuts) into the topping.
- Use a mix of tart and sweet apples for depth of flavor.
- Leftovers can be stored in the refrigerator for up to 3 days and reheated in the oven or microwave.
- Easily double the recipe for a crowd and bake in a 9×13-inch dish.


Leave a Reply