
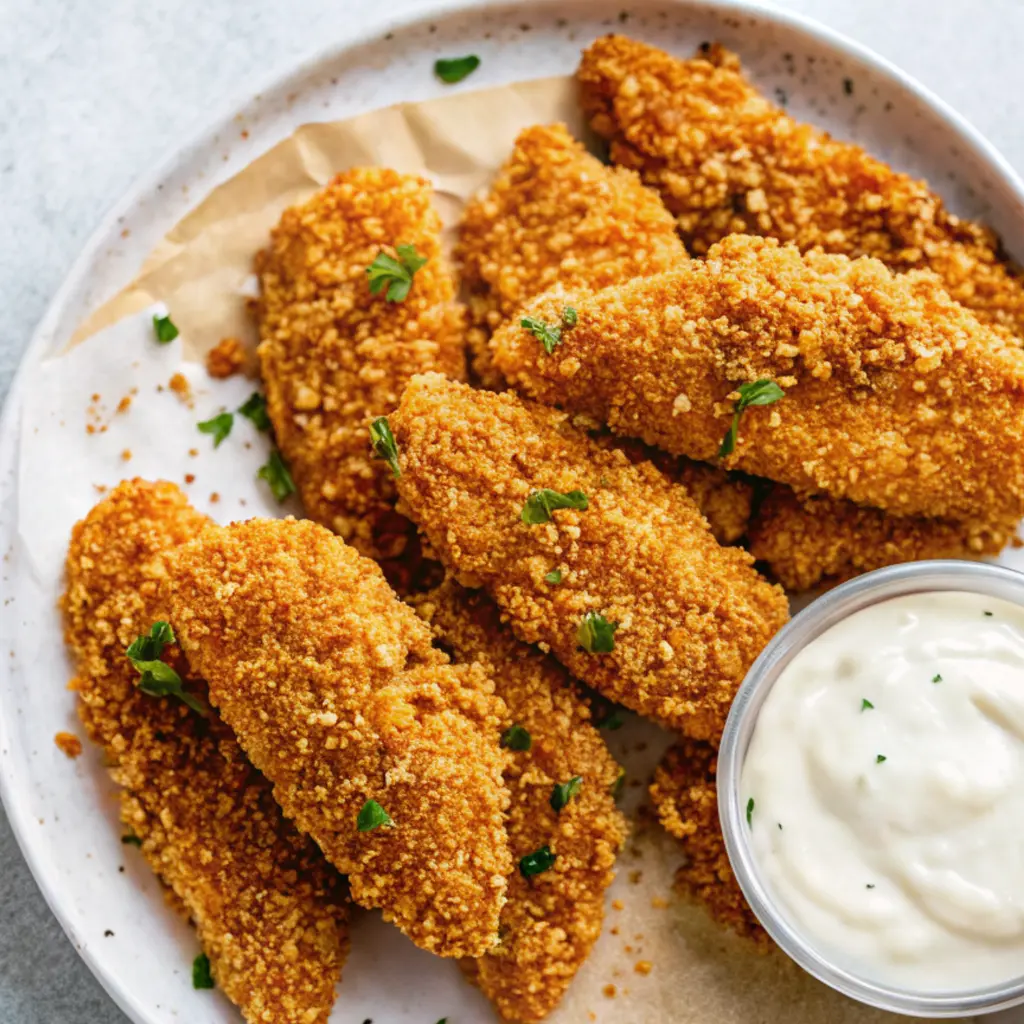
I still remember the first time I made chicken tenders from scratch. My youngest, Sam, had just come home from his first week of kindergarten, tired and overwhelmed, with that quiet little look that said the world had been just a bit too much. I asked him what he wanted for dinner, and without missing a beat, he whispered, “Chicken fingers… but the good kind.” I knew exactly what he meant—not the frozen kind from the box, not the ones with that rubbery breading that peels off in a single sheet. He wanted the ones that feel like home. I didn’t have a recipe, just a craving to comfort, and some boneless chicken breasts I had planned to bake. So I got to work, dredging, dipping, and frying, fumbling through instinct and memory. That first batch was imperfect—too much seasoning, a little overcooked—but Sam ate them like they were gold. And just like that, these homemade chicken tenders became a fixture in our kitchen. Over the years, I’ve refined the recipe with quiet confidence, and every time I make them now, I remember that moment: the power of something warm, simple, and made with love.
Why You’ll Love This Recipe:
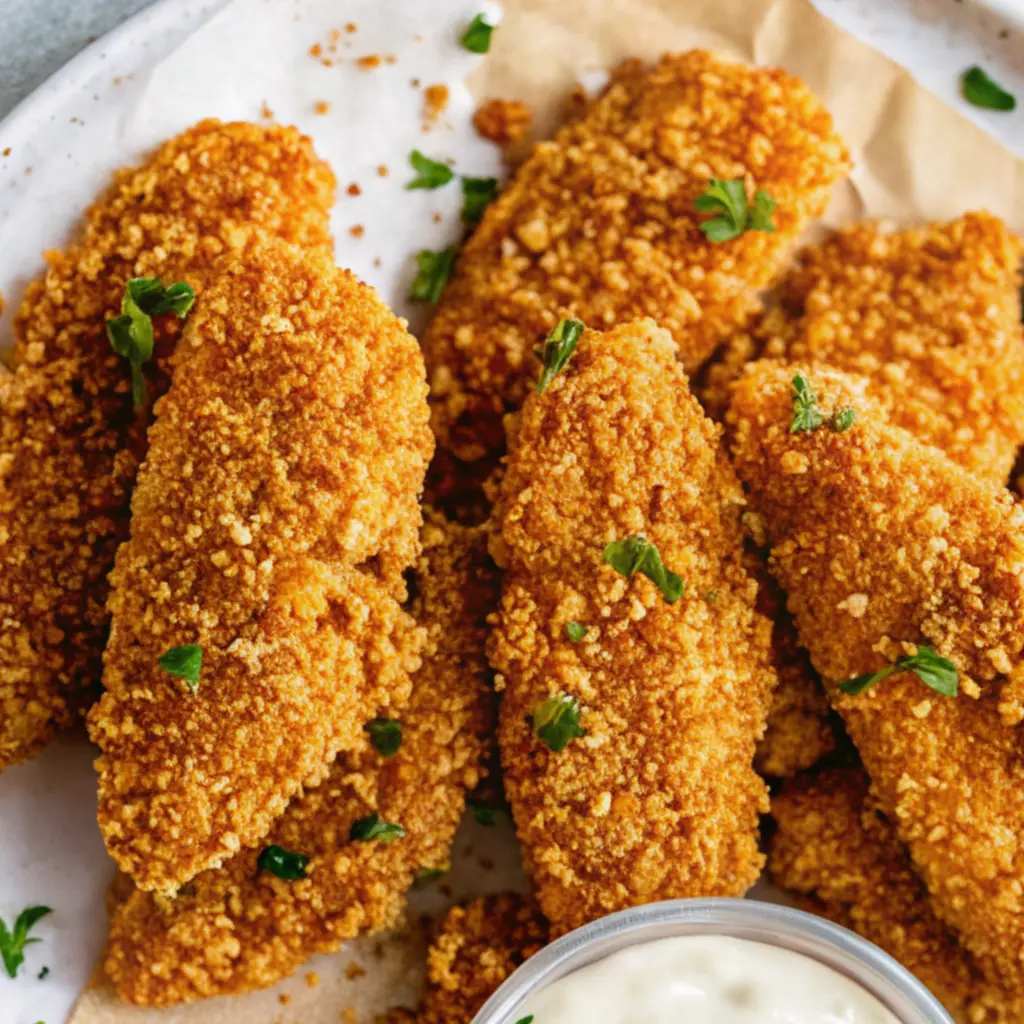
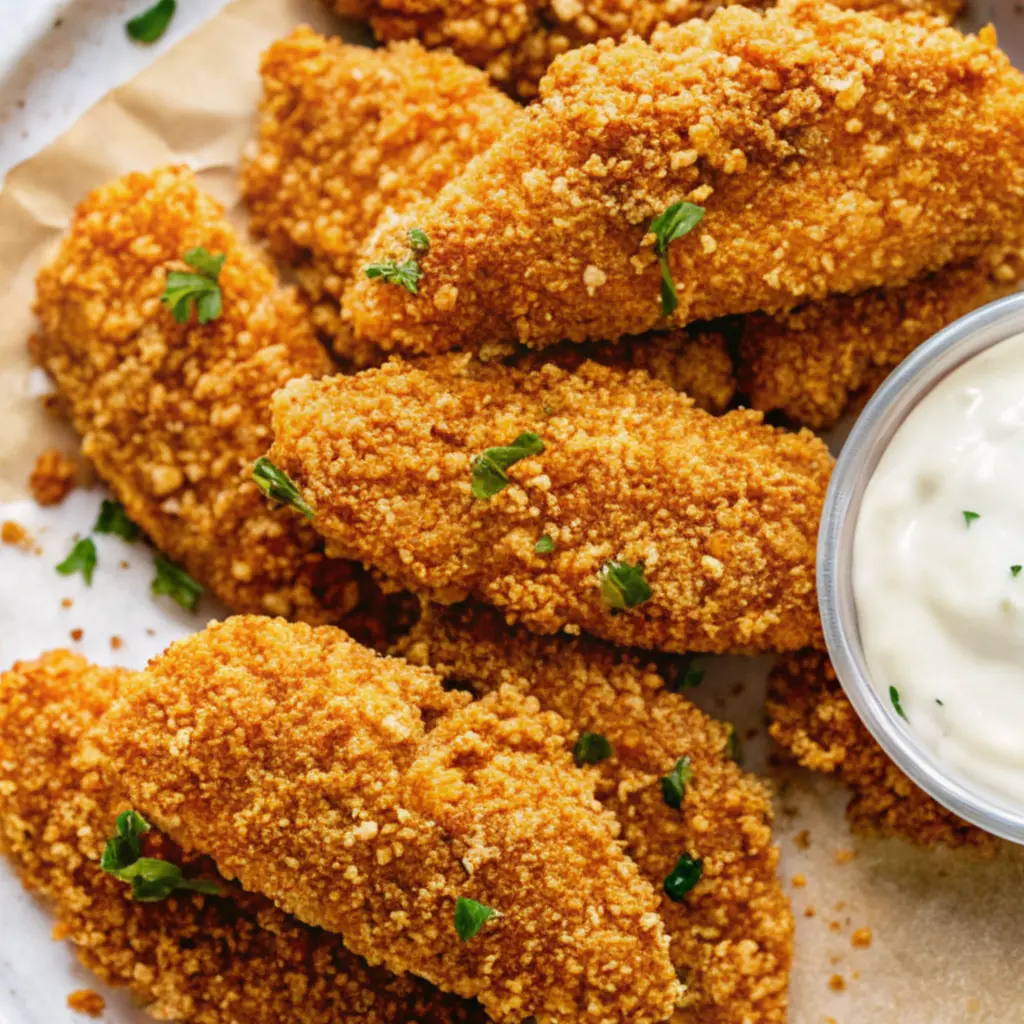
- Crispy on the outside, juicy on the inside
- Simple pantry ingredients, no fuss
- Kid-friendly and adult-approved
- Quick enough for weeknights
- Perfect for meal prepping or freezing
- Customizable with spices or dipping sauces
Ingredients You’ll Need:
Chicken: I always start with boneless, skinless chicken breasts, sliced into tenders (or use pre-cut tenderloins if you’re short on time). You want uniform size for even cooking. I’ve used thighs in a pinch—they turn out juicier, just a bit messier to handle.
Buttermilk: For marinating, it makes the chicken tender and flavorful. If you don’t have any, a mix of milk and a spoonful of lemon juice or vinegar does the trick. Let it sit for 10 minutes, and it’s close enough.
Flour: Good old all-purpose flour gives you that classic crisp coating. I’ve mixed in a bit of cornstarch before when I wanted extra crunch, especially when baking instead of frying.
Eggs: These help the flour stick to the chicken. I like to whisk mine with a splash of hot sauce or Dijon mustard for a subtle boost of flavor.
Breadcrumbs (optional): If I’m going for a super crunchy texture, I’ll mix panko into the flour dredge. But many days, I keep it simple with just seasoned flour.
Seasonings: My go-to mix is salt, pepper, paprika, garlic powder, onion powder, and a tiny pinch of cayenne. I adjust depending on who’s eating—less heat for the kids, more garlic for my husband.
Oil for Frying: I use canola or vegetable oil—something neutral with a high smoke point. You want about ½ inch of oil in the pan; it’s a shallow fry, not a deep one.
How to Make It (Step-by-Step Instructions):
Start by marinating your chicken tenders in buttermilk. I usually mix in a teaspoon of salt and a pinch of paprika right into the buttermilk, then toss the chicken to coat. Let it sit for at least 30 minutes, or up to overnight if you’re planning ahead. That marinade makes all the difference—your chicken will be juicy and flavorful all the way through, not just coated on the outside.
While the chicken soaks, I set up my dredging station. In one shallow bowl, I whisk eggs with a splash of hot sauce (don’t worry, it doesn’t make them spicy—it just deepens the flavor). In another, I mix flour with my seasoning blend. I used to under-season the flour, but after a few too-bland batches, I’ve learned that this is your big flavor opportunity.
Take the chicken out of the buttermilk and let the excess drip off, then dip it into the flour, then the egg, and finally back into the flour. Yes, double-dipping makes a difference—it gives you that craggy, crunchy coating that grabs onto sauce like a dream. Press the flour in with your hands to make sure it sticks well.
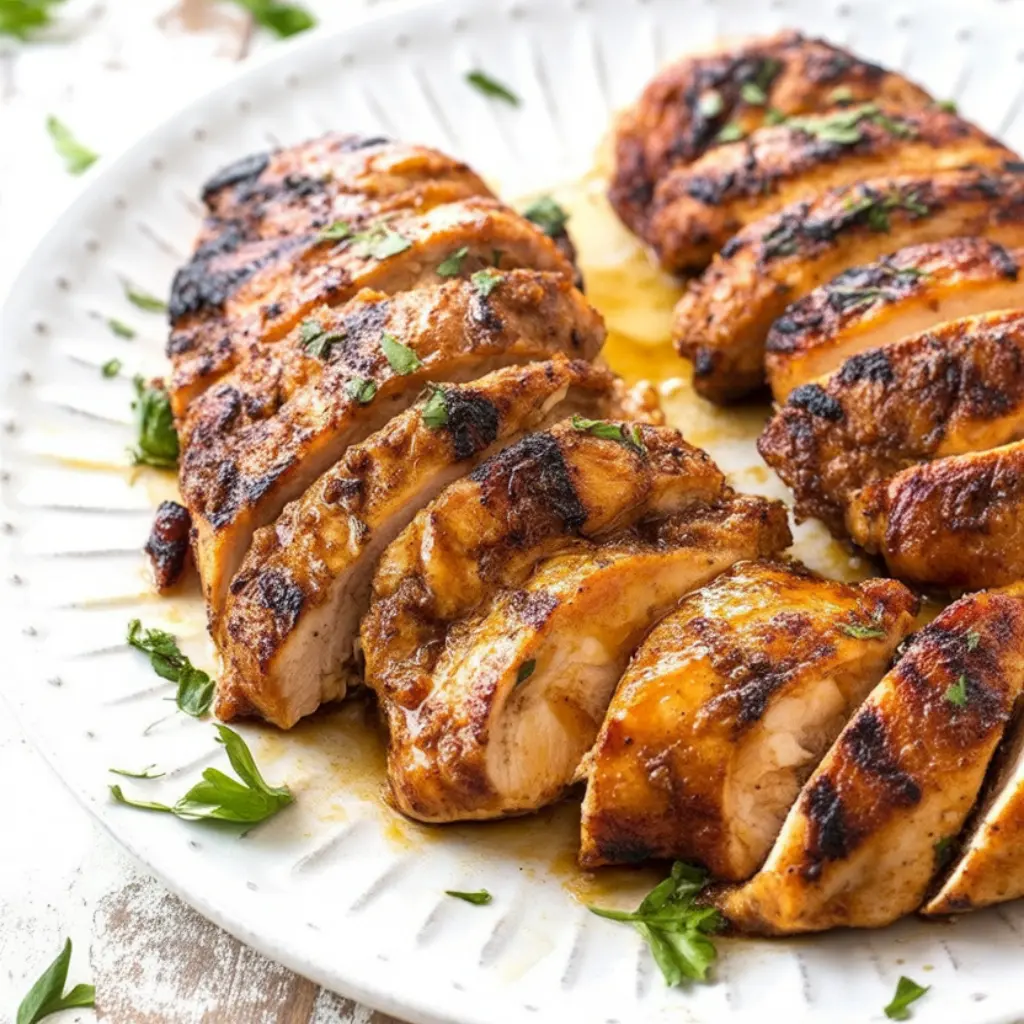
Heat your oil in a large skillet over medium heat. I test mine by dropping in a bit of flour—if it sizzles steadily, you’re ready. Too hot and the outside burns before the chicken’s done. Too cool and you’ll end up with greasy tenders. Fry the chicken in batches, without crowding the pan, for about 3 to 4 minutes per side. Flip carefully and watch the color—it should be golden, not dark brown. Transfer to a wire rack or paper towel-lined plate to drain.
Let them rest a few minutes before serving—just enough time to stir together a dipping sauce or set the table. Resting helps the coating set and the juices redistribute so every bite is just right.
Expert Tips for the Best Results:
What I’ve learned over years of making chicken tenders is that the real secret is patience and attention to detail. Don’t rush the dredging—press that flour into every crevice and let the coated tenders rest a few minutes before frying. This helps the breading stay on instead of sliding off in the pan. Don’t crank the heat to hurry things up—moderate, steady heat ensures a golden crust and fully cooked center. And always let the oil reheat between batches. Oh, and if you’re baking instead of frying, a wire rack on your sheet pan makes all the difference for crispness. These are the little things that seem small, but they’re what separate “fine” from “fantastic.”
Variations & Substitutions:
I’ve played around with this recipe more times than I can count. When I was out of buttermilk once, I used plain yogurt thinned with a bit of milk—it actually made the tenders extra tangy and tender. Sometimes I mix grated Parmesan into the flour for a little savory depth, or add a pinch of smoked paprika when I want that hint of campfire flavor. I’ve even rolled them in crushed cornflakes for a nostalgic crunch. And when I needed a gluten-free version for a friend, I used a mix of rice flour and cornstarch—it wasn’t identical, but it was darn close. These tenders are forgiving, which is part of why I love them.
Serving Suggestions:
Chicken tenders are the kind of meal that fits just about any night—movie night, game day, or a quick weeknight dinner when everyone’s hungry and a little cranky. I serve them with a mix of dipping sauces—honey mustard, barbecue, ranch, whatever’s in the fridge—and usually something fresh and crisp like coleslaw or a big green salad. If I have a little more time, homemade oven fries are the perfect partner. And when the kids have friends over, I just pile them on a platter and let them vanish.
Storage & Reheating Instructions:
Leftovers keep surprisingly well if you store them right—layer them between paper towels in an airtight container, and they’ll stay good in the fridge for up to three days. For reheating, I skip the microwave unless I’m in a rush; the oven or toaster oven is best for bringing back that crispy coating. About 10 minutes at 375°F usually does the trick. They won’t be quite as perfect as fresh, but they’ll still be darn good. I’ve even packed them cold in lunchboxes, and no one’s complained.
Recipe FAQs (Answered by Clara):
Can I make these in the oven instead of frying?
Absolutely. Bake them on a wire rack over a sheet pan at 425°F for about 20–25 minutes, flipping halfway through. Spray them lightly with oil for extra crispness.
Can I freeze them?
Yes, both before and after cooking. Freeze raw, breaded tenders on a sheet tray, then transfer to a bag once solid. To reheat cooked ones, bake straight from frozen at 400°F until hot and crisp.
What oil is best for frying?
I usually use canola or vegetable oil—neutral taste, high smoke point, and easy to find. Peanut oil is great too, but a bit pricier.
Why is my breading falling off?
That’s often from skipping the rest time before frying or not pressing the flour in firmly. Letting them sit 10–15 minutes before frying makes a big difference.
Can I use an air fryer?
Yes, though they come out a bit drier. Spray generously with oil and cook at 400°F for about 10–12 minutes, flipping once. Keep an eye on them so they don’t dry out.
There’s something about making chicken tenders from scratch that always brings me back to the basics—simple food, made with care, shared with people you love. I hope this recipe brings a little comfort and joy into your kitchen the way it has in mine. If you try it, let me know how it turns out—I love hearing your tweaks, your stories, and your triumphs. And if you’re just here for inspiration today, that’s okay too. Sometimes just thinking about dinner is enough for now.
Nutrition Information (Per Serving – Approx. 3 tenders):
Calories: 320 | Protein: 28g | Fat: 15g | Carbohydrates: 18g | Fiber: 1g | Sugar: 1g | Sodium: 420mg

Chicken Tenders
Ingredients
- 1½ lbs chicken tenders or chicken breasts cut into strips
- ½ cup all-purpose flour
- 2 large eggs
- 1 tablespoon milk
- 1 cup breadcrumbs or panko
- ½ cup grated Parmesan cheese optional
- 1 teaspoon paprika
- ½ teaspoon garlic powder
- ½ teaspoon salt
- ¼ teaspoon black pepper
- Cooking oil or spray for baking/frying
Instructions
- Set up breading station:
- Bowl 1: Flour
- Bowl 2: Beaten eggs mixed with milk
- Bowl 3: Breadcrumbs, Parmesan, paprika, garlic powder, salt, and pepper
- Coat the chicken: Dredge each tender in flour, dip in egg mixture, then coat in breadcrumb mixture, pressing gently.
- To bake: Preheat oven to 425°F (220°C). Line a baking sheet with parchment paper and spray with oil. Arrange tenders in a single layer and spray tops lightly with oil. Bake for 18–20 minutes, flipping halfway, until golden and cooked through.
- To fry: Heat ½ inch oil in a skillet over medium-high heat. Fry tenders in batches for 3–4 minutes per side until crispy and internal temp reaches 165°F (74°C). Drain on paper towels.
- To air fry: Preheat air fryer to 400°F (200°C). Lightly spray breaded tenders with oil. Cook in batches for 10–12 minutes, flipping halfway.
- Serve: Enjoy hot with ketchup, honey mustard, ranch, BBQ sauce, or your favorite dip.
Notes
- Add cayenne or hot sauce to the egg mixture for spicy tenders.
- Swap breadcrumbs for crushed cornflakes or pretzels for added crunch.
- Leftovers store well and reheat best in the oven or air fryer.
- Freeze uncooked breaded tenders on a tray, then store in freezer bags up to 2 months.
Leave a Reply