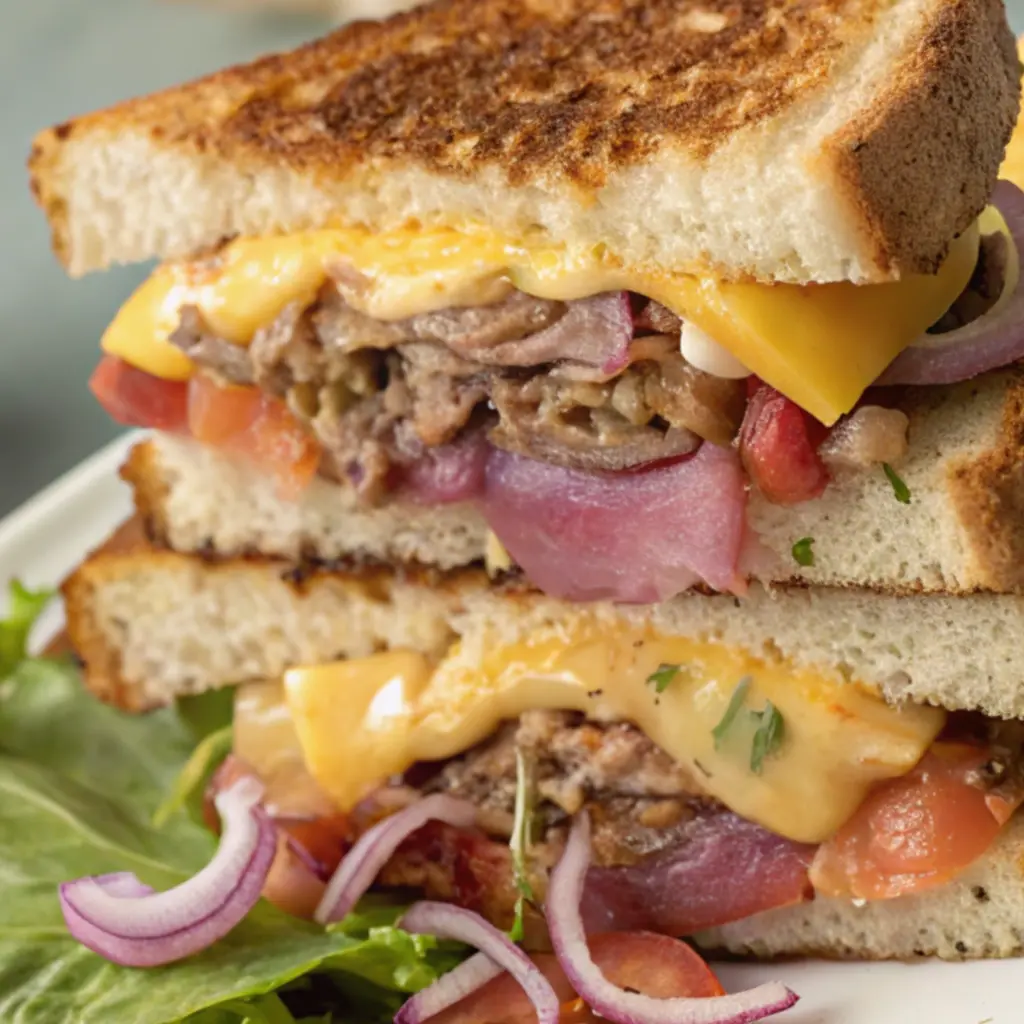
The first time I had a chopped cheese sandwich, it wasn’t in a trendy food truck or a spotlighted corner of a glossy magazine feature. It was in the back kitchen of my cousin Danny’s bodega in the Bronx. I was helping him stock drinks one summer afternoon—sweaty, tired, and definitely hungry. The guy behind the grill, Freddy, handed me a foil-wrapped sandwich like it was nothing. “You’ll like this,” he said, grinning. That first bite hit different. The savory meat, melted cheese, soft roll slightly toasted—it was messy, simple, absolutely glorious.
It wasn’t fancy, but it was real. And it stuck with me. I’ve since made it dozens of times at home, tweaking the technique, playing with the toppings, but always keeping the spirit of it alive. The chopped cheese sandwich is one of those meals that reminds you how good humble food can be when it’s made with care—and maybe a little attitude.

Why You’ll Love This Recipe:
- Quick and satisfying, even on your busiest night
- Budget-friendly ingredients you probably already have
- Packs bold, savory flavor into every bite
- A family favorite—even picky eaters get on board
- Great way to use up ground beef without making another burger
Ingredients You’ll Need:
- Ground beef (80/20) – I prefer this ratio because the fat brings out that irresistible sizzle and flavor on the griddle. Leaner beef works, but you’ll miss a bit of the juicy magic.
- Yellow onion, finely chopped – Don’t skip this. The onion softens and caramelizes into the beef, giving the sandwich its backbone of flavor. I’ve used red onion in a pinch; it works, but yellow’s more traditional.
- American cheese slices – There’s something nostalgic and perfect about the way American cheese melts. But I’ve also done this with cheddar or provolone when that’s what was in the fridge.
- Hoagie rolls or hero bread – Soft rolls with a slight chew are ideal. I’ve even used potato rolls when I was out of hoagie bread. You want something that’ll soak up the juices without falling apart.
- Lettuce and tomato – Classic toppings that add a cool crunch and balance the richness of the meat and cheese.
- Ketchup and mayo – The standard duo. You can add a little mustard or hot sauce if that’s more your style.
- Salt, pepper, garlic powder – I keep it simple, seasoning the beef generously just before cooking.
How to Make It (Step-by-Step Instructions):
Start by prepping everything before the heat goes on. Chop your onions, slice your rolls, lay out your cheese and toppings. This comes together fast once you start cooking, and you don’t want to be scrambling mid-sizzle.
Heat a skillet or griddle over medium-high heat. I usually go with cast iron for that golden sear. Add a bit of oil, then toss in your chopped onions. Let them soften and start to brown—this is where the aroma pulls everyone into the kitchen. After about 3–4 minutes, push the onions to the side of the pan.
Now comes the meat. Press your ground beef into the skillet right next to the onions. Don’t stir it right away. Let it develop some good color. After a couple of minutes, season it with salt, pepper, and garlic powder. Then, using your spatula, chop the beef up as it cooks. You want small, even bits—this is what gives the chopped cheese its signature texture.
Once the beef is fully cooked and crumbly, mix in the onions and give everything a good stir. Now, flatten the mixture slightly and layer on your cheese slices—cover the whole surface. Turn the heat to low, let the cheese melt right into the meat. This part is where the magic happens. Some folks stir the cheese in, but I like to let it sit for a bit and then gently fold it over itself so you get gooey pockets throughout.
While the cheese melts, toast your rolls lightly—just enough to give them a little structure. Then it’s time to build. Spread mayo on one side of the roll, ketchup on the other. Scoop in the cheesy meat mixture, top with shredded lettuce and sliced tomato, and close it up.
Cut it in half if you want to share. Or don’t. No judgment here.
Expert Tips for the Best Results:
Patience is key with the onions and the meat. Let the onions cook down properly—you want them soft and golden, not raw and sharp. And with the beef, give it time to brown before you start chopping it up. That seared flavor makes a big difference. Also, don’t skimp on the cheese. Let it melt fully, and don’t rush that step. I’ve tried to “speed it up” before and ended up with uneven pockets. Letting it melt slowly into the meat gives you that creamy texture throughout the sandwich.
Variations & Substitutions:
I’ve played around with this sandwich more times than I can count. Ground turkey works well if you’re looking for something lighter—though I usually add a splash of Worcestershire for extra depth. I’ve even made a vegetarian version using chopped mushrooms and a plant-based ground—surprisingly tasty. One night I was out of rolls and served the filling in pita bread with a pickle on the side, and my kids still ask for it that way sometimes. Don’t be afraid to riff on it. The soul of this sandwich is flexible.
Serving Suggestions:
This sandwich is the kind of thing I make when I want to feed a crowd without fuss—game nights, movie nights, lazy Sunday lunches. It’s best served hot, with a side of kettle chips or maybe a cold pickle. A fizzy soda or a chilled beer goes great alongside. If I’m doing a full spread, I’ll set out a platter of these sandwiches halved, with a big bowl of coleslaw or potato salad. It’s casual food that makes people happy.
Storage & Reheating Instructions:
If you have leftovers—which isn’t common in my house—they keep well in the fridge for about two days. I store the meat mixture separately in an airtight container. When I’m ready to reheat, I warm it slowly in a skillet with a splash of water or beef broth to keep it from drying out. Reassemble the sandwich fresh with new rolls and toppings. It won’t be quite the same as the first go-round, but it’s still pretty satisfying.
Recipe FAQs (Answered by Clara):
Can I make this ahead of time?
You sure can. I often cook the beef and onions earlier in the day, keep it in the fridge, then reheat and melt the cheese right before serving.
What’s the best cheese to use?
American is classic—it melts smooth and tastes like childhood. But cheddar, pepper jack, or even provolone all work if that’s what you’ve got.
Can I freeze the meat mixture?
You can. Let it cool completely, then freeze in a sealed container. Thaw in the fridge overnight and reheat on the stovetop for best texture.
Is this the same as a Philly cheesesteak?
Nope. Different vibe entirely. Chopped cheese uses ground beef and has a bodega-style charm. Philly cheesesteaks are sliced beef and usually don’t include ketchup or mayo.
What if I don’t have hoagie rolls?
Use what you have—burger buns, tortillas, pita bread. I’ve even used sandwich bread in a pinch. It’s the filling that shines.

There’s something about a chopped cheese that feels like home, even if you didn’t grow up eating it. It’s warm, a little messy, and absolutely full of personality—just like the best food often is. I hope you give it a try, and I hope it brings a little joy to your table. If you do make it, I’d love to hear how it went—leave a comment or share your version. And don’t be afraid to make it your own. After all, that’s what good cooking is about.
Nutrition Information (Per Sandwich – Approximate):
- Calories: 620
- Protein: 29g
- Fat: 38g
- Carbohydrates: 38g
- Sodium: 870mg
- Fiber: 2g

Chopped Cheese Sandwich
Ingredients
- 1 lb ground beef 80/20 recommended
- 1 small onion finely chopped
- 1 teaspoon salt
- ½ teaspoon black pepper
- ½ teaspoon garlic powder
- 4 slices American cheese
- 4 hero rolls or hoagie buns
- 1 cup shredded iceberg lettuce
- 1 tomato thinly sliced
- Mayonnaise and ketchup to taste
- 1 tablespoon vegetable oil or butter for grilling
Instructions
- Heat a large skillet over medium-high heat. Add oil and sauté the chopped onion until softened, about 3 minutes.
- Add the ground beef to the skillet. Season with salt, pepper, and garlic powder. Cook and break up the meat until browned, about 5–7 minutes.
- Chop the beef and onion mixture together with your spatula to create a fine, even texture.
- Add cheese: Divide the meat mixture into 4 portions in the pan. Place a slice of American cheese over each portion and let melt.
- Toast the rolls: While cheese is melting, lightly toast your rolls on a skillet or in the oven until golden.
- Assemble the sandwiches: Spread mayo and ketchup on each roll. Add a scoop of cheesy chopped beef, then top with shredded lettuce and tomato slices.
- Serve immediately, warm and melty.
Notes
- You can use cheddar or provolone instead of American cheese, but the classic NYC version uses American.
- For a spicier twist, add chopped jalapeños or a drizzle of hot sauce.
- Swap the hero roll for a brioche bun or wrap it all in a tortilla for a chopped cheese burrito.
- Best eaten fresh—this sandwich doesn’t hold up well for leftovers.