The smell of roast beef in the oven has always been one of those scents that feels like home to me. It’s the kind of aroma that fills every corner of the house and pulls people to the kitchen before the timer ever rings.
My love for roast beef began with Sunday dinners at my parents’ house—no fancy table settings, just a big platter of sliced beef, roasted potatoes, and a little gravy made from the pan drippings. My mother had this way of knowing exactly when to pull it from the oven without ever checking a thermometer. I, on the other hand, learned the hard way that guesswork and roast beef don’t always mix.
My first attempt turned into something closer to roast leather—tough, dry, and deeply disappointing. But every failed roast taught me something: about patience, about resting the meat, and about trusting the process more than the clock.
These days, roast beef has become one of my most reliable and comforting meals—a dish that brings everyone to the table and never fails to impress, even though it’s beautifully simple at its core.

Why You’ll Love This Recipe
- Perfectly tender and juicy with a golden crust
- Made with simple pantry ingredients—no fancy equipment needed
- Great for both family dinners and special occasions
- Easy to reheat and perfect for leftovers or sandwiches
- A true crowd-pleaser that looks impressive but feels approachable
Ingredients You’ll Need
For the Roast:
- 3 to 4 pounds beef roast (top sirloin, eye of round, or rib roast): I prefer top sirloin for its balance of tenderness and flavor. Rib roast is luxurious and ideal for holidays, while eye of round is leaner and more budget-friendly.
- 2 tablespoons olive oil: Helps create that perfect golden crust. Don’t skip it—it’s what seals in the juices.
- 1 tablespoon coarse salt: I always season generously; it’s what builds the flavor deep into the meat.
- 1 teaspoon black pepper: Freshly ground makes a noticeable difference.
- 2 teaspoons garlic powder: Adds warmth and depth without overpowering the beef.
- 1 teaspoon onion powder: Subtle, but it rounds out the flavor beautifully.
- 1 teaspoon dried rosemary (or fresh if you have it): Rosemary pairs perfectly with beef’s natural richness.
- 1 teaspoon thyme: I use it sparingly, just enough to add an earthy note.
For the Pan and Gravy (Optional but worth it):
- 1 cup beef broth: For deglazing the pan—those browned bits at the bottom are pure gold.
- 1 tablespoon flour or cornstarch: To thicken the juices into a light, flavorful gravy.
- 1 tablespoon butter: Adds richness and a glossy finish.
How to Make It (Step-by-Step Instructions)
Step 1: Bring the Beef to Room Temperature
This step might seem small, but it makes all the difference. Take your roast out of the refrigerator at least an hour before cooking. Cold meat seizes up when it hits the oven’s heat, which can lead to a tough texture. Letting it rest on the counter allows for even cooking throughout. I usually use this time to preheat the oven and gather my seasonings—it keeps me from rushing later.
Step 2: Preheat the Oven and Prepare the Roast
Preheat your oven to 450°F (230°C). While it heats, pat the roast completely dry with paper towels—moisture is the enemy of a good crust. Drizzle the roast with olive oil and rub it all over with salt, pepper, garlic powder, onion powder, rosemary, and thyme. I use my hands to make sure every inch is coated. Don’t be shy with seasoning; a roast this size can handle it. If you like, tie the roast with kitchen twine every couple of inches to help it keep its shape while roasting.
Step 3: Sear for Flavor
Place the roast in a roasting pan fitted with a rack, fat side up. The rack helps heat circulate and prevents the bottom from stewing in its juices. Slide it into the hot oven and let it roast at 450°F for 15 minutes—this high heat kickstarts the browning process and builds that flavorful crust. You’ll hear it sizzle, and your kitchen will start to smell incredible.
Step 4: Lower the Heat and Roast Slowly
After 15 minutes, reduce the oven temperature to 325°F (165°C) without opening the door. Continue roasting until the internal temperature reaches 125°F for medium-rare, 135°F for medium, or 145°F for medium-well. A good meat thermometer is worth investing in—it takes the guesswork out entirely. Depending on the size and cut, this can take anywhere from 60 to 90 minutes. Resist the temptation to keep checking; opening the oven too often drops the temperature and extends cooking time.
Step 5: Let It Rest
Once your roast reaches the desired temperature, remove it from the oven and tent it loosely with foil. This resting period—at least 15 to 20 minutes—is absolutely crucial. The juices inside need time to redistribute; cut too soon, and they’ll run out onto the cutting board instead of staying in the meat where they belong. The roast will also continue to cook slightly as it rests, usually rising about 5 degrees in temperature.
Step 6: Make the Pan Gravy (Optional but Delicious)
While the beef rests, pour off most of the fat from the roasting pan, leaving behind the flavorful browned bits. Set the pan on the stovetop over medium heat, add the beef broth, and scrape the bottom with a wooden spoon to loosen all those caramelized pieces. In a small bowl, whisk together the flour and a few tablespoons of water to make a slurry, then stir it into the broth. Add a pat of butter and simmer until thickened. It’s simple, rustic, and the best way to make use of what’s already in the pan.
Step 7: Slice and Serve
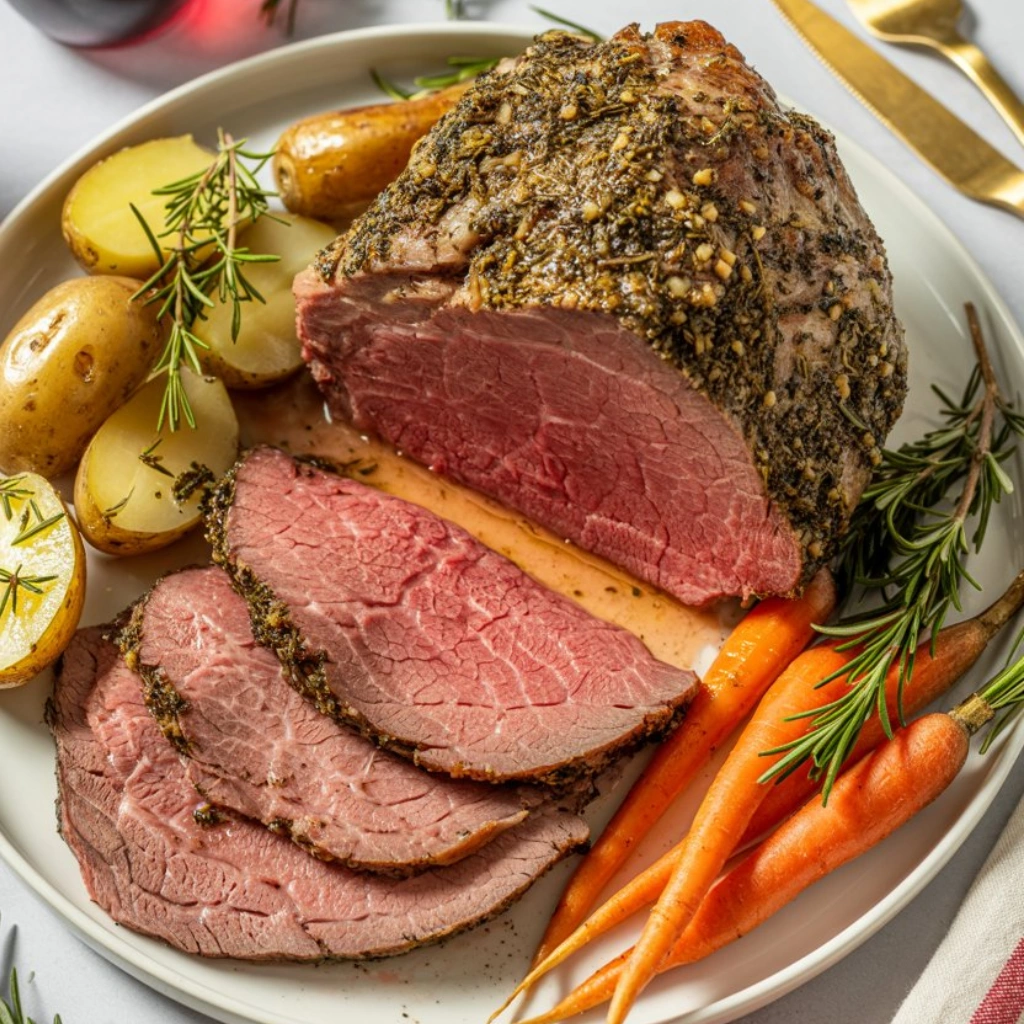
Use a sharp carving knife and slice against the grain for tender results. I like to cut the slices thin for serving with gravy or a bit thicker for sandwiches the next day. Arrange them on a platter, drizzle with a little pan gravy, and serve immediately. There’s something deeply satisfying about seeing that pink-centered roast surrounded by golden edges—it’s a meal that feels both humble and celebratory all at once.
Expert Tips for the Best Results
The key to an excellent roast beef lies in temperature control and patience. Always start with a high heat to develop that crust, then lower it to cook the meat gently and evenly. A meat thermometer is your best friend here—it’s the difference between perfect and overdone. Don’t skip the resting period; it’s not optional, no matter how tempting it is to slice right in. Use a heavy roasting pan or Dutch oven for even heat distribution, and if you want an extra flavor boost, toss a few halved onions or carrots into the pan while it cooks—they’ll caramelize beautifully and enrich the drippings for your gravy.
Variations & Substitutions
I’ve made this roast a dozen different ways depending on what’s in my kitchen. Sometimes I swap olive oil for melted butter when I want a richer flavor. If I’m short on fresh herbs, a teaspoon of Montreal steak seasoning works wonders. Once, I used balsamic vinegar and Dijon mustard in the rub, and it gave the beef a subtle tang that paired perfectly with roasted potatoes. You can also slow-cook tougher cuts like chuck roast at a lower temperature for several hours—they turn out fall-apart tender, almost like pot roast.
Serving Suggestions
Roast beef pairs beautifully with just about anything hearty. I love serving it with mashed potatoes, roasted carrots, or Yorkshire pudding when I want to feel a little traditional. A fresh green salad or buttered green beans add a lighter touch to balance the richness. On quieter nights, I’ll slice the leftovers thin and serve them cold on toasted sourdough with a swipe of horseradish cream—it’s one of my favorite ways to stretch a roast into another comforting meal.
Storage & Reheating Instructions
Leftover roast beef keeps well for up to four days in the refrigerator, tightly wrapped or stored in an airtight container. For longer storage, you can freeze it in slices with a bit of the pan gravy to keep it moist—it’ll last up to three months. When reheating, do it gently. I like to warm slices in a covered dish with a splash of broth in a 300°F oven until just heated through. Microwaving works in a pinch, but it tends to dry the meat, so add a bit of moisture if you go that route.
Recipe FAQs (Answered by Clara)
Can I make this ahead of time?
You sure can. I often prepare it in the morning, cover it tightly, and pop it in the fridge. It actually tastes better after resting. When you’re ready to serve, reheat it slowly in a low oven or slice it thin and serve it cold with gravy or sauce.
What’s the best cut of beef to use?
For the best balance of tenderness and flavor, I like top sirloin or rib roast. Eye of round is leaner but still works beautifully if cooked medium-rare and sliced thinly.
Can I serve it cold?
Absolutely. Cold roast beef sandwiches are one of my favorite leftovers—especially with a touch of horseradish or grainy mustard. Just make sure it’s sliced thinly against the grain for the best texture.
How do I make it less watery?
If your roast releases too much liquid, it might be because it was cooked too cold or sliced too soon. Always bring the meat to room temperature before roasting, and let it rest properly before cutting. This gives the juices time to redistribute and keeps them where they belong—in the meat.

Conclusion
Roast beef is one of those timeless recipes that remind us how simple ingredients can become something truly special with a little care and patience. It’s a dish that brings people together, whether it’s a quiet Sunday dinner or a holiday meal surrounded by laughter. If you’ve never tried making roast beef at home, I hope this recipe gives you the confidence to do it—it’s more forgiving than it seems, and the reward is always worth the effort. When you do make it, let me know how it turns out. Every oven, every roast, and every cook has their own story to tell, and I’d love to hear yours.
Nutrition Information (per serving):
Calories: ~380 | Protein: 38g | Fat: 24g | Carbohydrates: 2g | Sodium: 420mg

Roast Beef
Ingredients
- 3 lb beef roast sirloin tip, eye of round, or top round
- 2 tbsp olive oil
- 4 cloves garlic minced
- 1 tbsp kosher salt
- 1 tsp black pepper
- 1 tsp dried rosemary
- 1 tsp dried thyme
- ½ tsp onion powder
- ½ tsp paprika
Optional for serving:
- Pan drippings for gravy
- Fresh herbs for garnish
Instructions
- Preheat oven: Preheat to 450°F (230°C). Line a roasting pan with foil or place a rack in a roasting pan.
- Prepare the beef: Pat the roast dry with paper towels. Rub all over with olive oil, garlic, salt, pepper, rosemary, thyme, onion powder, and paprika.
- Sear (optional but recommended): Heat a large skillet over medium-high heat. Sear the roast on all sides for 2–3 minutes per side to create a crust.
- Roast: Transfer to the roasting pan and place in the oven. Roast at 450°F for 15 minutes, then reduce temperature to 325°F (165°C).
- Cook: Continue roasting until internal temperature reaches desired doneness: 125°F (52°C) for rare/ 135°F (57°C) for medium-rare/ 145°F (63°C) for medium
- Rest: Remove from oven, tent with foil, and let rest for 15–20 minutes before slicing.
- Serve: Slice thinly against the grain and serve with gravy or horseradish sauce.
Notes
- Always let the roast rest before slicing to retain juices.
- Use a meat thermometer for accuracy — oven times vary.
- For extra flavor, add onions, carrots, and potatoes to the pan as it roasts.
- Leftovers make excellent sandwiches or beef wraps the next day.