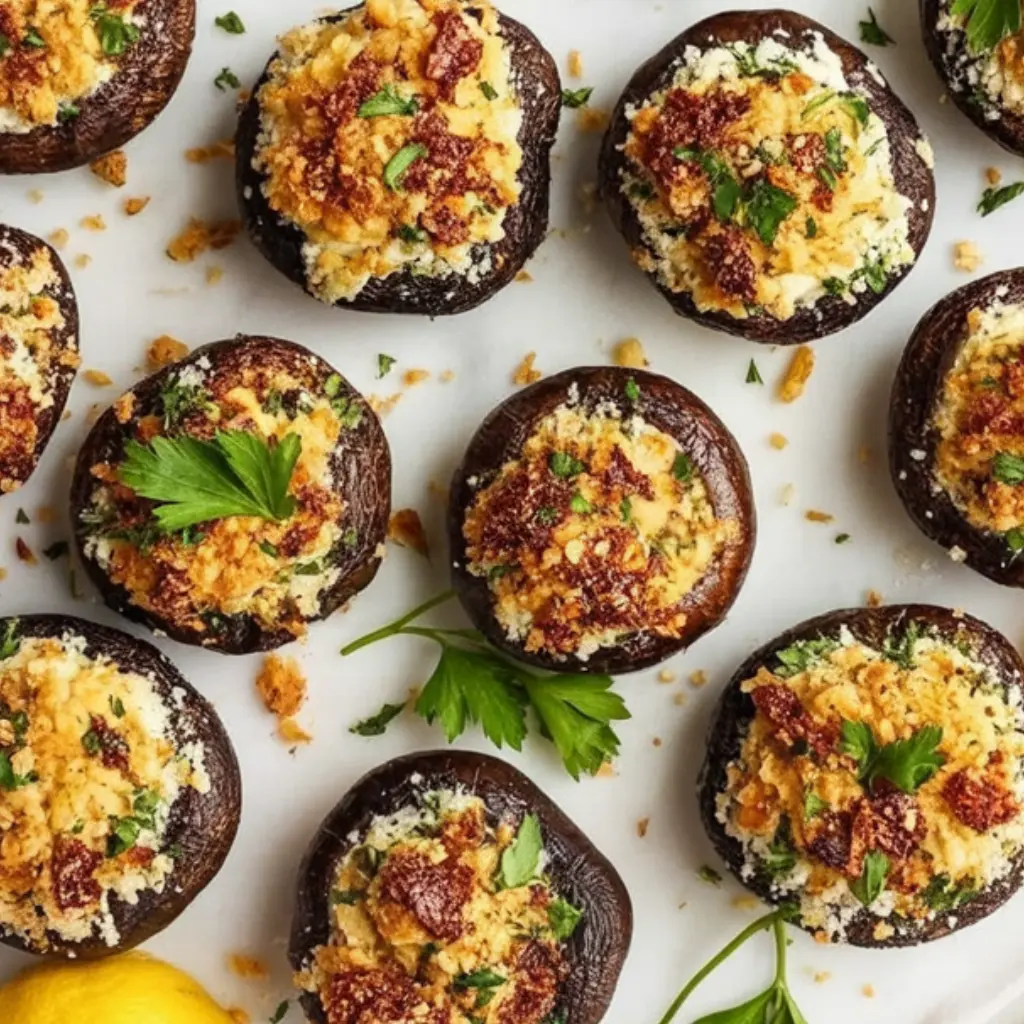
I still remember the first time I made stuffed mushrooms—not because they turned out perfect (they didn’t), but because of the look on my sister’s face when she took that first bite. It was Thanksgiving, years ago, and I was trying to impress the family with a few new appetizers. I had found some fancy recipe online, full of ingredients I didn’t recognize and instructions that seemed more concerned with sounding clever than actually helping me cook. I muddled through, skipped half the steps, and they came out a little soggy and overly rich. But somehow, they still disappeared off the plate in ten minutes flat.
Since then, I’ve made stuffed mushrooms a hundred different ways—each time learning what really matters, and what doesn’t. Now, this recipe is one of my go-to staples. It’s reliable, it’s satisfying, and it always feels a little more special than it is complicated. Whether I’m hosting a casual dinner or just craving something cozy on a weeknight, these mushrooms show up. They’ve taught me patience, improvisation, and the joy of small bites that deliver big flavor. And now I’m sharing them with you—not the fancy version, not the soggy one either, but the version that’s just right.
Why You’ll Love This Recipe:
- Easy to prepare and adaptable to what you have on hand
- Big flavor in a small, satisfying bite
- Perfect appetizer or side dish for gatherings
- Can be made ahead and reheated without losing texture
- Budget-friendly, especially if you’re feeding a crowd
Ingredients You’ll Need:
Mushrooms – I always go for white button or cremini mushrooms. You want them about two inches wide so they’re easy to stuff. Don’t toss the stems—you’ll chop them up and use them in the filling, which adds that earthy mushroom flavor back in.
Olive oil – Just a bit for sautéing. If I’m feeling indulgent, I use butter instead, or a mix of both.
Shallot or onion – Finely diced. Shallots give a slightly sweeter edge, but I’ve used yellow onion plenty of times when that’s what I had.
Garlic – Two cloves, minced. Fresh is always best here. Don’t skip it—it really brings the filling to life.
Breadcrumbs – Plain or Italian-style both work. I’ve even crushed up crackers or used panko when I was out of regular breadcrumbs. It’s all about texture.
Cream cheese – This adds creaminess and helps the filling hold together. Let it soften a bit before mixing, or you’ll fight with it.
Parmesan cheese – Freshly grated if possible. I know it’s tempting to use the jarred stuff, and I have in a pinch, but fresh makes a difference here.
Parsley – For brightness and color. You can skip it or sub in a bit of thyme if you prefer a more earthy taste.
Salt & pepper – Season to taste. I go light on the salt if my cheese is salty.
Optional: red pepper flakes, chopped spinach, or crumbled sausage – These are add-ins I’ve tried over the years when I wanted to mix things up.
How to Make It (Step-by-Step Instructions):
Start by gently wiping your mushrooms clean with a damp paper towel. Don’t rinse them under water—they’ll soak it up like little sponges and turn soggy. Pop out the stems and set them aside; you’ll use them in the filling.
Finely chop the mushroom stems, shallot, and garlic. Heat a tablespoon of olive oil (or butter, if you’re going that route) in a skillet over medium heat. Sauté the shallot until soft and translucent, about 3–4 minutes, then add the garlic and chopped stems. Cook everything down until most of the moisture has evaporated. This step is important—if the filling is watery, the mushrooms will never crisp up properly.
Transfer the cooked mixture to a bowl and let it cool for a few minutes. Then stir in your cream cheese, Parmesan, breadcrumbs, parsley, and a good pinch of salt and pepper. Mix until well combined. The filling should be thick but spreadable—if it’s too dry, add a bit more cream cheese; too wet, a few more breadcrumbs.
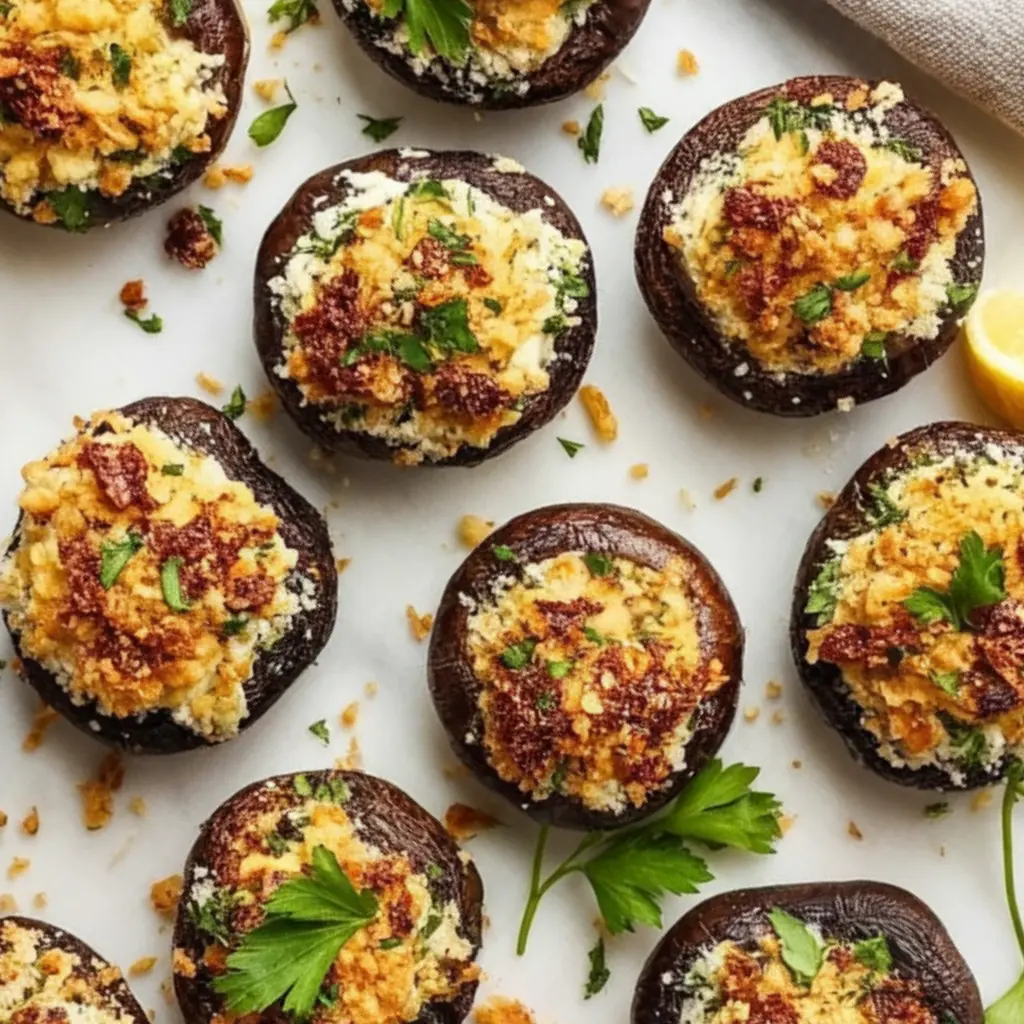
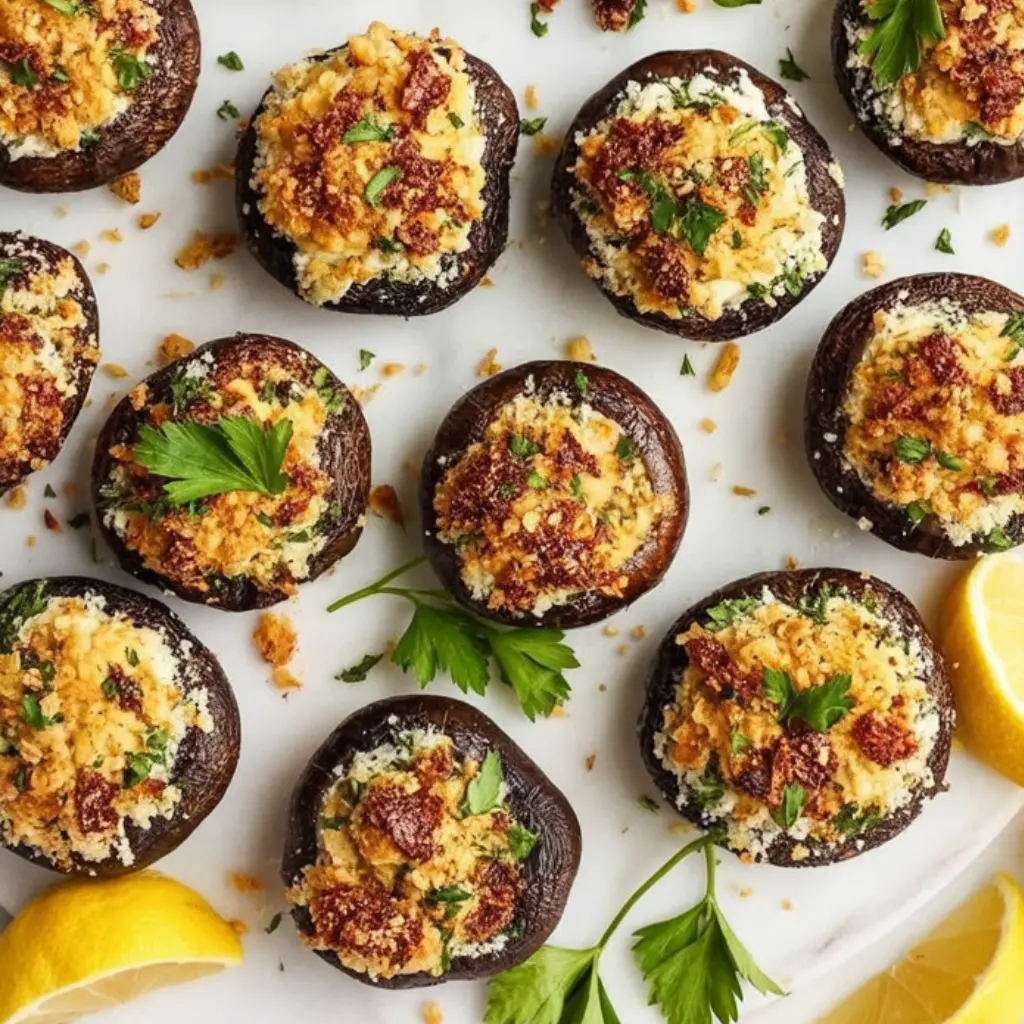
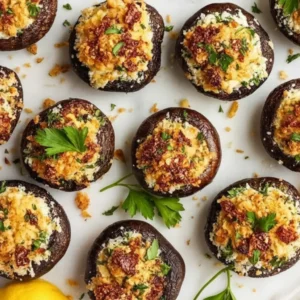
Preheat your oven to 375°F (190°C). Line a baking sheet with parchment paper or lightly oil it to prevent sticking. Arrange your mushroom caps hollow-side up and fill each one with a spoonful of the mixture. You can use a small spoon or your fingers—whichever gets the job done.
Bake for about 20 minutes, or until the mushrooms are tender and the tops are golden and slightly crisp. I usually peek at 18 minutes, just to be safe. If you want an extra golden top, turn on the broiler for the last minute or two—but watch closely, they go from golden to burnt fast.
Let them cool for a few minutes before serving. The flavors settle as they rest, and nobody wants to burn their tongue on molten cheese.
Expert Tips for the Best Results:
Stuffed mushrooms are one of those recipes that reward attention to small details. Always cook down your filling ingredients thoroughly before mixing—mushrooms hold a lot of moisture, and if you skip this step, the end result will be soggy. Let your cream cheese soften so it blends more easily, and don’t overpack the mushroom caps or they’ll overflow and make a mess. I also like to bake them on a wire rack set over a baking sheet if I want the bottoms to stay a bit drier, but parchment works fine too. And lastly, taste the filling before stuffing—yes, even if it’s just a little dab on your finger. You’ll catch if it needs more salt or a little extra zip before it’s too late.
Variations & Substitutions:
Over the years, I’ve played around with this recipe more times than I can count. Once, when I was out of cream cheese, I used goat cheese instead—and the tangy richness was surprisingly wonderful. Another time I folded in some chopped cooked spinach that needed using up, and it made the mushrooms feel almost like a mini spinach dip bite. I’ve also added a bit of crumbled sausage for a heartier version, which makes a great party appetizer. And for a spicier kick, a pinch of red pepper flakes goes a long way without overpowering the dish. Don’t be afraid to tweak this recipe based on what you have—it’s very forgiving.
Serving Suggestions:
I love serving these as part of a small-bites spread—maybe alongside a charcuterie board, some roasted nuts, or a glass of wine if we’re feeling fancy. They also pair beautifully with soups or salads if you want to make a light lunch out of them. Around the holidays, they shine as an elegant appetizer, but honestly, they’re just as welcome on a lazy Tuesday night when dinner needs a little spark. They’re the kind of thing that disappears quickly, so I always make a few extra.
Storage & Reheating Instructions:
Once cooled, leftover stuffed mushrooms can be stored in an airtight container in the fridge for up to three days. To reheat, I pop them in the oven at 350°F for about 10 minutes—just enough to warm them through and re-crisp the tops. They’ll never be exactly as good as freshly baked, but they hold up surprisingly well. Avoid the microwave if you can—it tends to make them rubbery.
Recipe FAQs (Answered by Clara):
Can I make these ahead of time?
Absolutely. I often prep them in the morning—stuff them and store them covered in the fridge—then just bake them before guests arrive. They actually seem to hold their shape better after resting.
Can I freeze stuffed mushrooms?
Technically yes, but I don’t recommend it. Mushrooms have a high water content and tend to get mushy when thawed. They’re best fresh or refrigerated short-term.
Do I need to remove the gills from the mushrooms?
Not for button or cremini mushrooms. The gills are small and don’t affect flavor or texture much. Just remove the stems and you’re good to go.
Can I make these vegetarian or vegan?
They’re already vegetarian as written, and for a vegan version, you can swap the cream cheese and Parmesan for plant-based alternatives. Just keep an eye on texture and taste—vegan cheeses vary a lot.
Conclusion:
If there’s one thing I’ve learned in my years of cooking, it’s that simple food done well will always be appreciated. These stuffed mushrooms may not look like much at first glance, but they have a way of bringing people back for seconds—and thirds. I hope you give this recipe a try, make it your own, and share it with people you love. If you do, I’d love to hear how it turned out for you. Leave a comment, send a photo, or just let me know what tweaks you tried. Cooking, after all, is better when it’s shared.
Nutrition Information (Per 1 stuffed mushroom, approx.):
- Calories: 55
- Protein: 2g
- Fat: 4g
- Carbohydrates: 3g
- Fiber: 0.5g
- Sugar: 0.5g
- Sodium: 95mg
Stuffed Mushrooms
Ingredients
- 24 whole white or cremini mushrooms
- 2 tablespoons olive oil
- 2 cloves garlic minced
- ½ small onion finely chopped
- ½ cup breadcrumbs preferably panko
- ½ cup grated Parmesan cheese
- 2 tablespoons chopped fresh parsley
- 2 tablespoons cream cheese optional for creamier filling
- Salt and pepper to taste
- Extra Parmesan or chopped parsley for garnish optional
Instructions
- Preheat oven: Preheat your oven to 375°F (190°C). Line a baking sheet with parchment paper.
- Clean mushrooms: Wipe mushrooms clean with a damp paper towel. Gently remove stems and finely chop them.
- Sauté filling: Heat olive oil in a skillet over medium heat. Sauté chopped mushroom stems, onion, and garlic for 5 minutes until softened.
- Mix filling: Transfer sautéed mix to a bowl. Stir in breadcrumbs, Parmesan, parsley, cream cheese (if using), salt, and pepper. Mix until well combined.
- Stuff mushrooms: Spoon the mixture into mushroom caps, pressing gently to pack.
- Bake: Arrange stuffed mushrooms on the prepared baking sheet. Bake for 18–20 minutes or until tops are golden and mushrooms are tender.
- Garnish & serve: Sprinkle with extra Parmesan or parsley before serving, if desired.
Notes
- Make ahead: You can assemble the mushrooms a few hours in advance and bake just before serving.
- Variations: Add crumbled sausage, bacon, or chopped spinach to the filling for a meaty or hearty twist.
- Vegan option: Use dairy-free cheese or nutritional yeast and vegan cream cheese.