It was a rainy Thursday, the first time I made stuffed peppers on my own. I’d just moved into my first real apartment after college—tiny, a little crooked, and with a stove that groaned louder than I did after a long shift. I was homesick, craving something warm and familiar. My mom used to make stuffed peppers every fall when the garden was overflowing with bell peppers too beautiful to waste. She’d hollow them out gently, like she was handling a baby bird, then fill them with rice, meat, tomato sauce, and a sprinkle of something magical I never quite figured out as a kid. That night in my squeaky kitchen, I tried to recreate her version from memory. I didn’t have a written recipe, but I had the smells in my mind and the way it made me feel. The first attempt was clumsy—rice undercooked, peppers too firm, sauce a little thin—but the flavor was there. And that was enough to make me keep at it.
Over the years, I’ve come to rely on this dish. It’s humble, hearty, endlessly adaptable, and it tastes like home. Whether I’m feeding my neighbor who just had surgery, prepping a Sunday dinner, or making lunches for the week, stuffed peppers always come through. They don’t ask for much, but they give a lot. And I think that’s what the best recipes do.
Why You’ll Love This Recipe:
- Comforting, filling, and full of flavor
- Easy to make with pantry staples
- Customizable for different diets and tastes
- A great way to use leftover rice or veggies
- Reheats beautifully for future meals
Ingredients You’ll Need:
- 6 medium bell peppers – I try to get a mix of colors for the prettiest presentation, but any kind will do. Just make sure they stand upright. If one’s a little wobbly, you can slice a tiny bit off the bottom to help it balance.
- 1 pound ground beef or turkey – I’ve used both with success. Turkey makes it a bit lighter, but beef gives it that classic richness.
- 1 cup cooked rice – White, brown, jasmine, even leftover rice from takeout containers—whatever you have. I’ve even subbed in quinoa once when rice ran out.
- 1 small onion, finely chopped – Sweet or yellow works. I cook it until soft and translucent for extra flavor.
- 2 cloves garlic, minced – Fresh is best, but in a pinch, garlic powder can work.
- 1 can (15 oz) diced tomatoes – I like the kind with basil and oregano, but plain is fine too.
- 1/2 cup tomato sauce or crushed tomatoes – This brings everything together. If I’m low, I’ve thinned some tomato paste with water.
- 1 teaspoon Italian seasoning – Or a mix of dried oregano, basil, and thyme. No need to overthink it.
- Salt and pepper to taste – Start light; you can always add more.
- 1 cup shredded cheese (optional) – Mozzarella, cheddar, or even a little Parmesan. I usually sprinkle it on top before baking.
- Olive oil – Just a drizzle for cooking the onion and garlic.
How to Make It (Step-by-Step Instructions):
Start by preheating your oven to 375°F. While that’s going, wash your peppers and carefully slice off the tops. I like to use a small paring knife and twist gently around the stem—like opening a little lid. Remove the seeds and ribs inside. Don’t toss those tops—if they have good pepper flesh on them, I chop and add them to the filling.
Bring a large pot of salted water to a boil and gently parboil the hollowed-out peppers for about 3–4 minutes. This softens them just enough to bake perfectly later. Drain and set them in a baking dish, open side up. I usually use a 9×13-inch pan.
In a skillet over medium heat, drizzle a bit of olive oil and cook your chopped onion (and extra pepper tops, if using) until soft—about 5 minutes. Add the garlic and stir for another 30 seconds. Then toss in your ground meat, breaking it up as it cooks. Season with salt, pepper, and your Italian herbs.
Once the meat is fully browned, stir in the cooked rice, diced tomatoes (with their juice), and tomato sauce. Let it simmer together for 5–7 minutes. The mixture should be thick and scoopable, not runny. If it’s too loose, simmer a little longer. Taste and adjust seasoning—this is your moment to make sure it’s flavorful.
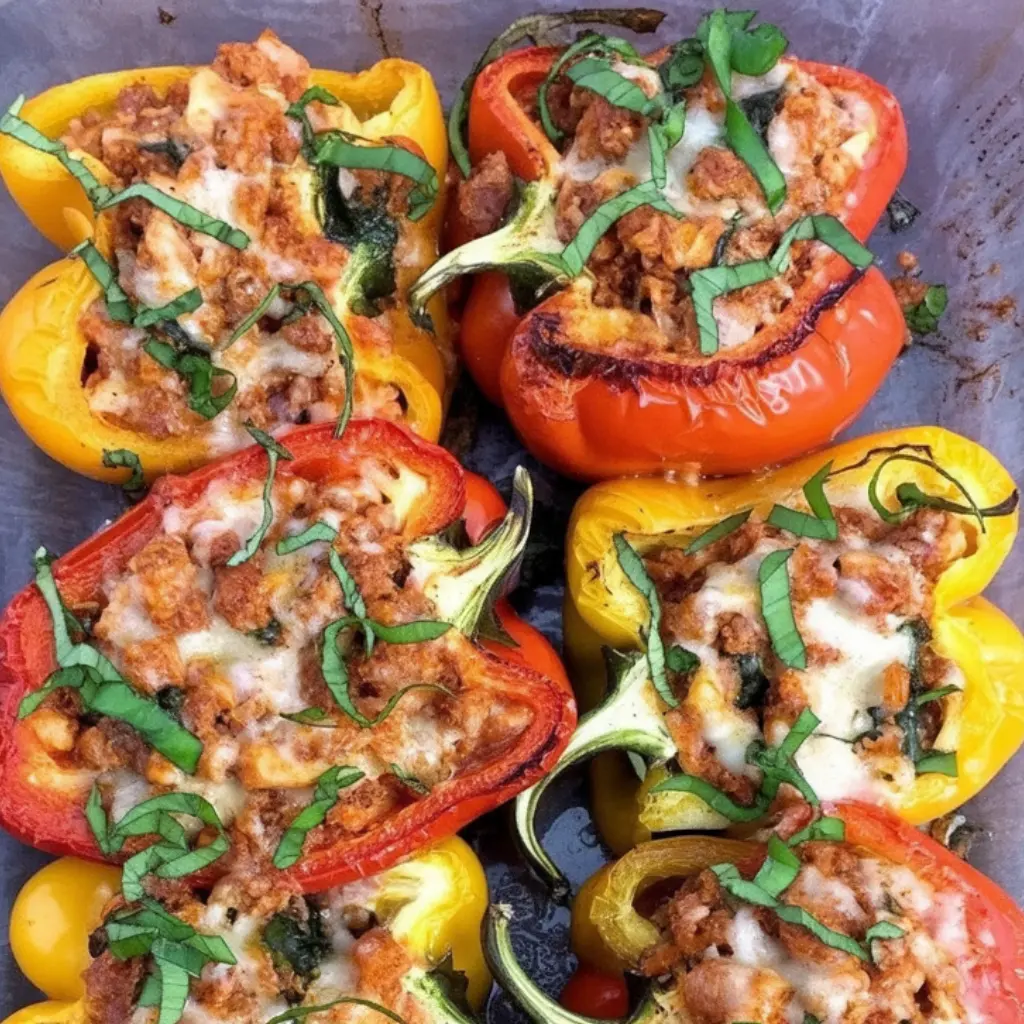
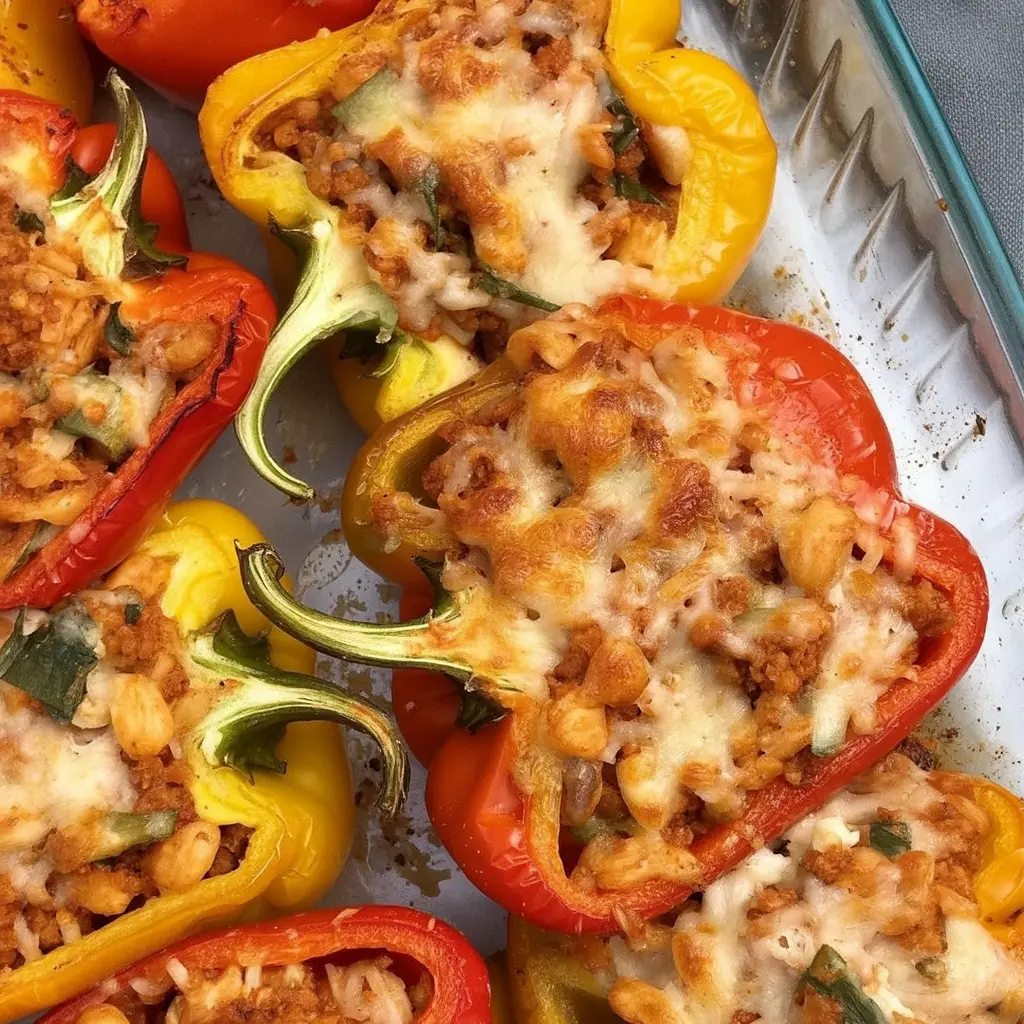
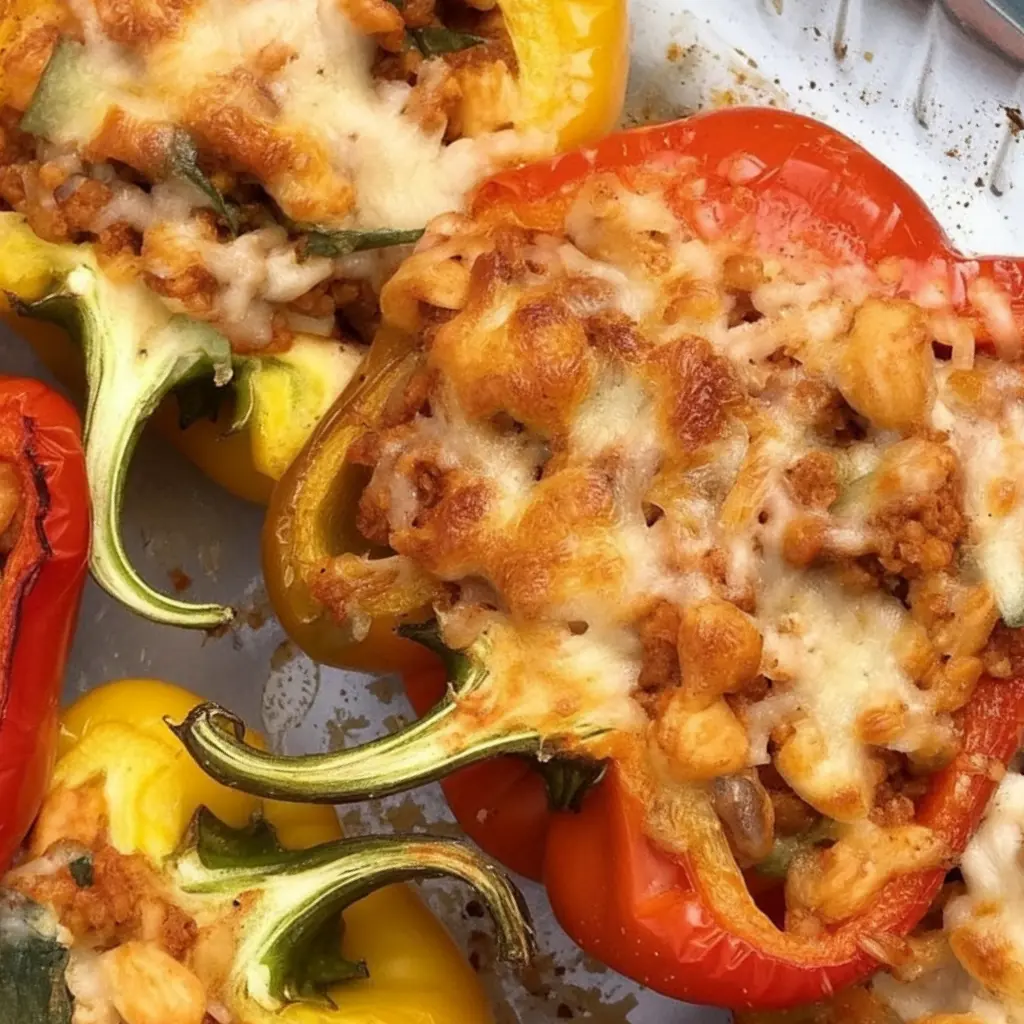
Spoon the filling generously into each pepper, pressing down a little so it’s well-packed. If you like things saucy (I do), pour a bit of extra tomato sauce around the base of the peppers in the baking dish. Cover the dish loosely with foil and bake for 30 minutes. Then remove the foil, sprinkle cheese over the tops if using, and return to the oven for another 10–15 minutes, or until the cheese is melty and golden.
Let them rest a few minutes before serving—just like any good dish, they settle and taste even better once they’ve had a moment.
Expert Tips for the Best Results:
Through plenty of trial and error (some of them pretty humorous), I’ve learned that the texture of the pepper matters a lot—parboiling is a small extra step that makes a big difference. If you skip it, the peppers can stay tough even after baking. Also, always taste your filling before stuffing the peppers. It should be delicious on its own—that’s how you know it’s ready. Finally, don’t skimp on seasoning, especially if your rice is unseasoned or cold from the fridge; it can dull the flavor more than you’d expect.
Variations & Substitutions:
I’ve swapped the rice for couscous, barley, and even finely chopped cauliflower once, and each version brought something different. You can use ground chicken, lentils, or even black beans if you want to go meatless—I once made a vegetarian version with mushrooms and spinach when my niece came to visit, and we both went back for seconds. Cheese on top is totally optional, but when I’m feeling indulgent, a little sharp white cheddar gives it a nostalgic kick. You can also stir in some chopped olives or capers for a little briny edge, especially if you lean Mediterranean with the spices.
Serving Suggestions:
These peppers are hearty enough to be a meal on their own, but I love serving them with a simple green salad dressed with lemon and olive oil. If we’re having guests, I might add a crusty baguette or some roasted potatoes on the side. On chilly nights, I’ve even paired them with a small bowl of soup—tomato or lentil is my go-to. They’re versatile, cozy, and look beautiful on the plate, whether it’s a weeknight or a dinner party.
Storage & Reheating Instructions:
I store leftover peppers right in the baking dish, covered tightly with foil or a lid. They’ll keep well in the fridge for up to four days. When reheating, I add a splash of water or broth to the bottom of the dish and cover it to keep the moisture in—350°F for about 20 minutes usually does the trick. Microwaving works in a pinch too, though the pepper gets a bit softer. The flavors actually deepen by the next day, and I’ve been known to eat one cold, straight from the fridge, when no one’s looking.
Recipe FAQs (Answered by Clara):
Can I make this ahead of time?
You sure can. I often prepare it in the morning, cover it tightly, and pop it in the fridge. It actually tastes better after resting.
Do I have to cook the peppers first?
I really recommend it. Just a few minutes in boiling water makes them tender and much easier to eat later on.
Can I freeze stuffed peppers?
Absolutely. I let them cool completely, wrap each one individually, and freeze. They reheat beautifully—just thaw in the fridge overnight and warm in the oven.
Is this recipe gluten-free?
It can be. Just make sure your rice and seasonings are certified gluten-free, and you’re good to go.
Can I use brown rice instead of white?
Of course. It adds a nutty flavor and a bit more texture—I use it often when I have extra cooked brown rice on hand.
Conclusion:
If you’ve made it this far, thank you for letting me share one of my most comforting, memory-filled recipes with you. Stuffed peppers aren’t flashy, but they carry the kind of honest flavor that lingers long after the meal is over. I hope you’ll try them, maybe tweak them to your own tastes, and most of all, enjoy the process. Whether you’re feeding your family, your friends, or just yourself on a quiet evening, I promise these peppers will bring a little warmth to your table. If you do make them, I’d love to hear how it went—drop a comment or share your own twist.
Nutrition Information (per stuffed pepper):
Calories: ~320 | Protein: 20g | Carbs: 22g | Fat: 18g | Fiber: 3g

Stuffed Peppers
Ingredients
- 6 large bell peppers any color, tops cut off and seeds removed
- 1 lb ground beef or ground turkey
- 1 cup cooked white or brown rice
- 1 small onion finely diced
- 2 cloves garlic minced
- 1 14.5 oz can diced tomatoes, drained
- 1 cup shredded mozzarella or cheddar cheese divided
- 2 tablespoons tomato paste
- 1 teaspoon Italian seasoning
- Salt and pepper to taste
- 1 tablespoon olive oil
- Fresh parsley chopped (optional garnish
Instructions
- Preheat oven to 375°F (190°C).
- Bring a large pot of salted water to a boil. Add bell peppers and boil for 3–4 minutes to slightly soften. Drain and set aside.
- In a large skillet over medium heat, heat olive oil. Add diced onion and cook for 2–3 minutes until softened.
- Add ground beef and cook until browned, breaking it up with a spoon. Drain excess fat.
- Stir in garlic, tomato paste, diced tomatoes, cooked rice, Italian seasoning, salt, and pepper. Let it cook for 2–3 minutes until well combined.
- Remove from heat and mix in ½ cup shredded cheese.
- Place the peppers upright in a baking dish. Spoon the beef and rice mixture into each pepper, pressing down slightly.
- Top each stuffed pepper with remaining cheese.
- Add a small amount of water (about ¼ cup) to the bottom of the baking dish to help steam the peppers. Cover with foil.
- Bake for 30 minutes, then remove foil and bake uncovered for another 10–15 minutes, or until cheese is melted and bubbly.
- Garnish with chopped parsley if desired, and serve warm.
Notes
- Make it vegetarian: Substitute cooked lentils, beans, or a meatless crumble in place of the beef.
- Use quinoa or cauliflower rice: For a lower-carb or gluten-free option.
- Freeze for later: Stuff and freeze peppers before baking. Thaw in the fridge overnight, then bake as directed.
- Add spice: Mix in chili flakes or a splash of hot sauce to the filling for heat.