When I was a girl, I thought biscuits came out of a cardboard tube. You know the kind—you press a spoon against the seam, and the whole kitchen jumps when the can pops. They were fine for quick Saturday mornings, but they never felt like something worth slowing down for. That changed the first time I visited my grandmother in North Carolina. I still remember waking up to the smell of flour and butter drifting down the hallway. She didn’t measure with cups so much as with her hands, and she’d hum while she worked, pulling soft dough together with such ease. When she handed me a warm biscuit, split open and dripping with honey, I realized biscuits weren’t just bread—they were a comfort you could hold in your hand.
I’ve been chasing that taste ever since. It took me years of lopsided, too-dense, or too-crumbly attempts before I learned that biscuits aren’t about perfection—they’re about patience, cold butter, and trusting that a shaggy dough can become something tender and flaky in the oven. These buttermilk biscuits are the ones I make now, the ones my children beg for on Sunday mornings, and the ones I always seem to pull together when a friend stops by for coffee.

Why You’ll Love This Recipe
- Simple, pantry-friendly ingredients
- Flaky, buttery layers without fuss
- Budget-friendly and endlessly adaptable
- Perfect for breakfast, dinner, or snacking
- Comfort food that feels like home
Ingredients You’ll Need
- All-purpose flour – I stick with plain flour here because it keeps the biscuits light. I’ve tried bread flour, but it made them too chewy. If you only have self-rising flour, just skip the baking powder and reduce the salt.
- Baking powder – This is what gives the biscuits their lift. Make sure it’s fresh; old baking powder makes for sad, flat biscuits.
- Baking soda – Since we’re using buttermilk, we need a touch of baking soda to balance the acidity and help with browning.
- Salt – Regular table salt is fine, but if you’ve got kosher salt, that’s even better for a softer seasoning.
- Cold unsalted butter – The colder, the better. I’ve even grated frozen butter into the flour before when the kitchen was too warm, and it gave me the flakiest biscuits I’ve ever had. If salted butter is all you’ve got, just cut back on the salt a bit.
- Buttermilk – This is the heart of the recipe. It gives the biscuits that tang and tenderness. If I’m out, I stir a tablespoon of vinegar into regular milk and let it sit for five minutes—it works just fine.
- Optional honey or sugar – Not traditional, but sometimes I add a teaspoon of honey for just a whisper of sweetness.
How to Make It (Step-by-Step Instructions)
Start by preheating your oven to 425°F (220°C). Biscuits love high heat—it shocks the butter and helps create those lofty, flaky layers. Line a baking sheet with parchment paper so you’re not scrubbing afterward.
In a large bowl, whisk together the flour, baking powder, baking soda, and salt. Don’t rush this step; I used to just dump them in, but taking the time to whisk evenly makes sure there aren’t hidden pockets of baking powder waiting to surprise you.
Next comes the butter. Cut it into small cubes and scatter it over the flour. Use a pastry cutter or even your fingertips to work it in until the mixture looks like coarse crumbs with some pea-sized pieces of butter still visible. Those little chunks are what melt in the oven and create the layers. The first few times I made biscuits, I overworked the butter, and they came out tough. Now I remind myself: it’s okay if the dough looks messy—it’s supposed to.
Pour in the cold buttermilk all at once and stir gently with a fork until the dough just comes together. It will look shaggy and a little sticky, but resist the urge to keep stirring. Overmixing is the fastest way to lose that tender crumb.
Turn the dough out onto a lightly floured counter. With floured hands, pat it gently into a rectangle about an inch thick. Here’s where the magic happens: fold the dough over itself like a letter, turn it, and pat it down again. Do this folding and patting three or four times. Each fold builds those flaky layers, like a shortcut version of puff pastry.
Finally, pat the dough to about ¾-inch thick and cut out biscuits using a round cutter or even a drinking glass. Press straight down without twisting—twisting seals the edges and keeps them from rising properly. Gather the scraps, gently press them together, and cut again.
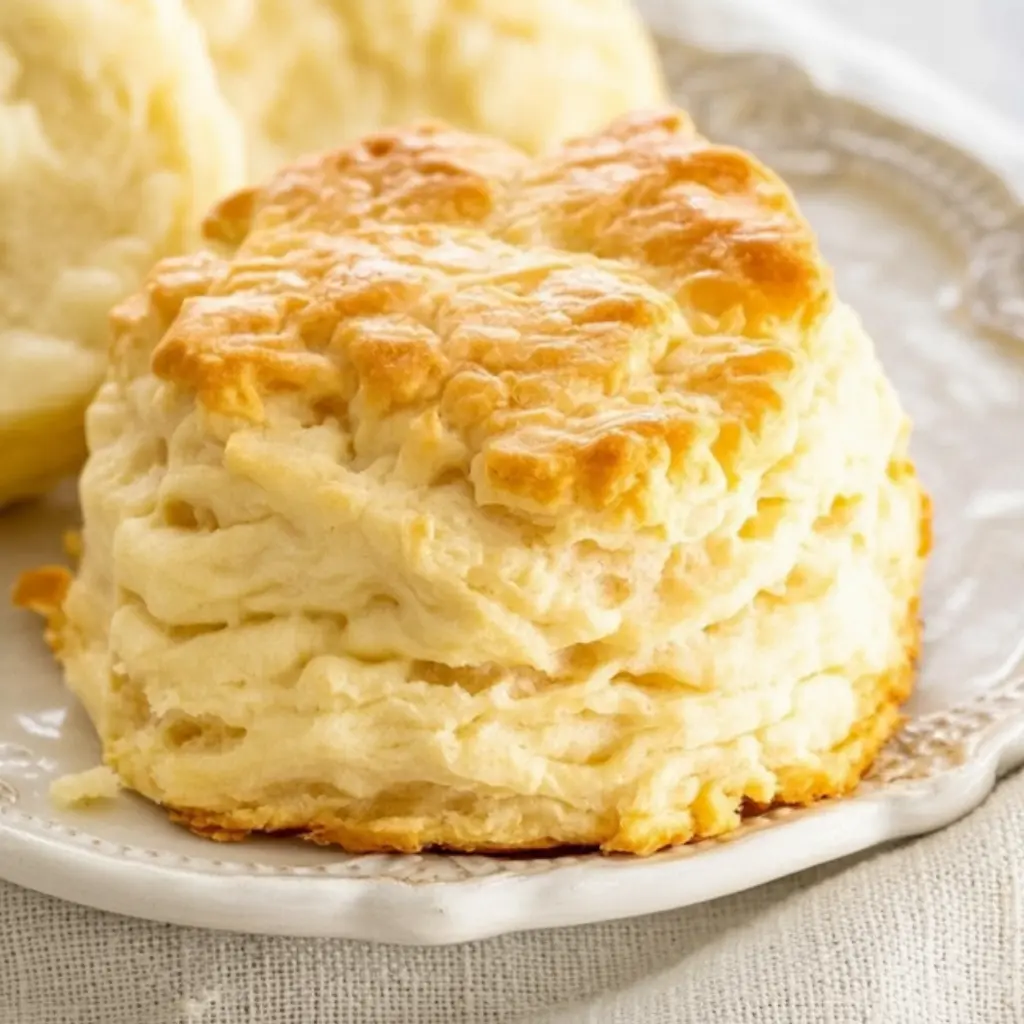
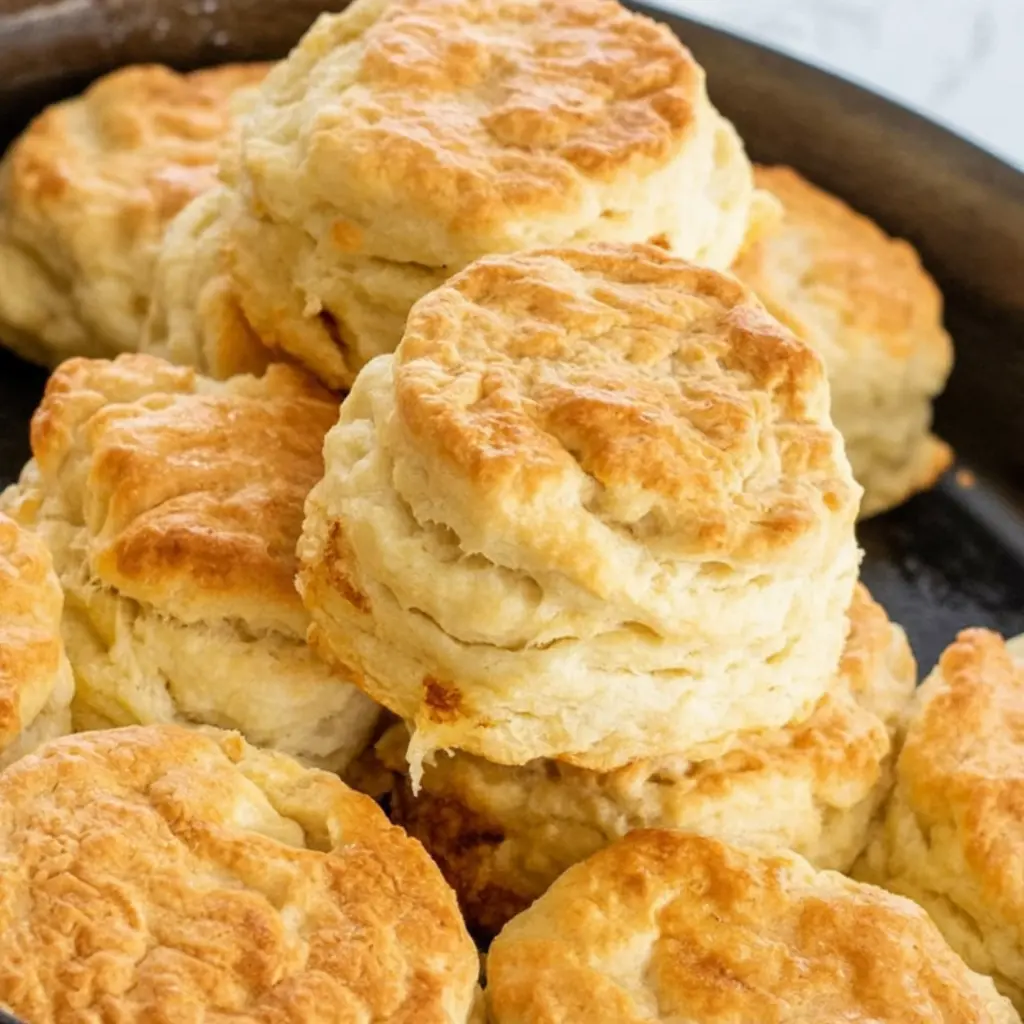
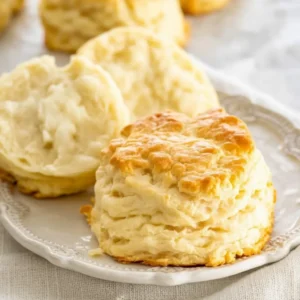
Place the biscuits close together on your baking sheet for soft sides, or space them out if you like crisper edges. Brush the tops with a little melted butter or extra buttermilk, and bake for 12–15 minutes, until golden brown. When they come out of the oven, let them cool just long enough that you don’t burn your fingers. They’re best eaten warm, pulled apart with steam rising from the center.
Expert Tips for the Best Results
I’ve learned that the key to good biscuits isn’t fancy tools or exact measurements—it’s temperature and touch. Keep everything cold, from the butter to the buttermilk, and work quickly so the butter doesn’t melt into the flour before baking. Don’t knead the dough the way you would bread; biscuits thrive on a gentle hand. If you’re ever in doubt, stop mixing earlier than you think you should. A rough, scrappy dough has more life in it than one that’s been fussed over. And above all, trust the process—biscuits have a way of forgiving small mistakes.
Variations & Substitutions
I’ve made these biscuits so many ways, often by necessity. Once, when I realized I was out of buttermilk, I used plain yogurt thinned with milk, and it gave the biscuits a lovely tang. I’ve added shredded cheddar and chopped chives for a savory twist, which made them disappear faster than I could set them on the table. Even brushing the tops with honey butter before baking creates a golden, glossy finish that tastes like dessert. I like to think of this recipe as a backbone—you can dress it up or keep it simple, and it will still be a biscuit worth sharing.
Serving Suggestions
There’s no wrong way to enjoy a biscuit, but I find they shine brightest alongside a simple breakfast. I serve them split open with soft scrambled eggs, or layered with slices of country ham when we’re feeling indulgent. On chilly evenings, they’re the perfect companion to a pot of stew, soaking up all the broth. And sometimes, I’ll just set out a basket of warm biscuits with butter and jam when friends stop by for coffee—it never fails to make the table feel more welcoming.
Storage & Reheating Instructions
If you somehow end up with leftovers, store them in an airtight container at room temperature for a day or two, or in the freezer for longer. To bring them back to life, I like to pop them in a warm oven for about 10 minutes—the heat restores their crisp edges and fluffy centers. The microwave works in a pinch, but it does soften them a bit, so I usually wrap them in foil and use the oven when I can. Just know they’ll never taste quite as magical as fresh from the oven, which is all the more reason to enjoy them right away.
Recipe FAQs (Answered by Clara)
Can I make these ahead of time?
You sure can. I often mix the dough, cut the biscuits, and freeze them unbaked. That way, I can bake just a few at a time, straight from the freezer, adding a couple of extra minutes to the baking time.
Why did my biscuits turn out flat?
Usually it’s because the butter was too warm or the dough was overworked. Make sure your ingredients are cold and remember that a messy dough is a good sign.
Can I use margarine instead of butter?
I wouldn’t recommend it. Butter gives flavor and structure that margarine just can’t match. If butter isn’t an option, use shortening—it won’t taste the same, but it will keep the texture light.
What’s the best way to cut the biscuits?
Always press straight down with your cutter. Twisting seals the edges and keeps them from rising. I learned that the hard way when my “biscuits” looked more like hockey pucks.
Conclusion
If you’ve been hesitant to try making biscuits from scratch, I hope you’ll give these a chance. They don’t require perfection, just a bit of patience and a willingness to get a little flour on your hands. There’s something deeply satisfying about pulling a tray of golden biscuits from the oven, knowing you made them yourself. I’d love for you to try them, share them with someone you love, and maybe even tell me how they turned out in your own kitchen. After all, recipes are only truly alive when they’re shared.
Nutrition Information (per biscuit, approximate)
Calories: 180
Fat: 9g
Carbohydrates: 21g
Protein: 3g
Fiber: 1g
Sodium: 320mg
Buttermilk Biscuits
Ingredients
- 2 ½ cups all-purpose flour
- 1 tbsp baking powder
- ½ tsp baking soda
- 1 tsp salt
- 1 tbsp granulated sugar optional
- ½ cup 1 stick cold unsalted butter, cut into cubes
- 1 cup cold buttermilk plus extra for brushing
Instructions
- Preheat oven: Preheat to 425°F (220°C). Line a baking sheet with parchment paper.
- Mix dry ingredients: In a large bowl, whisk together flour, baking powder, baking soda, salt, and sugar.
- Cut in butter: Add cold butter cubes. Cut in with a pastry cutter or your hands until mixture resembles coarse crumbs.
- Add buttermilk: Pour in cold buttermilk. Stir just until dough comes together—do not overmix.
- Shape dough: Turn dough onto a lightly floured surface. Gently pat and fold 2–3 times for layers. Flatten to about 1-inch thick.
- Cut biscuits: Use a biscuit cutter (2–3 inches) to cut biscuits. Place them close together on baking sheet.
- Bake: Brush tops with buttermilk. Bake 12–15 minutes, or until golden brown.
- Serve: Serve warm with butter, honey, or jam.
Notes
- Cold ingredients matter: Keep butter and buttermilk cold for flaky layers.
- Folding trick: Folding the dough helps create tall, layered biscuits.
- Storage: Store leftovers in an airtight container at room temp for 2 days or freeze up to 2 months.
- Flavor variations: Add shredded cheese, garlic powder, or fresh herbs for a savory twist.