
There are a handful of recipes I can trace back to a moment so vividly, I can smell the kitchen as it was. This chicken leg recipe is one of them. It was a gray Sunday, one of those slow, silent afternoons that beg for something warm in the oven and something grounding on your plate. My youngest had just come home from college for a visit, lanky and tired but with that same hunger in his eyes he had as a boy. I needed something nourishing and nostalgic—something that said “welcome home” without a single word. I reached for a pack of chicken legs, butter, a few sprigs of thyme from the garden still holding on in the cold, and I let my hands remember what comfort food should taste like. The result? These simple, deeply flavorful roasted chicken legs that now live permanently in my recipe binder, right alongside my grandmother’s meatballs and the chocolate cake that forgives even the worst of days.

Why You’ll Love This Recipe:
- Crispy skin with juicy, tender meat inside
- Affordable and easy-to-find ingredients
- Flavor-packed with minimal effort
- Great for meal prep or feeding a crowd
- Adaptable to different herbs and seasonings
Ingredients You’ll Need:
- Chicken legs (drumsticks or quarters) – I use bone-in, skin-on legs for the best flavor and texture. If you’re using quarters, they’ll need a few extra minutes in the oven.
- Unsalted butter (4 tablespoons) – Butter helps the skin brown beautifully and adds richness. I’ve also used olive oil in a pinch, but butter is my go-to here.
- Garlic (4 cloves, minced) – Fresh garlic gives this recipe its backbone. You can use garlic powder if you’re in a tight spot, but I promise the real thing makes a difference.
- Fresh herbs (thyme, rosemary, or parsley) – Thyme is my favorite in this dish. I’ve also done a rosemary-lemon twist when thyme wasn’t around. Use what you have.
- Salt and freshly cracked black pepper – Don’t be shy. Seasoning well is the difference between bland and beautiful.
- Paprika (optional) – Just a pinch for color and a little smoky depth.
- Lemon zest (optional) – If I’ve got a lemon lying around, I’ll grate a little zest over the chicken right before roasting. It brightens everything up.
How to Make It (Step-by-Step Instructions):
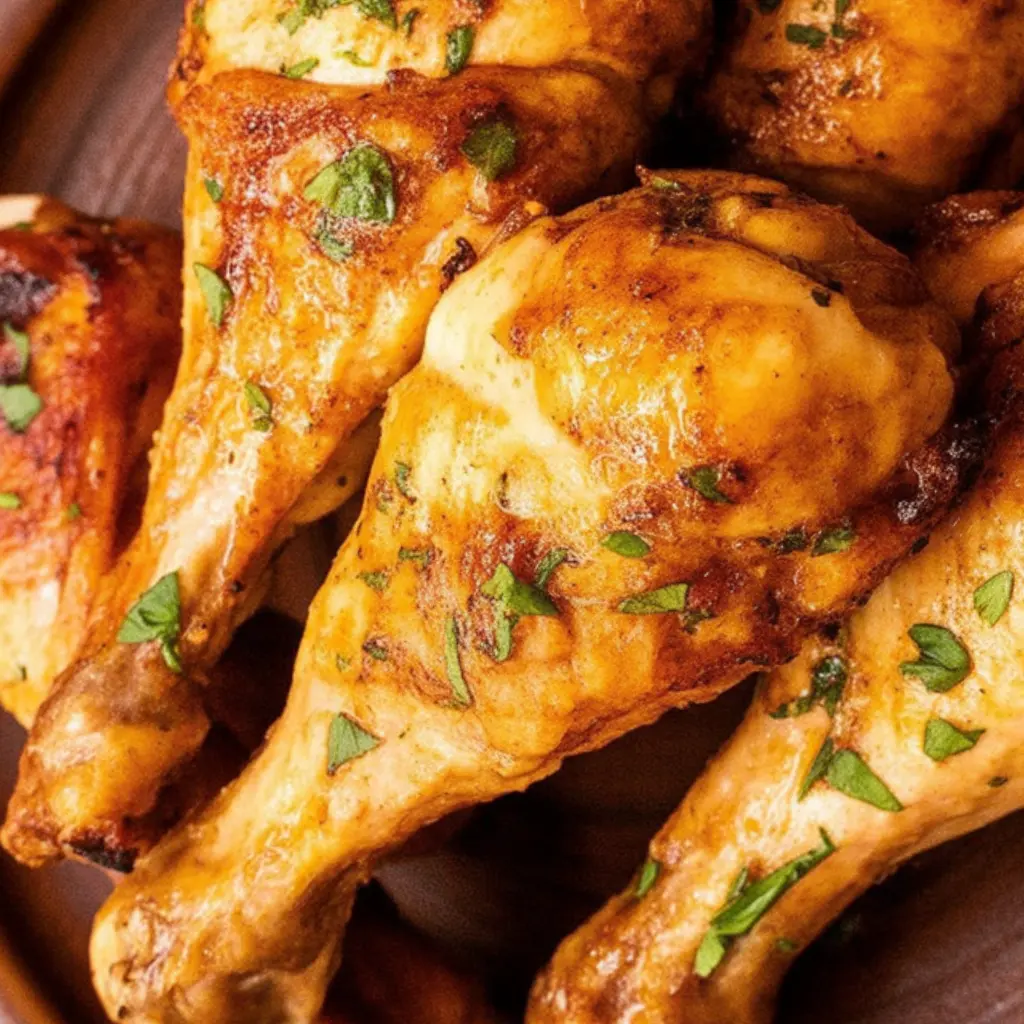
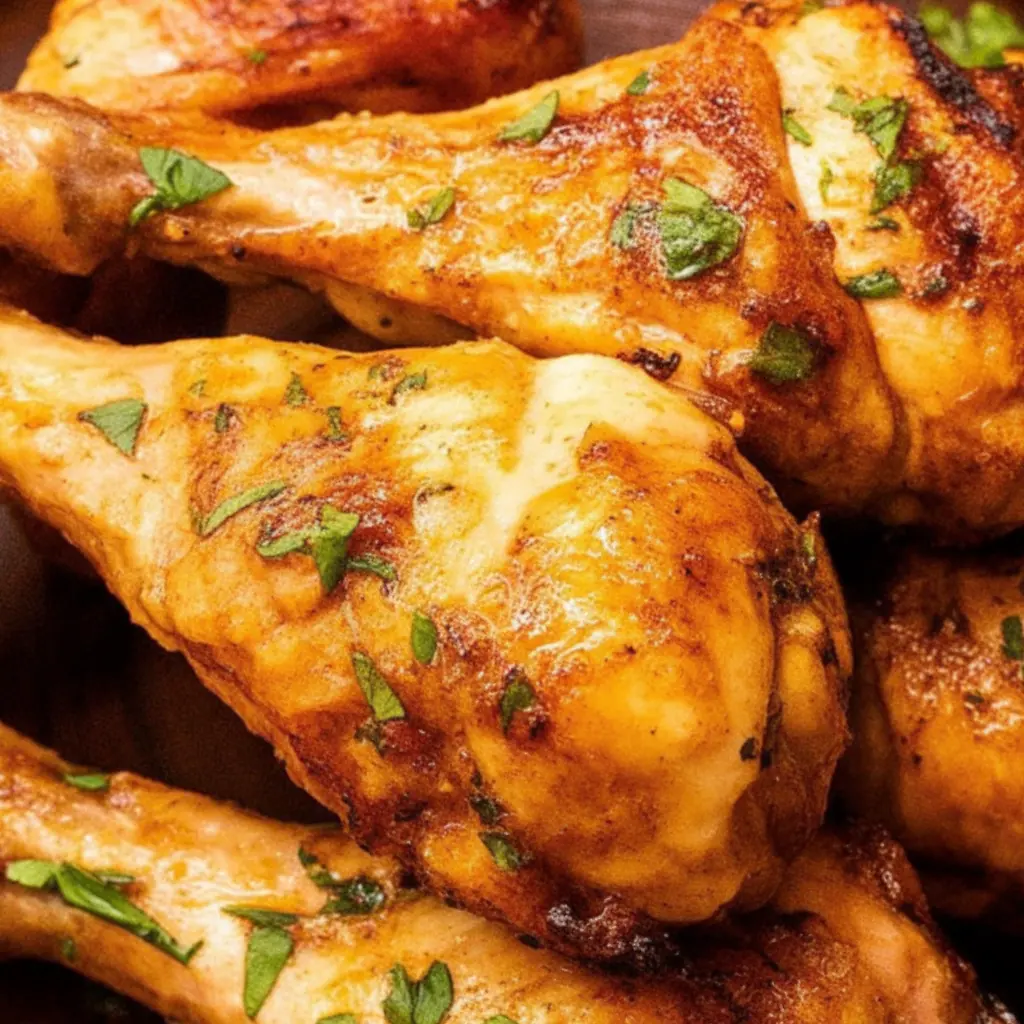
Start by patting the chicken legs dry with paper towels. This isn’t just a fussy extra step—it’s essential for getting that crispy skin. Wet skin steams, dry skin browns. Trust me, I’ve skipped this when in a rush, and I’ve regretted it every time.
Preheat your oven to 425°F. I know that seems high, but high heat is how we get the golden crust without drying out the meat. While the oven warms up, melt the butter in a small saucepan or microwave, then stir in the minced garlic and chopped fresh herbs. If your kitchen already smells amazing, you’re doing it right.
Place the chicken legs in a single layer on a rimmed baking sheet or roasting pan. I like to line the pan with foil or parchment for easier cleanup—because no one wants to soak a pan on a Sunday night. Pour the garlic-herb butter over the legs, turning them a few times to coat. Season generously with salt, pepper, and paprika, then nestle them skin-side up and give them a little breathing room. Crowded chicken steams instead of roasts.
Roast in the preheated oven for about 40–45 minutes, turning once halfway through. I start checking around the 35-minute mark—especially if the legs are smaller. When the skin is deep golden and a thermometer inserted into the thickest part reads 165°F, they’re done. If the skin needs more color, I sometimes pop them under the broiler for 2–3 minutes at the end. Watch closely though—it goes fast from golden to burnt.
When they’re ready, let them rest for 5–10 minutes. This part always feels impossible when everyone’s hovering in the kitchen, but it’s worth it. The juices redistribute, and the meat stays wonderfully moist.
Expert Tips for the Best Results:
The biggest lesson I’ve learned with roasted chicken legs is that patience with heat pays off. Starting with dry skin, roasting at high heat, and not overcrowding the pan are the three quiet steps that make all the difference. Also, don’t underestimate the power of resting the meat before serving—it really does keep everything tender. And if you’re using fresh herbs, bruise them a bit before chopping. It wakes up their oils and makes their flavor more vibrant in the finished dish.
Variations & Substitutions:
Over the years, I’ve swapped in whatever I had on hand—olive oil instead of butter when I was low, dried herbs instead of fresh when the garden was bare, and once even a pat of miso paste mixed into the butter, which gave the chicken a deep, savory undertone that surprised all of us. I’ve done versions with a splash of soy sauce, a sprinkle of chili flakes, and once out of necessity, lemon pepper seasoning from the back of the pantry. It’s a forgiving recipe, the kind that lets you be creative or simply resourceful.
Serving Suggestions:
These roasted chicken legs make a beautiful main dish just about any night of the week. I love serving them with mashed potatoes or buttery rice and a side of something green—steamed broccoli or a crisp arugula salad both work well. For casual company dinners, I’ll often do them with roasted carrots and a big loaf of crusty bread to mop up the garlicky juices. They hold their own on a potluck table or as a hearty addition to a Sunday spread.
Storage & Reheating Instructions:
Leftovers keep well in an airtight container in the fridge for up to four days. To reheat, I usually pop them back into a 350°F oven for 10–15 minutes until warmed through—it helps crisp the skin back up without drying out the meat. Microwaving is fine in a pinch, but you’ll lose that lovely texture on the skin. Sometimes I pull the meat off the bone and toss it into salads or wraps for lunch the next day, and it’s just as satisfying.
Recipe FAQs (Answered by Clara):
Can I make this ahead of time?
Yes, and I often do. You can prep the chicken with the butter and seasonings a few hours in advance, then cover and refrigerate. When you’re ready to bake, let it sit at room temperature for about 20 minutes before going into the oven.
Can I use boneless chicken instead?
You can, but I wouldn’t recommend it here. The bone and skin really help with flavor and moisture. Boneless cuts cook faster and can dry out easily in this recipe, but if you must, reduce the cooking time and keep an eye on it.
What if I don’t have fresh herbs?
No problem at all. Use dried thyme or rosemary—just cut the amount in half since dried herbs are more concentrated. It’s still delicious.
Can I freeze cooked chicken legs?
You can. Let them cool completely, then wrap tightly and freeze for up to 3 months. Thaw in the fridge overnight and reheat in the oven. The texture of the skin might soften, but the flavor holds up well.
This chicken leg recipe has fed my family more times than I can count, and it’s never let me down. Whether you’re cooking for someone you love or just yourself on a quiet night, there’s something honest and grounding about it. I hope you’ll give it a try, make it your own, and come back to it the way I have. If you do make it, I’d love to hear how it turned out for you—drop me a note in the comments or just tuck the recipe into your binder for the next gray Sunday. Either way, I’m so glad we cooked together today.
Nutrition Information (Approximate, per serving):
Calories: 320 | Protein: 25g | Fat: 22g | Carbohydrates: 1g | Fiber: 0g | Sodium: 310mg

Chicken Legs
Ingredients
- 8 chicken legs drumsticks, skin on
- 2 tablespoons olive oil
- 1 teaspoon garlic powder
- 1 teaspoon paprika smoked or sweet
- ½ teaspoon onion powder
- ½ teaspoon salt
- ½ teaspoon black pepper
- Optional: ¼ teaspoon cayenne pepper or chili powder for heat
- Optional garnish: chopped parsley or lemon wedges
Instructions
- Preheat the oven: Preheat oven to 425°F (220°C). Line a baking sheet with foil and place a wire rack on top. Lightly grease the rack.
- Prep the chicken: Pat the chicken legs dry with paper towels (this helps them crisp up). Place in a large bowl or zip-top bag.
- Season: Drizzle olive oil over the chicken. Add garlic powder, paprika, onion powder, salt, pepper, and cayenne (if using). Toss until chicken is evenly coated.
- Arrange on rack: Place the seasoned chicken legs on the wire rack, spacing them out so they cook evenly.
- Bake: Bake for 35–45 minutes, flipping halfway through, until the skin is crispy and the internal temperature reaches 165°F (74°C).
- Serve: Let rest for 5 minutes before serving. Garnish with fresh parsley or lemon wedges if desired.
Notes
- Drying the chicken well before seasoning is key for crispy skin.
- You can marinate the chicken with the spices up to 24 hours ahead.
- Great served with mashed potatoes, rice, or roasted vegetables.
- Leftovers keep well in the fridge for up to 4 days and reheat beautifully in the oven or air fryer.


Leave a Reply