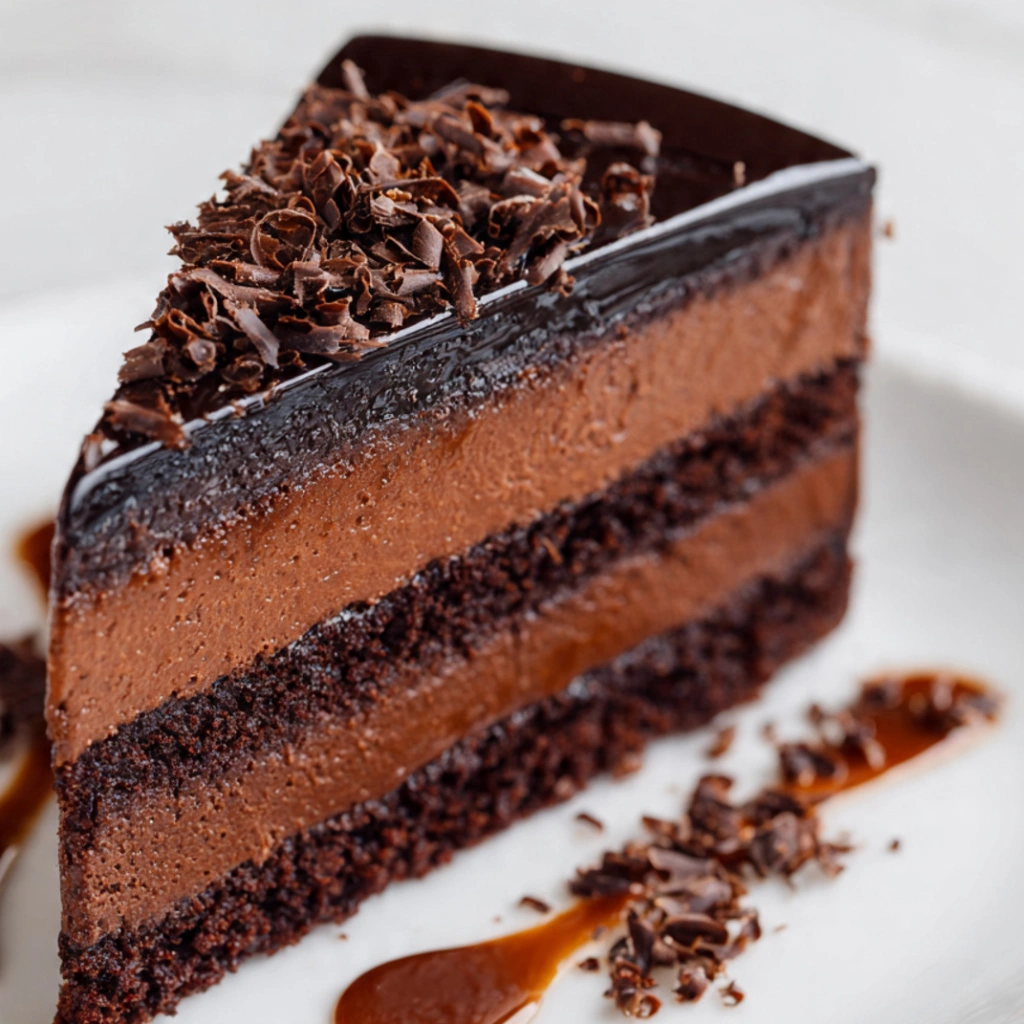
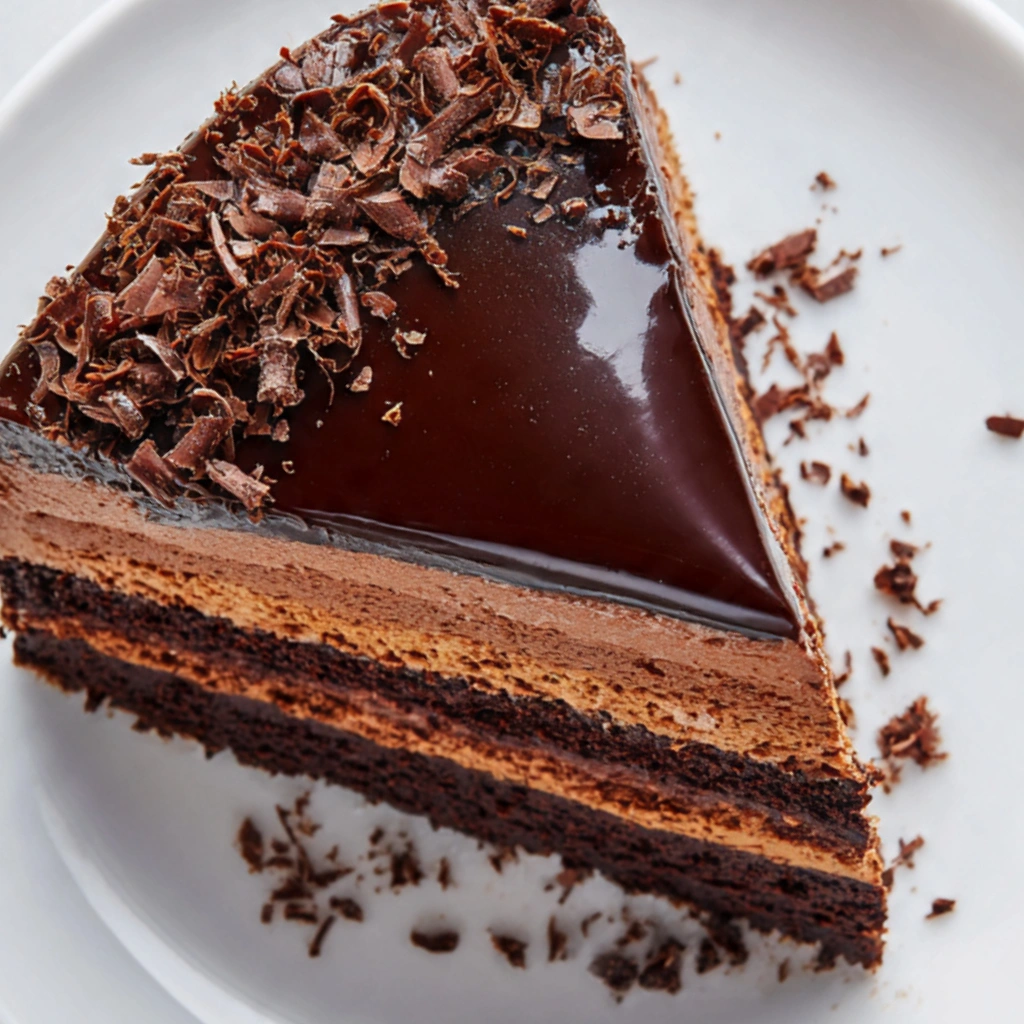
I still remember the first time I tried to make a Chocolate Mousse Cake. It was one of those rainy weekends when everything outside felt slow and gray, and I wanted something in the kitchen that felt like comfort but also a little bit special. I had just come back from a small café where I had a slice that honestly felt like it melted the world away for a few minutes. Light, rich, airy, and deeply chocolatey all at once. I thought to myself, surely this can’t be that hard to recreate at home.
I was wrong at first.
My early attempts were either too dense like a brownie pretending to be mousse, or too airy like sweetened chocolate foam that collapsed the moment I looked at it. I almost gave up on the idea entirely, but there was something about that café slice I couldn’t forget. So I kept testing, adjusting, and learning what chocolate mousse cake really needs: patience, temperature control, and a little respect for each layer.
Now, after many kitchen trials, this is the version I come back to every time. It’s the kind of dessert that feels like it belongs at a celebration, even if you’re just making it for yourself on a quiet evening.

Why You’ll Love This Recipe
- It looks impressive but is surprisingly manageable once broken into steps
- The texture is light, creamy, and deeply chocolatey without being heavy
- It can be made ahead, making it perfect for gatherings or special dinners
- No fancy equipment required, just basic kitchen tools
- It feels like something from a bakery, but made right in your own kitchen
Ingredients You’ll Need
For the chocolate cake base, I usually stick with a simple cocoa sponge because it supports the mousse without overpowering it. You’ll need flour, cocoa powder, sugar, eggs, baking powder, a pinch of salt, milk, and a little neutral oil. I’ve tried butter-based versions, and while they’re richer, I find oil keeps the cake softer even after chilling.
For the chocolate mousse layer, this is where things get interesting. You’ll need good-quality dark chocolate because it’s the star here. I prefer something around 60–70% cocoa. Then there’s heavy cream, eggs, sugar, and a bit of vanilla extract. Some recipes skip eggs, but I’ve always found that a lightly whipped egg base gives the mousse its signature airy structure.
For the ganache topping, it’s simply chocolate and cream. That’s it. I used to overthink ganache, adding butter or corn syrup, but honestly, simplicity wins here. If your chocolate is good, the ganache will be good.
Over the years, I’ve also learned that ingredient temperature matters more than most people think. Cold cream whips better, but melted chocolate needs to cool slightly before mixing, otherwise you risk a grainy texture. I’ve had to learn that the hard way more than once.
How to Make It (Step-by-Step Instructions)
Step 1: Prepare the cake base
Start by preheating your oven and preparing a simple chocolate sponge batter. I usually whisk the eggs and sugar until they become pale and slightly thick because that small step helps create structure without heaviness. Then I gently fold in the dry ingredients, being careful not to overmix. Overmixing was one of my earliest mistakes—it leads to a dense cake that doesn’t support the mousse properly.
Once the batter is ready, pour it into your prepared pan and bake until a toothpick comes out clean. Let it cool completely. I cannot stress this enough: if the cake is even slightly warm, the mousse layer will not sit properly on top.
Step 2: Make the chocolate mousse
This is the heart of the cake. Melt your chocolate slowly, either over a double boiler or in short microwave bursts. I prefer the double boiler because it gives me more control and less risk of burning.
While the chocolate cools slightly, whip your cream until soft peaks form. In another bowl, whisk egg yolks with sugar until smooth and slightly thickened. I remember the first time I rushed this step and ended up with a grainy mousse base—it never set right.
Fold the melted chocolate into the egg mixture first, then gently incorporate the whipped cream. The folding motion matters more than speed here. You want to keep the air in the mixture; that’s what gives the mousse its signature lightness.
Step 3: Assemble the cake
Place your cooled cake base back into the pan, ideally lined with parchment or acetate for easy removal. Pour the mousse over the top and smooth it out gently. I usually tap the pan lightly on the counter to release any air bubbles.
Then comes patience again. Refrigerate the cake for at least 4–6 hours, though overnight is even better. I’ve learned that mousse cakes are always kinder the next day.
Step 4: Add the ganache topping
Once the mousse is set, pour a slightly cooled chocolate ganache over the top. It should be fluid but not hot. Spread it evenly and return the cake to the fridge for another short chill so everything sets beautifully.
Expert Tips for the Best Results
The biggest lesson I’ve learned with Chocolate Mousse Cake is that technique matters more than complexity. Use good chocolate, not the cheapest bar you can find, because there’s nowhere to hide in a dessert this simple. Be gentle when folding the mousse; aggressive mixing will deflate it and change the texture completely. Also, don’t rush the chilling time. I used to think a few hours would be enough, but the structure truly develops overnight. And finally, always taste your mousse before assembling—it should feel balanced, not overly sweet or overly bitter, because once it sets, there’s no going back.
Variations & Substitutions
Over time, I’ve played with this recipe more than I expected. Once, I ran out of dark chocolate and used a mix of milk chocolate and cocoa powder, and while it turned out sweeter than usual, it was still surprisingly good. Another time, I added a hint of espresso to the mousse, which deepened the chocolate flavor in a way I now prefer for dinner parties. If you want a lighter version, you can reduce the ganache layer or skip it entirely and dust the top with cocoa powder instead. I’ve even made a version with a biscuit crust instead of sponge when I was short on time, and it worked beautifully.
Serving Suggestions
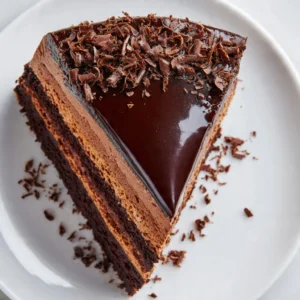
I like serving this cake slightly chilled, not straight from the fridge where it feels too firm, but after letting it sit for about 10–15 minutes so the mousse softens just enough. It pairs wonderfully with fresh berries, especially raspberries, which cut through the richness. For special occasions, I sometimes add a dollop of lightly whipped cream on the side or a few chocolate shavings on top. It fits perfectly at birthdays, dinner parties, or even quiet evenings when you just want something deeply satisfying without needing an excuse.
Storage & Reheating Instructions
This cake actually stores very well in the refrigerator, covered tightly so it doesn’t absorb other flavors. I usually keep it for up to three days, and I’ve noticed the texture becomes even more cohesive after the first night. I don’t recommend freezing it, as the mousse tends to lose its airy structure once thawed. There’s no reheating needed, but if it’s been in the fridge for a while, letting it sit at room temperature for a few minutes before serving makes a noticeable difference in texture and flavor.
Recipe FAQs (Answered by Clara)
Can I make this ahead of time?
You sure can. I often prepare it the day before serving. In fact, I think it tastes better after resting overnight because the layers settle and the flavors deepen.
What’s the best method for melting chocolate?
I always prefer a double boiler because it gives me control and prevents burning. Microwaving works too, but you need to go slowly and stir often.
Can I serve it cold?
Yes, but I personally prefer it slightly softened after sitting out for a short while. Straight from the fridge, it’s firmer and less creamy.
How do I make it less watery?
The most common issue is overwhipping the cream or mixing too aggressively. Gentle folding is key. Also, make sure your chocolate isn’t too warm when combining, or it can break the structure.
Conclusion
Chocolate Mousse Cake is one of those desserts that teaches you patience as much as it rewards you with flavor. It’s not about rushing or trying to perfect everything on the first attempt. It’s about learning how chocolate behaves, how cream holds air, and how simple ingredients can turn into something memorable when treated with care.
If you try this recipe, don’t worry if it’s not perfect the first time. Mine certainly wasn’t. What matters is that you come back to it, adjust it, and make it your own. And if you do end up making it, I’d genuinely love to hear how it turned out in your kitchen.
Nutrition Information (Optional)
Per serving (approximate, depending on portion size):
- Calories: 420–480
- Fat: 30–35g
- Carbohydrates: 35–40g
- Protein: 6–8g
- Sugar: 25–30g
Chocolate Mousse Cake
Ingredients
For the Cake Layer:
- 1 cup 125 g all-purpose flour
- ½ cup 50 g cocoa powder
- 1 teaspoon baking powder
- ½ teaspoon baking soda
- ¼ teaspoon salt
- ¾ cup 150 g sugar
- 2 large eggs
- ½ cup 120 ml milk
- ¼ cup 60 ml vegetable oil
- 1 teaspoon vanilla extract
For the Chocolate Mousse:
- 1 cup heavy whipping cream
- 1 cup semi-sweet chocolate chips melted
- 2 tablespoons powdered sugar
- 1 teaspoon vanilla extract
For the Ganache (Optional):
- ½ cup heavy cream
- ½ cup chocolate chips
Instructions
Preheat oven to 350°F (175°C). Grease and line an 8-inch cake pan.
Make the cake:
- In a bowl, whisk flour, cocoa powder, baking powder, baking soda, and salt.
- In another bowl, mix sugar, eggs, milk, oil, and vanilla.
- Combine wet and dry ingredients until smooth.
- Pour into the pan and bake for 25–30 minutes.
- Cool completely.
Prepare the mousse:
- Whip heavy cream with powdered sugar and vanilla until soft peaks form.
- Gently fold in melted chocolate until smooth and airy.
Assemble the cake:
- Place the cooled cake layer in a springform pan or serving dish.
- Spread mousse evenly over the cake.
Chill:
- Refrigerate for at least 3 hours until set.
Make ganache (optional):
- Heat cream until warm, then pour over chocolate chips.
- Stir until smooth and pour over the chilled cake.
Serve:
- Slice and serve chilled for best texture.
Notes
- Smooth mousse: Let melted chocolate cool slightly before folding into whipped cream.
- Clean slices: Use a warm knife for neat cuts.
- Make ahead: Ideal for preparing a day in advance.
- Storage: Refrigerate for up to 4 days.