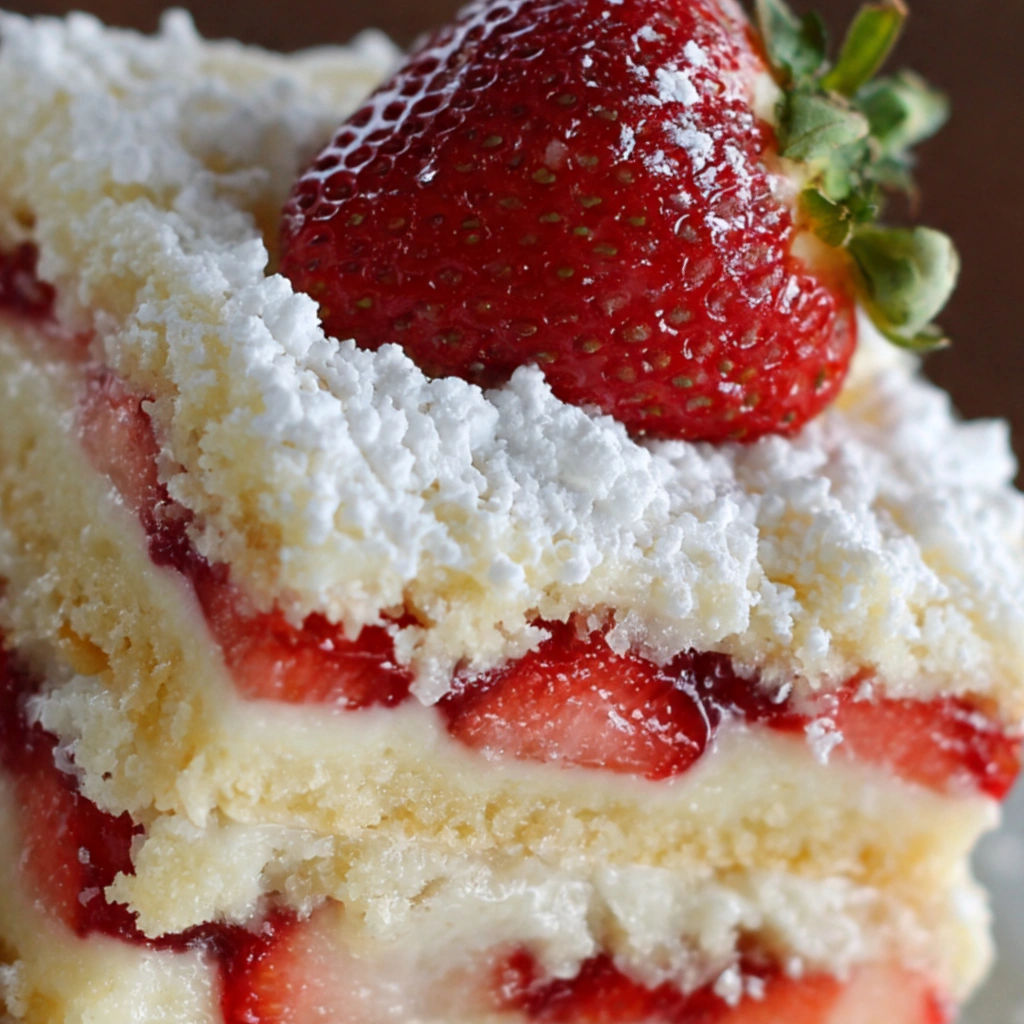
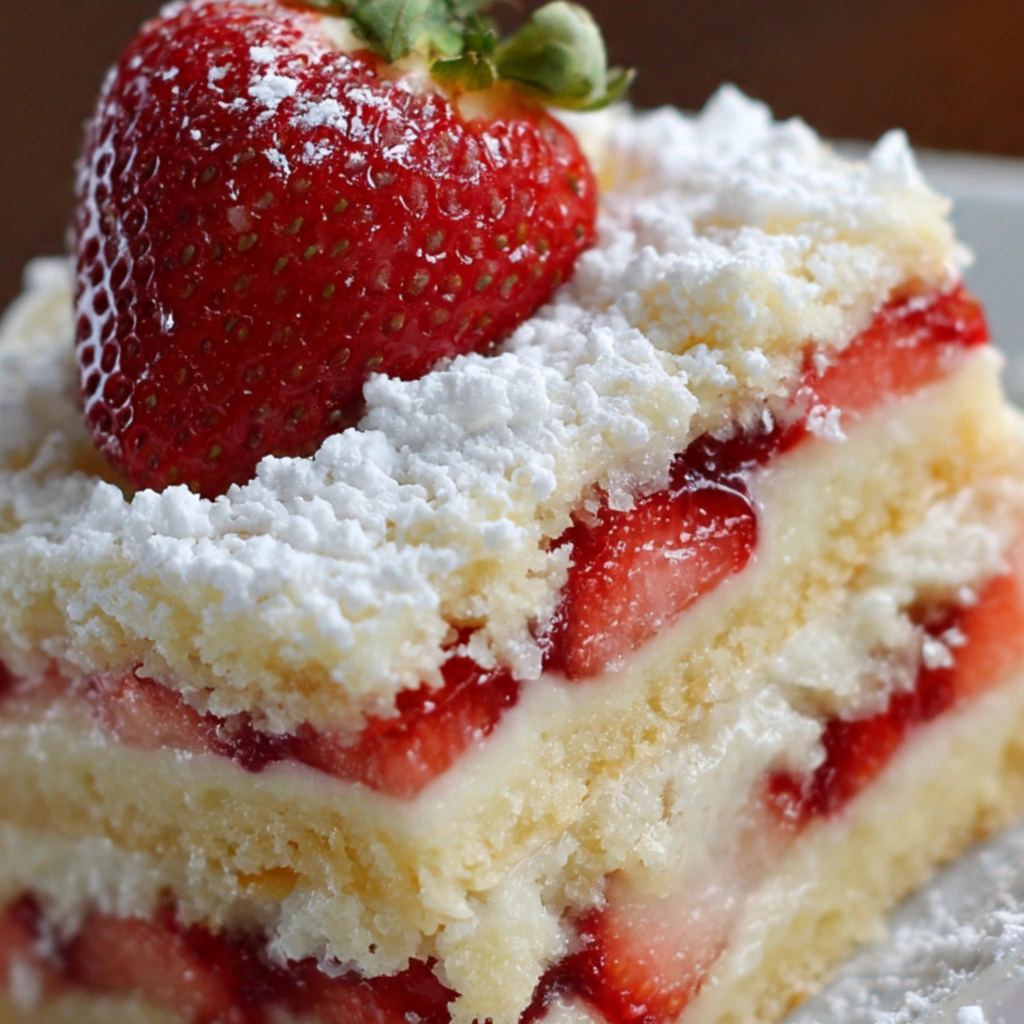
The first time I made these strawberry shortcake bars, it wasn’t for a party or a holiday—it was just one of those afternoons where I had strawberries that were on the edge of going too soft and a quiet kitchen that felt like it needed a little life. I remember slicing into that first batch, still slightly warm, and realizing I had stumbled onto something special. Not fancy, not complicated—just honest, comforting, and deeply satisfying.
I’ve always loved traditional strawberry shortcake, but I’ll admit, assembling individual portions can feel like a lot when you’re short on time or patience. These bars came from that exact feeling—wanting all the flavor without the fuss. Over the years, I’ve made them for family gatherings, last-minute guests, and even just for myself on a Sunday afternoon. Every time, they remind me that good baking doesn’t have to be perfect to be memorable.

Why You’ll Love This Recipe
- Simple ingredients you likely already have at home
- Easier than traditional shortcake—no layering required
- Perfect balance of buttery crust and juicy strawberries
- Great for feeding a crowd or prepping ahead
- Holds up well for leftovers (if you have any)
Ingredients You’ll Need
- Fresh strawberries (about 2 cups, diced): I always recommend fresh over frozen here if you can. Frozen works in a pinch, but they tend to release more water. If you do use them, thaw and drain well—I learned that the messy way.
- Granulated sugar (¾ cup, divided): This sweetens both the strawberries and the crust. Sometimes, if my strawberries are especially ripe, I’ll dial it back just a little.
- Lemon juice (1 tablespoon): Just enough to brighten everything up. It’s subtle, but you’d miss it if it weren’t there.
- All-purpose flour (2 cups): The base of our buttery crust and crumble topping.
- Baking powder (1 teaspoon): Helps give the base a slight lift so it’s not too dense.
- Salt (½ teaspoon): Balances the sweetness—don’t skip it.
- Unsalted butter (1 cup, cold and cubed): Cold butter is key here. I used to rush this step and ended up with a greasy base instead of a crumbly one.
- Egg (1 large): Helps bind everything together.
- Vanilla extract (1 teaspoon): Adds warmth and depth.
- Optional glaze (powdered sugar + milk): I don’t always add it, but when I do, it gives a lovely bakery-style finish.
How to Make It (Step-by-Step Instructions)
Step 1: Prepare the strawberries
Start by combining your diced strawberries with about ¼ cup of the sugar and the lemon juice. Give it a gentle stir and let it sit for about 10–15 minutes. This step pulls out the natural juices and softens the berries slightly. I used to skip this when I was in a hurry, but it really does make a difference in flavor.
Step 2: Make the crust and crumble
In a large bowl, whisk together the flour, remaining sugar, baking powder, and salt. Add the cold, cubed butter and work it in using a pastry cutter or your fingers until the mixture resembles coarse crumbs. It should feel a bit like damp sand with some larger bits—that’s exactly what you want.
Stir in the egg and vanilla until the dough just starts to come together. Don’t overmix here; I’ve done that before, and it makes the bars tough instead of tender.
Step 3: Press the base
Take about two-thirds of the mixture and press it evenly into a lined baking pan. I like to use parchment paper—it makes lifting the bars out later so much easier. Press firmly, especially into the corners, so you get an even base.
Step 4: Add the strawberry layer
Spoon the strawberries over the crust, including a bit of the juices, but don’t drown it. Too much liquid can make the base soggy. Spread them out evenly so every bite gets a little fruit.
Step 5: Add the crumble topping
Sprinkle the remaining dough over the strawberries. Don’t worry about covering everything perfectly—those little gaps let the strawberries peek through and caramelize slightly in the oven.
Step 6: Bake
Bake at 375°F (190°C) for about 35–40 minutes, or until the top is lightly golden and the edges look set. Your kitchen will smell incredible at this point—it’s one of my favorite parts.
Step 7: Cool and slice
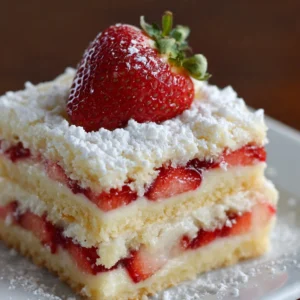
Let the bars cool completely before slicing. I know it’s tempting to cut in early (I’ve done it more times than I’d like to admit), but they hold together much better once cooled.
Expert Tips for the Best Results
Over time, I’ve learned that the little details matter most with a recipe like this—keeping your butter cold, not overworking the dough, and being mindful of how juicy your strawberries are can make or break the final texture. If your berries are extra ripe, I sometimes toss them with a teaspoon of flour to help thicken the juices as they bake, and I always resist the urge to rush the cooling process because that’s when the bars really set into those clean, beautiful slices.
Variations & Substitutions
There have been plenty of evenings where I didn’t have exactly what I needed, and these bars have been surprisingly forgiving—I’ve swapped strawberries for a mix of berries when that’s what I had, and once even added a handful of blueberries that needed using up, which turned out better than expected. If you’re out of fresh lemons, a tiny splash of bottled juice works, and for a richer base, I’ve occasionally replaced a small portion of the flour with almond flour for a subtle nuttiness that pairs beautifully with the fruit.
Serving Suggestions
I like serving these bars slightly chilled or at room temperature, depending on the day—they’re wonderful on their own, but if I’m feeling a little indulgent, I’ll add a spoonful of whipped cream or a scoop of vanilla ice cream on the side. They fit just as easily into a casual afternoon snack as they do onto a dessert table at a family gathering, and I’ve even packed them up for picnics where they held up beautifully without any fuss.
Storage & Reheating Instructions
In my kitchen, these bars usually disappear quickly, but when they don’t, I store them in an airtight container in the refrigerator for up to three days—the texture becomes slightly softer, but the flavor deepens in a really lovely way. If you prefer them a bit warmer, you can gently bring them to room temperature or give them a few seconds in the microwave, though I find they’re just as good straight from the fridge when you’re sneaking a late-night bite.
Recipe FAQs (Answered by Clara)
Can I make this ahead of time?
You sure can. I often prepare it in the morning, cover it tightly, and pop it in the fridge. It actually tastes better after resting.
What’s the best spiralizer to use?
For this recipe, you won’t need a spiralizer at all, which is part of its charm. It’s simple, straightforward, and doesn’t rely on special tools—just a good knife and a steady hand.
Can I serve it cold?
Absolutely. In fact, on warmer days, I prefer it chilled. The flavors settle in nicely, and it becomes even more refreshing.
How do I make it less watery?
That’s something I had to figure out through trial and error—make sure to let the strawberries sit and release their juices first, and avoid adding too much liquid to the pan. A light dusting of flour over the berries can also help absorb excess moisture.
Conclusion
If there’s one thing I’ve learned over the years, it’s that the simplest recipes often become the ones we return to again and again. These strawberry shortcake bars have earned that place in my kitchen—not because they’re perfect, but because they’re reliable, comforting, and always welcomed.
If you give them a try, I hope they bring a little bit of that same warmth into your home. And if you tweak them, experiment, or make them your own, I’d truly love to hear how they turn out. That’s the beauty of cooking—it’s never just about the recipe, but the story you create with it.
Nutrition Information (Optional)
Per serving (approximate):
- Calories: 280
- Fat: 14g
- Carbohydrates: 36g
- Sugar: 18g
- Protein: 3g
Strawberry Shortcake Bars
Ingredients
For the Crust & Topping:
- 1½ cups 190 g all-purpose flour
- ½ cup 100 g granulated sugar
- ¼ teaspoon salt
- ¾ cup 170 g unsalted butter, cold and cubed
For the Strawberry Filling:
- 2 cups fresh strawberries diced
- ⅓ cup 65 g sugar
- 1 tablespoon cornstarch
- 1 tablespoon lemon juice
- 1 teaspoon vanilla extract
Instructions
Preheat oven to 350°F (175°C). Line an 8×8-inch baking pan with parchment paper.
Make the crust mixture:
- In a bowl, mix flour, sugar, and salt.
- Cut in cold butter using a pastry cutter or fingers until crumbly.
Form the crust:
- Press about two-thirds of the mixture firmly into the bottom of the pan.
Prepare the filling:
- In another bowl, combine strawberries, sugar, cornstarch, lemon juice, and vanilla.
Assemble:
- Spread the strawberry filling evenly over the crust.
- Sprinkle the remaining crumb mixture on top.
Bake:
- Bake for 35–40 minutes, or until the top is golden and the filling is bubbly.
Cool and slice:
- Let cool completely before cutting into bars.
Notes
- Fresh vs frozen: Fresh strawberries work best, but frozen can be used (thaw and drain first).
- Cleaner slices: Chill before cutting for neat bars.
- Flavor boost: Add a pinch of cinnamon or almond extract for variation.
- Storage: Store in an airtight container in the fridge for up to 4 days.