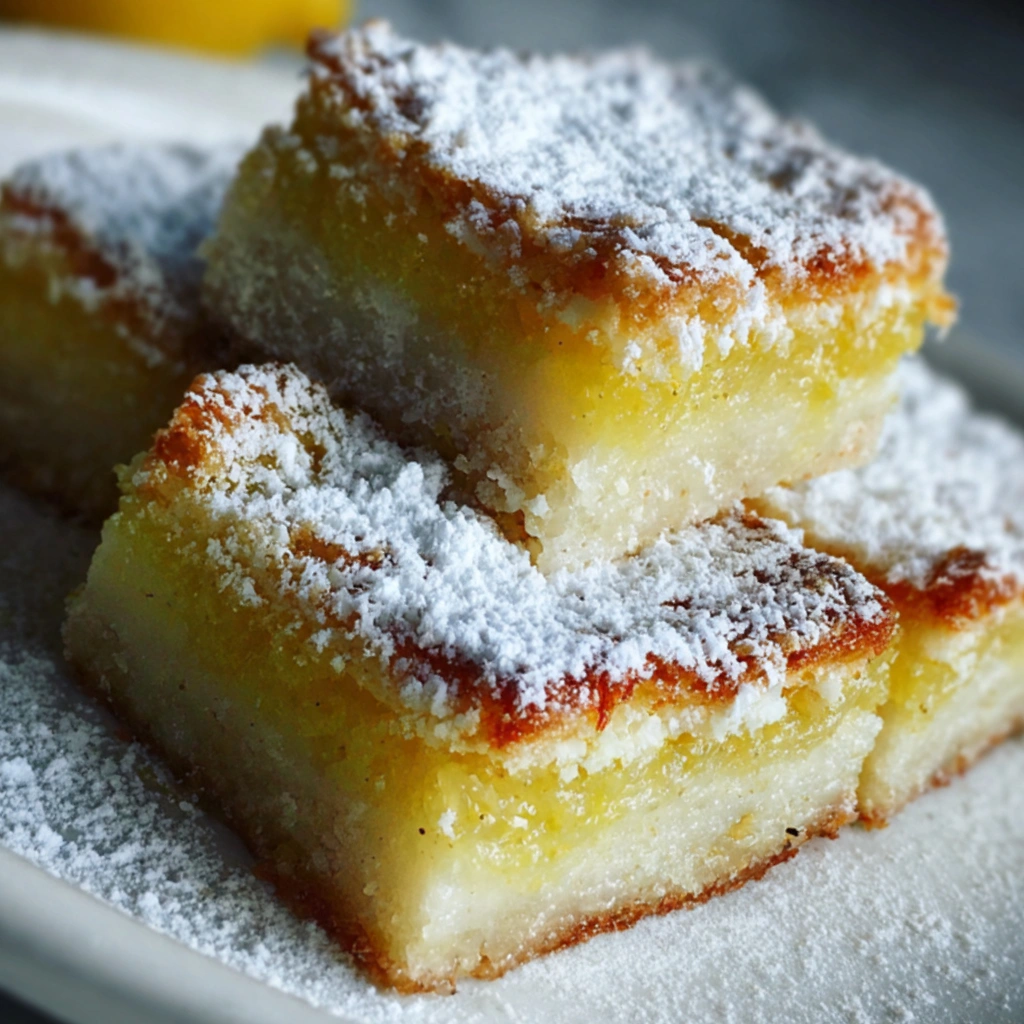
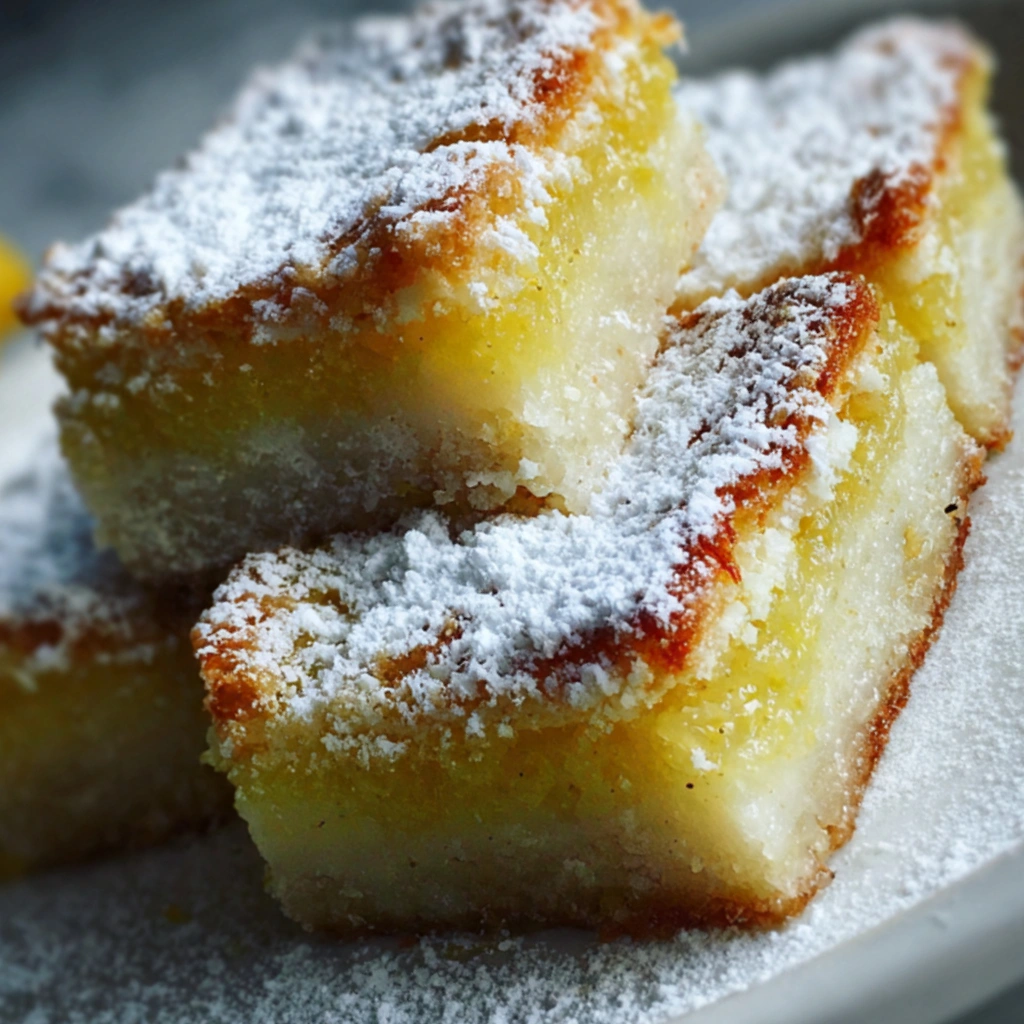
The first time I made lemon bars, I was standing in my kitchen on a gray afternoon, craving something that felt like sunshine. I didn’t want a complicated dessert or anything too rich—just something simple, bright, and comforting. I remember pulling a few lemons from the fruit bowl, not entirely sure what I was doing, and hoping for the best. What came out of the oven that day wasn’t perfect—the crust was a bit too thick, and the filling leaned a little too sweet—but that first bite still stopped me in my tracks. It was soft, buttery, and bursting with citrus in a way that felt almost nostalgic, even though I’d never made them before.
Over the years, I’ve made lemon bars more times than I can count. I’ve learned how to balance the tartness, how to get that delicate, tender crust just right, and most importantly, how to trust the process. Lemon bars are one of those desserts that reward patience and a gentle touch. They’re simple, yes—but they’re also quietly impressive, the kind of treat that people remember long after the plate is empty.

Why You’ll Love This Recipe
- Simple pantry ingredients with big flavor payoff
- A perfect balance of sweet and tangy
- Great make-ahead dessert for gatherings or busy weeks
- No fancy equipment required
- Light yet satisfying, especially after a heavy meal
Ingredients You’ll Need
For the crust:
- 1 cup (2 sticks) unsalted butter, softened
I’ve tried cutting corners with margarine once—never again. Butter gives that rich, melt-in-your-mouth base that makes all the difference. - 1/2 cup granulated sugar
Just enough to lightly sweeten the crust without overpowering the filling. - 2 cups all-purpose flour
Spoon and level it—too much flour can make the crust dense. - 1/4 teaspoon salt
For the lemon filling:
- 4 large eggs
Room temperature eggs blend more smoothly and give a better texture. - 1 1/2 cups granulated sugar
This might seem like a lot, but it balances the lemon’s sharpness. - 1/4 cup all-purpose flour
Helps set the filling without making it rubbery. - 2/3 cup freshly squeezed lemon juice (about 3–4 lemons)
Fresh is non-negotiable here. Bottled juice just doesn’t have the same brightness. - 1 tablespoon lemon zest
This is where the real flavor lives—don’t skip it. - Powdered sugar, for dusting
How to Make It (Step-by-Step Instructions)
Step 1: Prepare the crust
Start by preheating your oven to 350°F (175°C). Line a 9×13-inch baking pan with parchment paper, leaving a little overhang so you can lift the bars out later. Trust me, this small step saves a lot of frustration.
In a large bowl, cream together the softened butter and sugar until it’s smooth and slightly fluffy. Add the flour and salt, mixing just until a soft dough forms. It may look a bit crumbly at first—that’s okay. I’ve learned not to overwork it.
Press the dough evenly into the prepared pan. I like to use the bottom of a measuring cup to smooth it out. Bake for 18–20 minutes, or until the edges are just lightly golden.
Step 2: Make the lemon filling
While the crust is baking, whisk together the eggs and sugar in a bowl until fully combined. Add the flour and whisk again until smooth—no lumps. Then stir in the lemon juice and zest.
This is the part where I used to rush, but I’ve learned to slow down. A smooth, well-mixed filling is what gives you that silky texture later.
Step 3: Bake the bars
Once the crust comes out of the oven, don’t let it cool completely. Pour the lemon filling directly onto the warm crust. It might seem unusual, but this helps the layers bond beautifully.
Return the pan to the oven and bake for another 20–25 minutes, until the center is just set. It shouldn’t jiggle like liquid, but it also shouldn’t feel firm.
Step 4: Cool and finish
Let the bars cool completely in the pan. I know it’s tempting to cut into them early—I’ve done it more times than I’d like to admit—but they truly need time to set.
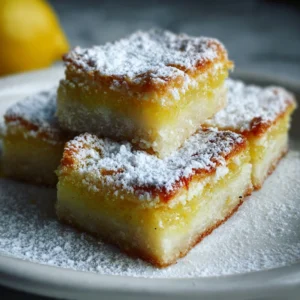
Once cooled, lift them out using the parchment paper, dust generously with powdered sugar, and slice into squares.
Expert Tips for the Best Results
If there’s one thing I’ve learned from making lemon bars over the years, it’s that patience matters more than precision. Let your butter soften naturally instead of microwaving it, take a moment to zest your lemons before juicing them, and don’t rush the cooling process no matter how good they smell. I used to overbake the filling because I thought firmer meant better, but that only led to a rubbery texture—what you’re looking for is a gentle set that still feels tender when pressed. And when it comes to slicing, a clean knife wiped between cuts makes all the difference in getting those neat, bakery-style squares.
Variations & Substitutions
There have been plenty of evenings when I didn’t have everything on hand, and lemon bars are surprisingly forgiving. I’ve swapped half the lemon juice for lime when I ran short, and it gave the bars a slightly tropical twist that my family loved. On another occasion, I added a thin layer of shredded coconut to the crust before baking, which added a subtle texture and warmth. If you prefer a less sweet version, you can reduce the sugar in the filling slightly, though I’d recommend doing it gradually. And if you ever find yourself without fresh lemons, you can still make them—but I’ll be honest, they won’t have that same lively brightness that makes this recipe so special.
Serving Suggestions
I like to serve lemon bars chilled, especially on warm days when something cool and refreshing feels just right. They’re wonderful on their own with a cup of tea in the afternoon, but I’ve also brought them to family gatherings where they disappear faster than anything else on the table. Sometimes I’ll add a few fresh berries on the side or a light dusting of powdered sugar just before serving to make them feel a little extra special. They’re simple enough for a weekday treat but elegant enough for celebrations, which is part of what makes them so dependable.
Storage & Reheating Instructions
In my kitchen, lemon bars rarely last more than a couple of days, but when they do, I store them in an airtight container in the refrigerator. They hold up beautifully for about 3–4 days, and I actually think the flavor deepens a bit overnight. Just be sure to separate layers with parchment paper so they don’t stick together. I don’t recommend reheating them—they’re meant to be enjoyed cool or at room temperature—but if they’ve been in the fridge, letting them sit out for 10–15 minutes softens the texture nicely.
Recipe FAQs (Answered by Clara)
Can I make this ahead of time?
You sure can. I often prepare it in the morning, cover it tightly, and pop it in the fridge. It actually tastes better after resting.
What’s the best spiralizer to use?
For lemon bars, you won’t need a spiralizer at all. A simple fine grater or zester is all you need for the lemon zest, and I’ve found that a handheld one gives the best control.
Can I serve it cold?
Yes, and in fact, I prefer it that way. The filling sets more firmly, and the flavor feels brighter when it’s slightly chilled.
How do I make it less watery?
If your lemon bars turn out watery, it’s usually because they weren’t baked long enough or didn’t have enough time to cool and set. Make sure the center is just set before removing them from the oven, and always let them cool completely before slicing.
Conclusion
Lemon bars have become one of those recipes I return to again and again—not just because they’re delicious, but because they remind me to slow down and enjoy the process. There’s something deeply satisfying about turning a handful of simple ingredients into something that feels so bright and comforting.
Lemon Bars
Ingredients
For the Crust:
- 1 cup 125 g all-purpose flour
- ¼ cup 50 g granulated sugar
- ½ cup 115 g unsalted butter, cold and cubed
For the Lemon Filling:
- 1 cup 200 g granulated sugar
- 2 tablespoons all-purpose flour
- 3 large eggs
- ½ cup fresh lemon juice
- 1 tablespoon lemon zest
For Topping:
- Powdered sugar for dusting
Instructions
Preheat oven to 350°F (175°C). Line an 8×8-inch pan with parchment paper.
Make the crust:
- In a bowl, mix flour and sugar.
- Cut in butter until crumbly.
- Press evenly into the bottom of the pan.
- Bake for 15–18 minutes, until lightly golden.
Prepare the filling:
- In a bowl, whisk sugar and flour.
- Add eggs, lemon juice, and zest. Mix until smooth.
Bake:
- Pour the filling over the warm crust.
- Return to the oven and bake for 20–22 minutes, until set.
Cool and finish:
- Let cool completely, then refrigerate for at least 1 hour.
- Dust with powdered sugar before slicing into bars.
Notes
- Clean cuts: Chill thoroughly before slicing for neat squares.
- Extra tangy: Add more lemon zest for a stronger citrus flavor.
- Storage: Keep refrigerated in an airtight container for up to 4 days.
- Freezing: Freeze bars (without powdered sugar) for up to 2 months