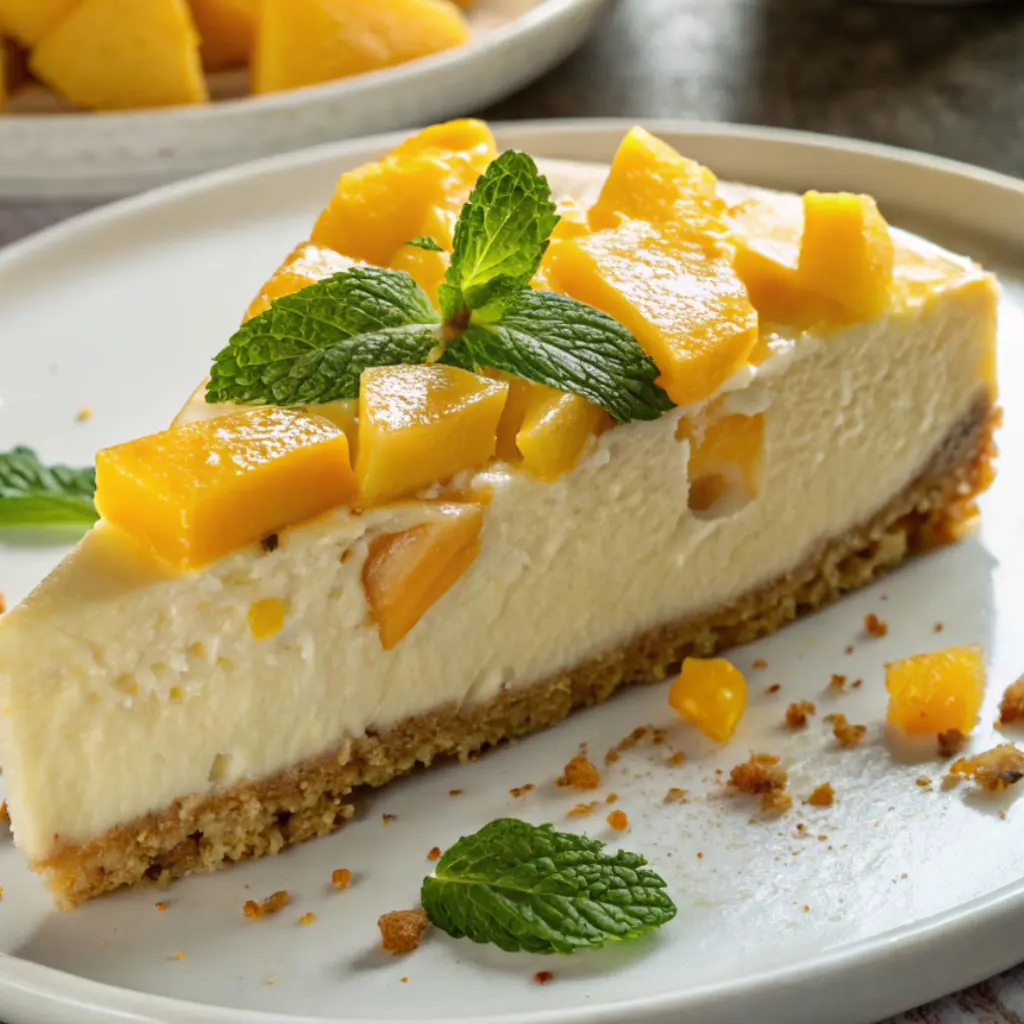
The first time I made a no-bake cheesecake, it wasn’t because I wanted to—it was because my oven decided to give up on me the day before a family gathering. I remember standing in my kitchen, staring at a block of cream cheese and a pack of graham crackers, wondering if I could still pull off something that felt special. That little kitchen hiccup turned into one of the most reliable desserts I’ve ever made. Over time, I’ve come to appreciate the quiet beauty of a no bake cheesecake—the way it comes together without fuss, the way it chills into something silky and comforting, and the way it never fails to impress, even though it’s one of the simplest desserts in my repertoire.
There’s something deeply satisfying about a dessert that asks you to slow down just a bit—mix, taste, adjust, and then let time do the rest. No-bake cheesecake has become my go-to for busy days, warm afternoons, and moments when I want something sweet without the stress. And after many tries (and a few overly soft, slightly runny attempts), I’ve learned exactly how to make it just right.
Why You’ll Love This Recipe
- No oven required, perfect for warm days or small kitchens
- Simple, affordable ingredients you likely already have
- Creamy, rich texture without complicated techniques
- Easy to make ahead for gatherings or busy schedules
- Customizable with different toppings and flavors
- Beginner-friendly with very forgiving steps
Ingredients You’ll Need
- Graham crackers (about 200g) – I usually crush them myself because I like a slightly uneven texture, but store-bought crumbs work just fine when I’m in a hurry.
- Unsalted butter (100g, melted) – This holds the crust together. I’ve tried reducing it before, but the crust tends to crumble too much, so I stick to this amount.
- Cream cheese (500g, softened) – This is the heart of the cheesecake. Make sure it’s truly softened—I’ve rushed this step before and ended up with lumps that refused to disappear.
- Powdered sugar (120g) – I prefer powdered sugar over granulated because it blends smoothly without leaving a grainy texture.
- Heavy whipping cream (250ml) – This gives the cheesecake its light, airy structure. Whip it until soft peaks form.
- Vanilla extract (1–2 teaspoons) – Adds warmth and depth. I sometimes go a little heavy-handed here, and I’ve never regretted it.
- Lemon juice (1 tablespoon) – Just enough to brighten the flavor without making it taste lemony. It balances the richness beautifully.
Optional toppings:
- Fresh berries
- Fruit compote
- Chocolate drizzle
- Crushed cookies
How to Make It (Step-by-Step Instructions)
Step 1: Prepare the crust
Start by crushing your graham crackers. I usually put them in a zip-top bag and roll over them with a rolling pin—it’s oddly therapeutic. You’re aiming for fine crumbs with a few slightly larger pieces for texture. Mix the crumbs with the melted butter until everything looks evenly coated and resembles wet sand. Press this mixture firmly into the bottom of your pan. I use the back of a spoon or a flat glass to really pack it down. This step matters more than it seems—if the crust isn’t compact, it won’t hold together when sliced. Place it in the fridge while you prepare the filling.
Step 2: Make the cream cheese filling
In a large bowl, beat the softened cream cheese until it’s completely smooth. Take your time here. I’ve learned that rushing this step leads to tiny lumps that never quite go away. Once smooth, add the powdered sugar and mix again until fully incorporated. Stir in the vanilla extract and lemon juice. At this point, the mixture should be creamy and slightly glossy.
Step 3: Whip the cream
In a separate bowl, whip the heavy cream until soft peaks form. You don’t want it too stiff—it should hold its shape but still look soft and billowy. I’ve overwhipped cream before, and it made the cheesecake a bit dense, so I stop as soon as it looks just right.
Step 4: Combine everything
Gently fold the whipped cream into the cream cheese mixture. I do this in batches, using a spatula and a light hand. You want to keep as much air in the mixture as possible. This is what gives the cheesecake that soft, mousse-like texture.
Step 5: Assemble and chill
Pour the filling over the chilled crust and smooth the top. Tap the pan lightly on the counter to release any air bubbles. Cover it and place it in the refrigerator for at least 6 hours, though I prefer leaving it overnight. Patience really pays off here—the longer it sets, the better the texture.

Expert Tips for the Best Results
Over the years, I’ve learned that no bake cheesecake is all about patience and small details. Let your cream cheese soften properly—it should feel almost spreadable before you begin. When mixing, don’t rush; smoothness at the start means a perfect texture at the end. Be gentle when folding in the whipped cream, because that’s where the lightness comes from. And most importantly, give it enough time to chill. I know it’s tempting to slice into it early, but I’ve done that more times than I’d like to admit, and it always ends in a slightly collapsed slice. A well-set cheesecake is worth the wait.
Variations & Substitutions
There have been many evenings when I realized I was missing an ingredient and had to improvise, and honestly, some of those moments led to my favorite versions of this cheesecake. I’ve swapped graham crackers for digestive biscuits, chocolate cookies, and even crushed pretzels for a sweet-salty twist. When I didn’t have heavy cream, I once used whipped topping, and while it was a bit sweeter, it still worked beautifully. You can fold in melted chocolate for a richer filling or swirl in fruit puree before chilling. One summer, I added mashed strawberries directly into the batter, and while it softened the texture slightly, the flavor made up for it completely.
Serving Suggestions
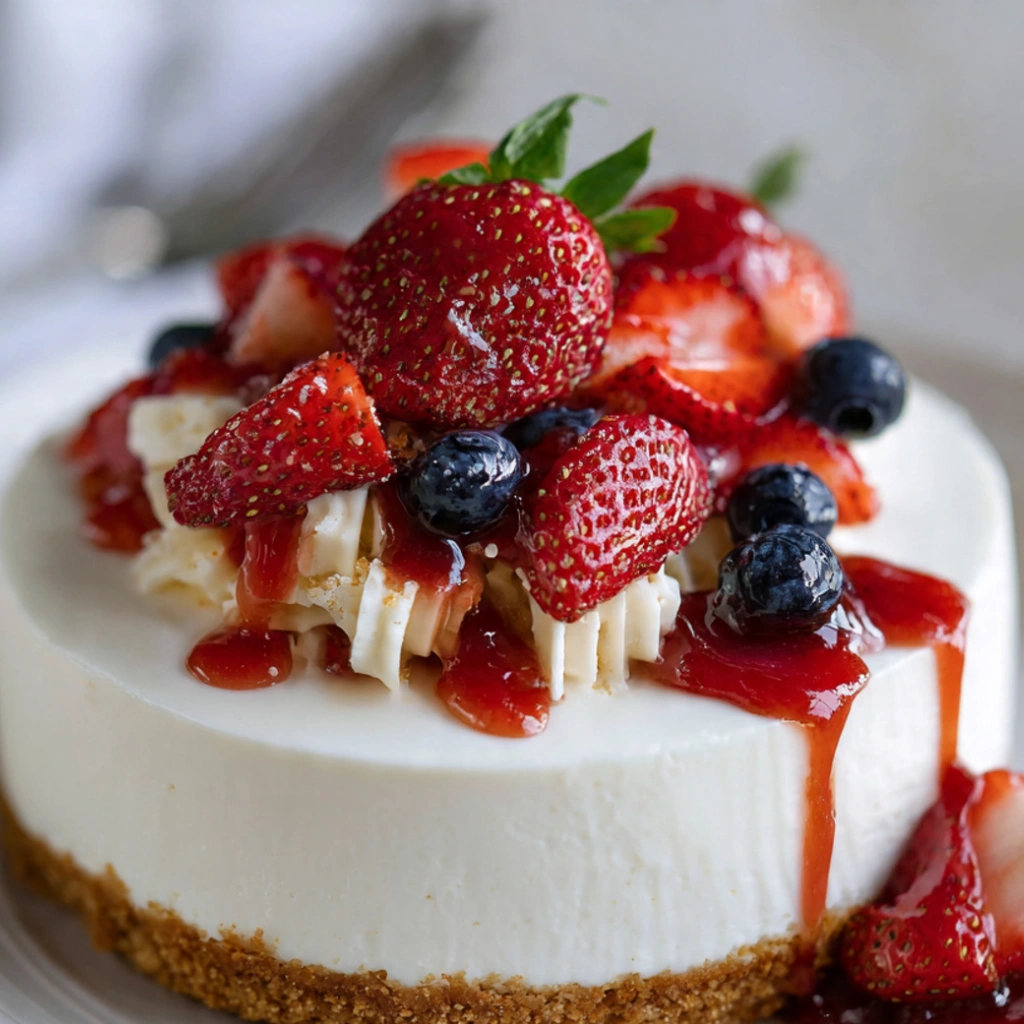
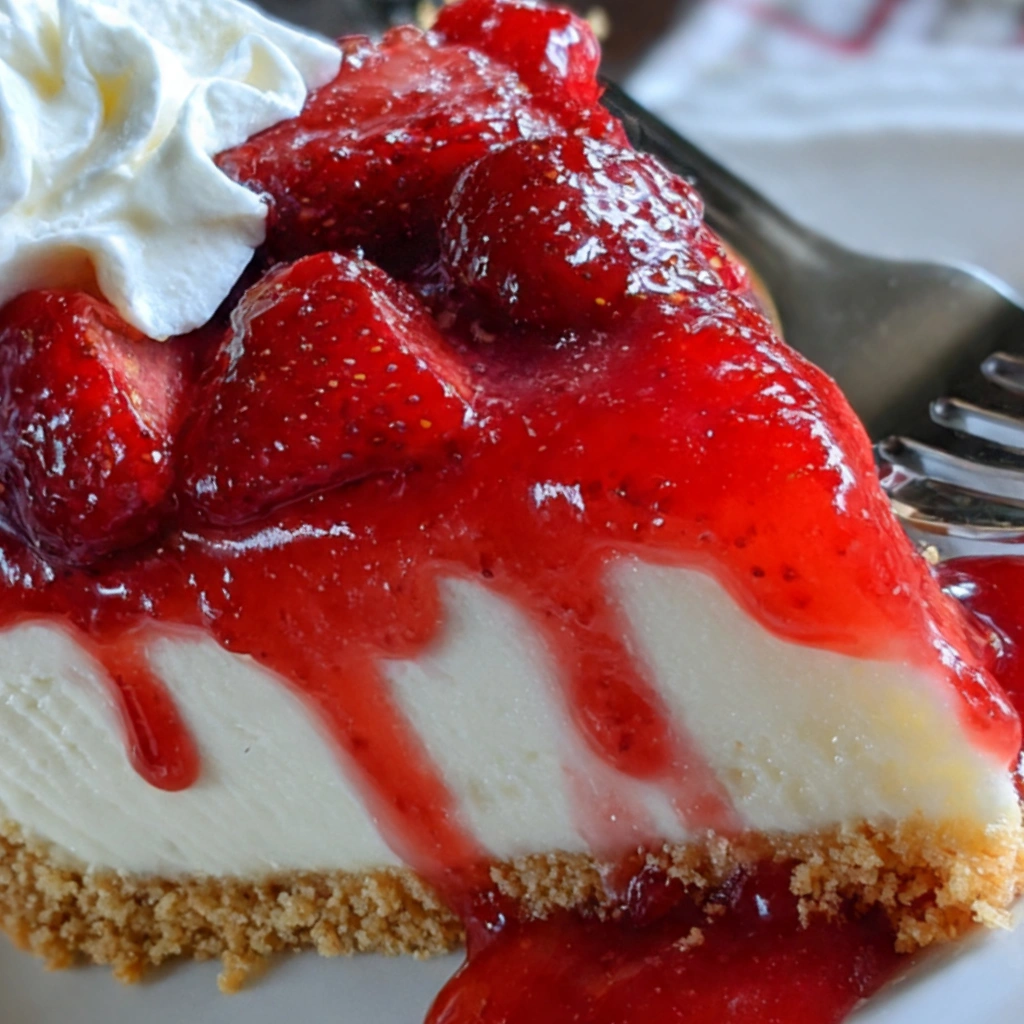
I like to serve this cheesecake straight from the fridge, topped with whatever I have on hand. Fresh berries are my usual choice—they add a brightness that cuts through the richness—but a simple drizzle of chocolate or even a spoonful of jam works just as well. It’s the kind of dessert that fits almost any occasion, from a quiet evening at home to a lively family gathering. I’ve even served it with a cup of coffee on a slow afternoon, and it felt just right.
Storage & Reheating Instructions
This cheesecake keeps surprisingly well, which is one of the reasons I make it so often. I cover it tightly and store it in the refrigerator, where it stays fresh for up to four days. The texture actually improves after the first day as it fully sets. I don’t recommend freezing it too often, as it can change the consistency slightly, but it can be done in a pinch. Since it’s a no bake dessert, there’s no reheating involved—just slice and serve straight from the fridge. If it sits out too long, it may soften, so I usually return leftovers to the fridge promptly.
Recipe FAQs (Answered by Clara)
Can I make this ahead of time?
You sure can. I often prepare it in the morning, cover it tightly, and pop it in the fridge. It actually tastes better after resting.
What’s the best spiralizer to use?
That’s a funny one for this recipe—I don’t use a spiralizer here at all. For this cheesecake, a good hand mixer or stand mixer is really the tool that makes the biggest difference.
Can I serve it cold?
Absolutely. In fact, I think it’s best served cold. That’s when the texture is firm yet creamy, just the way it should be.
How do I make it less watery?
This usually comes down to a few things I’ve learned the hard way: make sure your whipped cream is properly whipped, don’t skip the chilling time, and avoid overmixing once everything is combined. Also, full-fat cream cheese tends to give the best, most stable results.
Conclusion
This no bake cheesecake has become one of those recipes I return to again and again—not because it’s fancy, but because it’s dependable, comforting, and always brings a little joy to the table. If you’ve never made cheesecake before, this is a gentle place to start. And if you have, I hope this version feels like an old friend with a few new stories to share. Take your time with it, trust the process, and don’t worry about perfection. When you make it, I’d love to hear how it turned out for you.
Nutrition Information (Optional)
Per serving (approximate):
- Calories: 320
- Fat: 22g
- Carbohydrates: 26g
- Sugar: 18g
- Protein: 5g

No Bake Cheesecake
Ingredients
For the Crust:
- 1½ cups graham cracker crumbs
- ⅓ cup 75 g melted butter
- 2 tablespoons sugar
For the Filling:
- 16 oz 450 g cream cheese, softened
- 1 cup heavy whipping cream
- ¾ cup powdered sugar
- 1 teaspoon vanilla extract
- 1 tablespoon lemon juice optional, for brightness
Optional Toppings:
- Fresh berries
- Fruit compote or jam
- Chocolate sauce or caramel
- Whipped cream
Instructions
Prepare the crust:
- In a bowl, mix graham cracker crumbs, melted butter, and sugar.
- Press the mixture firmly into the bottom of a springform pan.
- Chill in the refrigerator for 20–30 minutes to set.
Make the filling:
- In a large bowl, beat the cream cheese until smooth.
- Add powdered sugar, vanilla extract, and lemon juice. Mix until creamy.
Whip the cream:
- In a separate bowl, whip the heavy cream until stiff peaks form.
Combine:
- Gently fold the whipped cream into the cream cheese mixture until smooth and fluffy.
Assemble:
- Spread the filling evenly over the chilled crust.
Chill:
- Refrigerate for at least 4 hours (or overnight) until fully set.
Serve:
- Add your favorite toppings before serving and slice.
Notes
- Firm texture: Chill overnight for best results.
- Flavor variations: Add melted chocolate, fruit puree, or peanut butter to the filling.
- No graham crackers?: Use digestive biscuits or cookies as a substitute.
- Storage: Refrigerate for up to 4 days or freeze for up to 1 month.